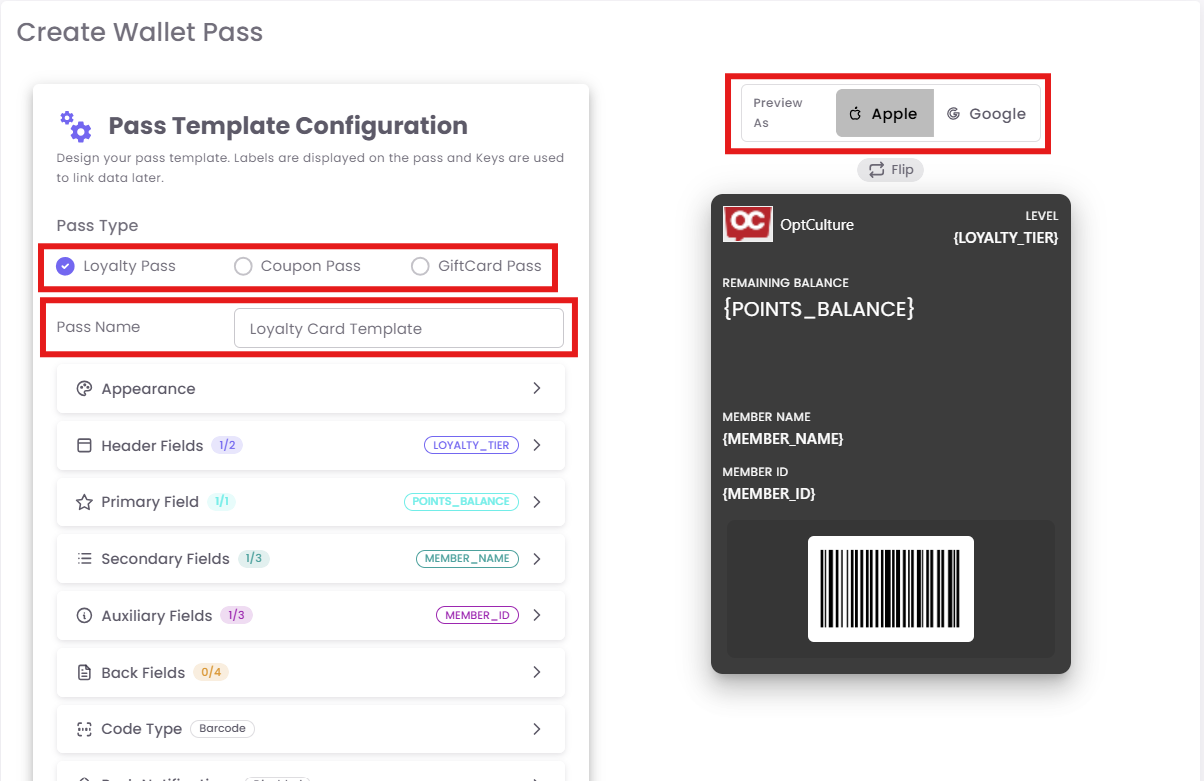
Designing the Pass
The Pass Template Configuration page is where you map your brand's data to the visual layout of the card.
Step 1: General Settings
-
Pass Type: Choose from Loyalty, Coupon, or Gift Card.
-
Note: You can only have one active template per pass type. If you try to create a second, you will receive an error.
-
-
Pass Name: Internal name (e.g., "Holiday Rewards 2026").
-
Pass Location: Enter your store's coordinates to enable geofenced notifications.
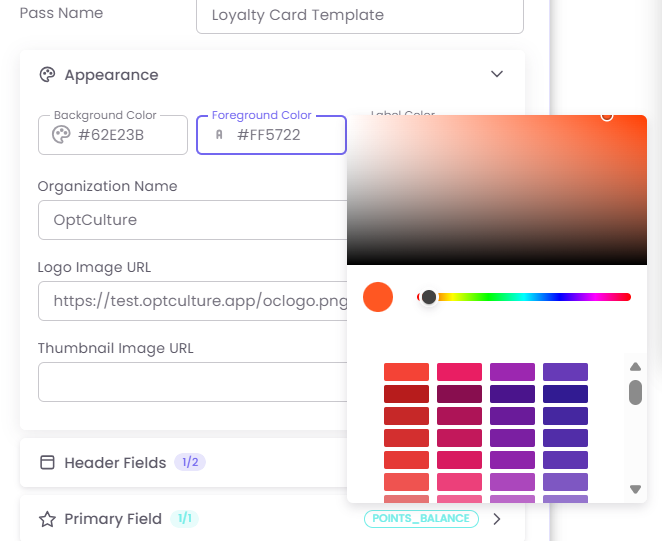
Step 2: Appearance & Branding
Customize the "look and feel" to match your brand:
-
Background Color: Use your brand’s primary hex code.
-
Logo Image: Upload a high-resolution PNG (transparent backgrounds work best).
-
Organization Name: This appears at the very top of the pass.

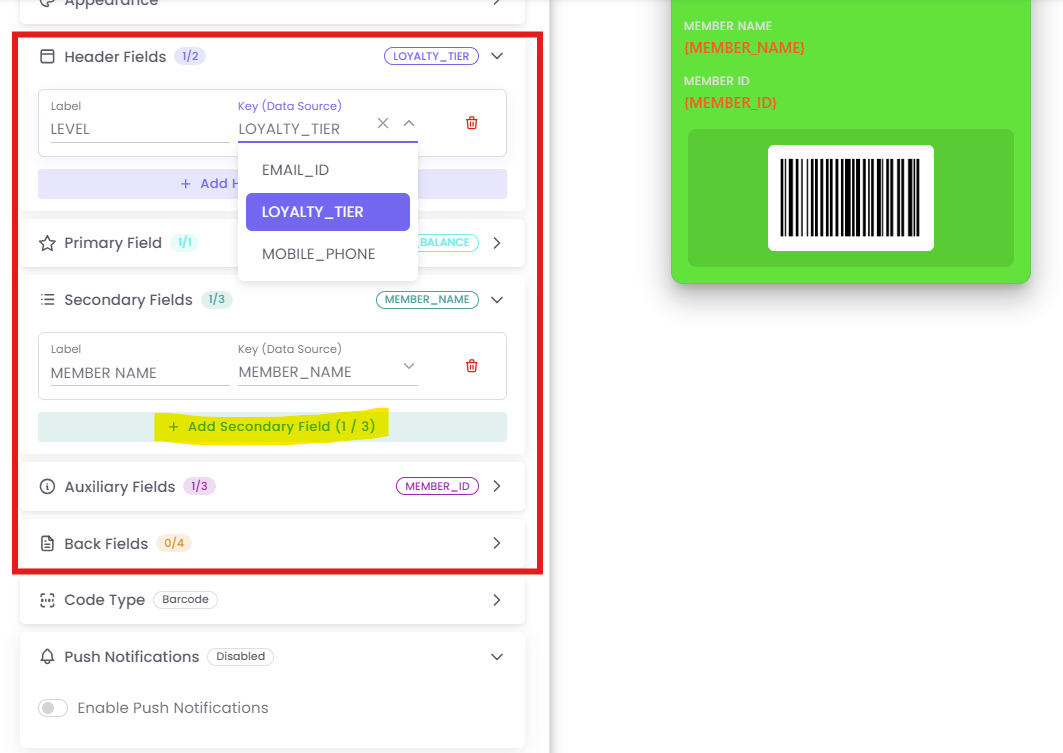
Step 3: Field Configuration (The Layout)
Fields are where the "magic" happens. You connect a Label (static text) to a Key (dynamic data from your database).
| Field Type | Best Use Case | Example Mapping |
| Header | High-level status | Label: TIER |
| Primary | The most important info | Label: BALANCE |
| Secondary | Personalization | Label: MEMBER |
| Auxiliary | Transactional details | Label: MEMBER ID |
| Back Fields | Terms & Conditions | (Apple Wallet Only) - Store address, fine print, etc. |
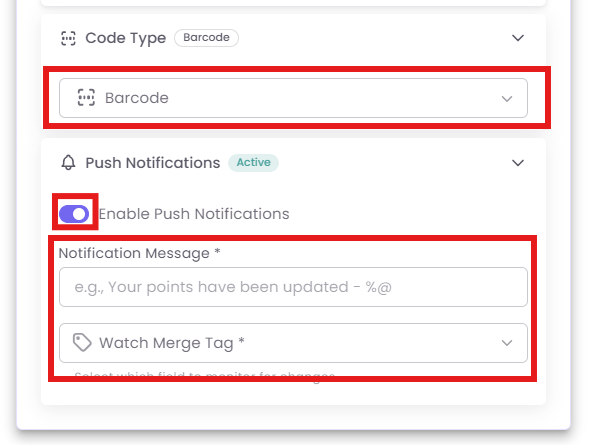
Step 4: Technical Settings
-
Code Type: Select the format for the scannable code on the pass. It can be Barcode or QR Code
-
Toggle this ON to enable push updates (e.g., alerting the user when their points balance changes).