
Create a Advanced Flow
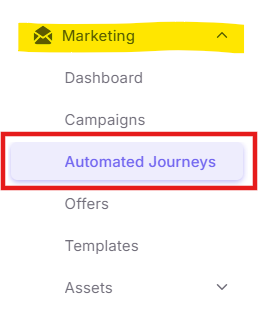
Step 1: Navigate to Flow Automation
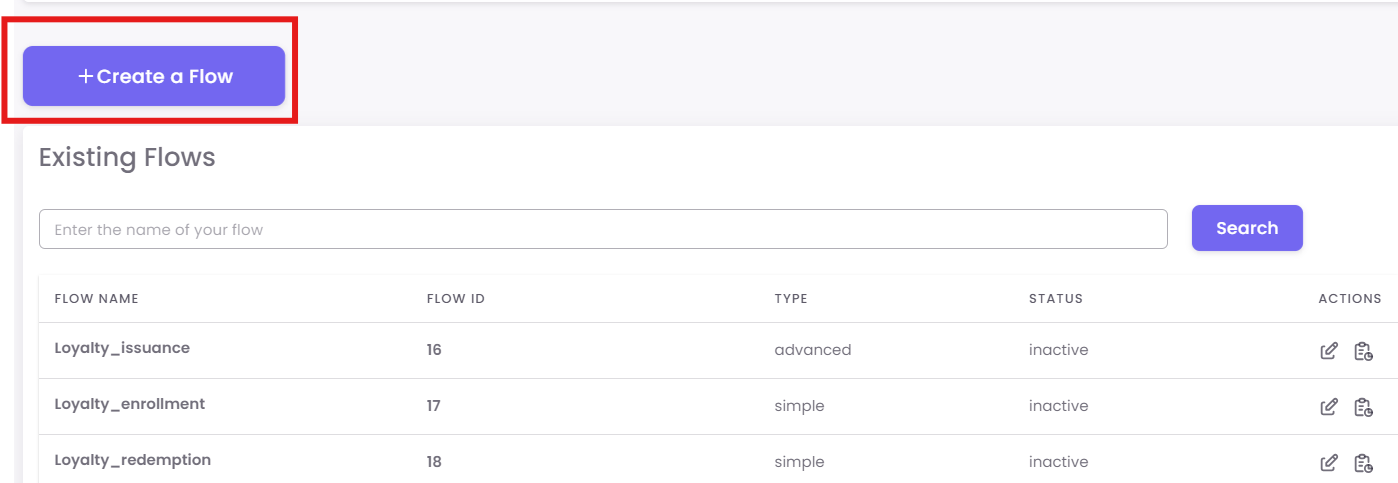
Step 2: Create a New Advanced Flow
In the "Existing Flows" dashboard, click the + Create a Flow button.
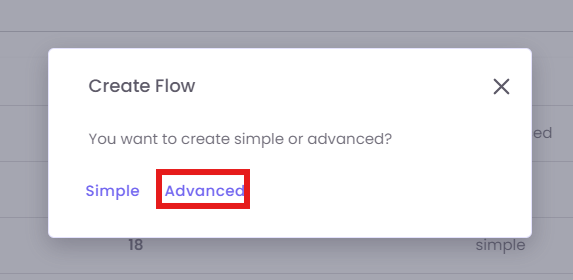
A pop-up will ask you to choose the type. Select Advanced.
Step 3: Select Your Trigger
You will now see the blank canvas. Your first step is to choose the event that will start this flow.
-
On the "Nodes" panel (left), make sure you are on the Triggers tab.
-
Drag your desired trigger onto the canvas. This will be step0.
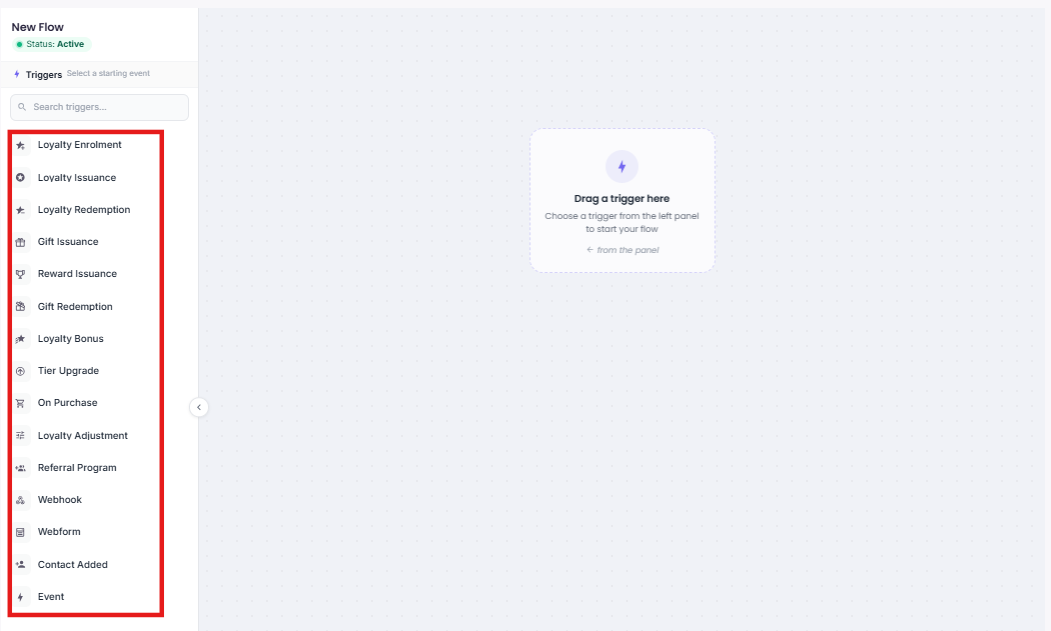
Available Triggers:
-
Loyalty Enrolment: Starts when a customer first signs up for the loyalty program.
-
Loyalty Issuance: Triggers when points are awarded, typically after a purchase.
-
Loyalty Redemption: Triggers when a customer spends points to claim a reward.
-
Gift Issuance: Starts when a gift card is purchased and issued.
-
Reward Issuance: Triggers when a non-point reward (like a coupon) is given.
-
Gift Redemption: Triggers when a customer uses a gift card for payment.
-
Loyalty Bonus: Starts when a customer receives bonus points (e.g., a birthday bonus).
-
Tier Upgrade: Triggers the moment a customer moves to a higher loyalty tier.
-
On Purchase: Starts whenever any customer completes a purchase transaction.
-
Loyalty Adjustment: Triggers when a staff member manually adds or removes points.
-
Referral Program: Starts when a customer successfully refers a signed-up friend.
-
Webhook: An advanced trigger that starts a flow via an external system signal.
-
Webform: Triggers when a customer submits an OptCulture-hosted webform.
-
Contact Added: A general trigger that starts when any new contact enters the database.
- Event: Triggers based on Online order status.
Step 4: Add and Connect Action Nodes
Next, you will build the journey using "Action" nodes. Click the required Action on the left panel.
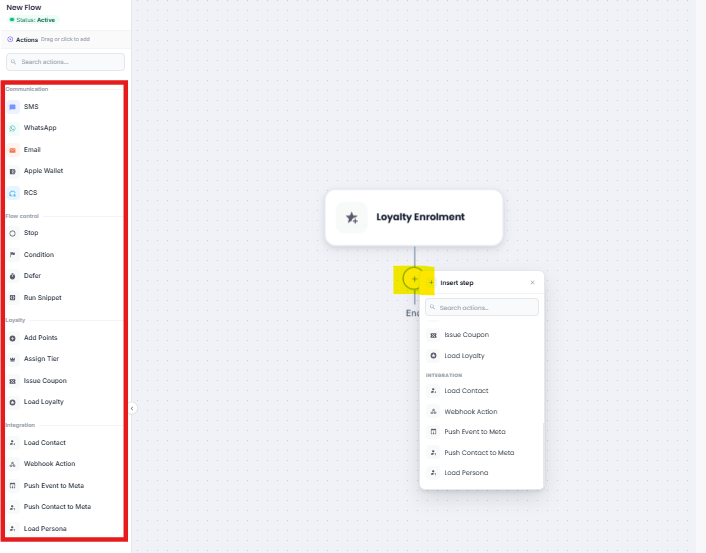
Action Sidebar Definitions:
-
Communication
ChannelsChannels:- SMS,
SMS:WhatsApp,SendsEmail,aAppletextWallet,message to the customer.WhatsApp:Sends a text message directly to the customer’s mobile number.RCS.-
Email:Sends a formatted email (usually for receipts, newsletters, or notifications). Apple Wallet:Likely triggers a push notification or an update to a digital pass/card stored in the customer's Apple Wallet.
Logic &FlowControlcontrol:-
Stop: Ends the specific workflow
branch for that customer. Defer:A "Wait" timer. It pauses the workflow for a specific duration (e.g., 2 days) or until a specific date/time before moving to the next step.Condition:TheConditionnode acts as a decision engine using If/Then logic to personalize the customer journey. It checks if a customer meets specific criteria, they follow theYes Branch; if not, they follow theNo Branch.These properties are categorized into:Identity Data:Email, Phone, First Name.branch.-
Transaction Data:Condition:ReceiptCreatesNumber,branchingReceipt Amount, Store Number, Transaction Date, Quantity.logic. -
Loyalty Data:Defer:EarnedAType/Value:waitHow they earned points.Currency/Point Balance:How many points they currently have.timer.-
TierRunName:Snippet.Their current status level. LifeTime Metrics:Total points or purchase value over the history of their account.
-
-
Loyalty & Reward ManagementAdd Points:Increases the customer’s loyalty point balance by a defined amount.Assign Tier:Manually moves a customer to a specific membership level (e.g., "Gold" or "VIP").Issue Coupon:Generates and assigns a unique discount code or voucher to the customer's account.LoadLoyalty:RetrievesAddthePoints,customer'sAssigncurrentTier,loyaltyIssuedataCoupon,(balance,Loadtier, etc.) to be used in subsequent steps or messages.
-
Data & IntegrationIntegration:- Load
Contact:Contact,Fetches specific profile details for the user (like name or phone number) from the database. - Webhook
Action:Action,SendsPushdataEvent toanMeta,externalPushthird-partyContactsystemto(likeMeta,yourLoadown website or a different CRM) via an API call.
- Load
Step 5: Configure Your Nodes
This is the most important step. You must click on each node you add to open the Configuration Panel on the right and set it up.
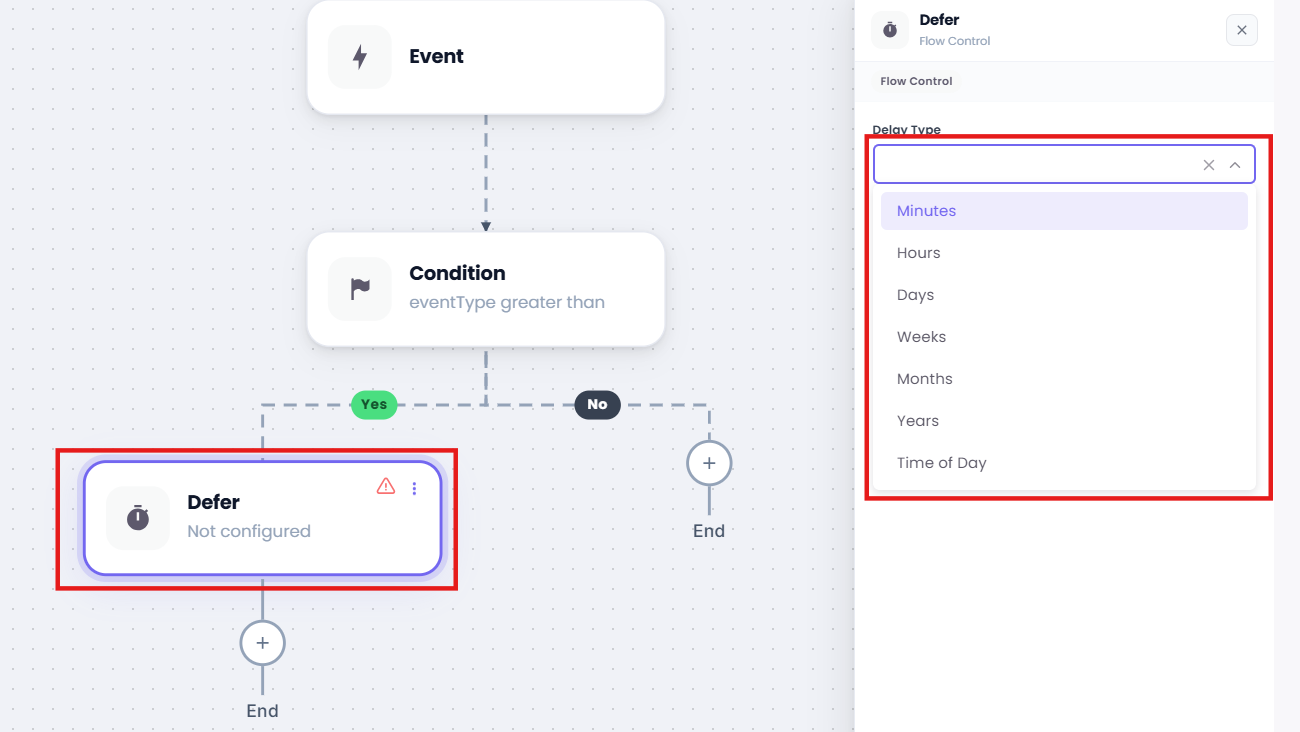
Example A: Configuring a 'Condition'Defer' (Branching)Wait) Node
This isnode pauses the mostflow powerful node. It createsfor a "Yes"set / "No" branch.time.
-
1.Drag theConditionDefer node onto your canvas and connect it. -
2.Click theConditionDeferCondition"Defer" panel will open. -
3.Set the Delay Type (e.g., Minutes, Hours, Days) and Delay Value (e.g., 2).
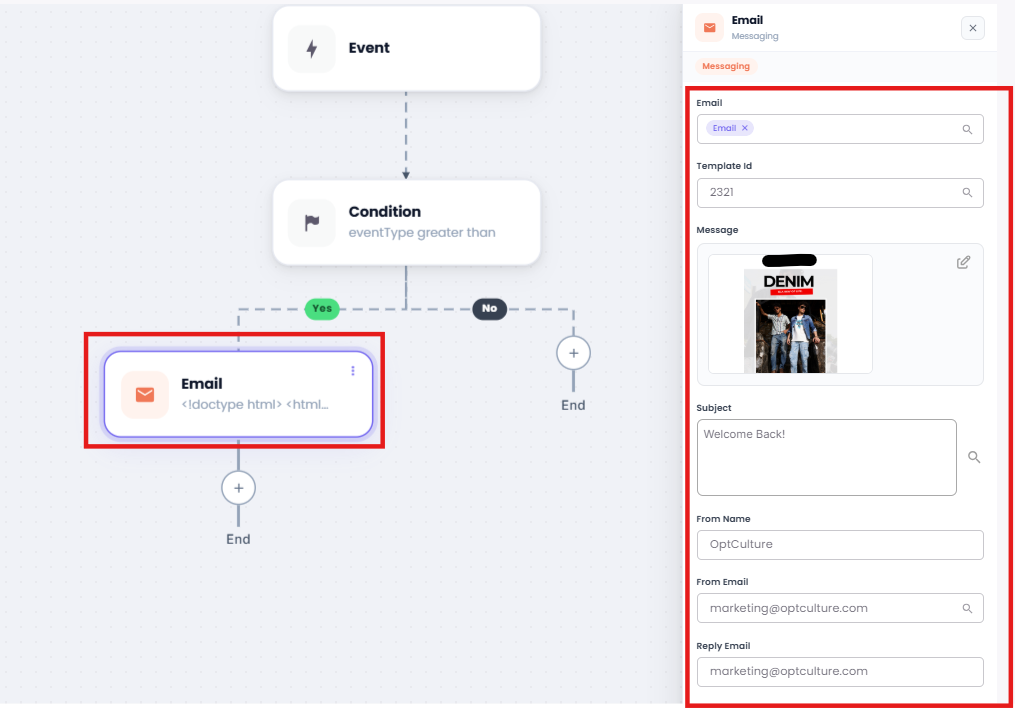
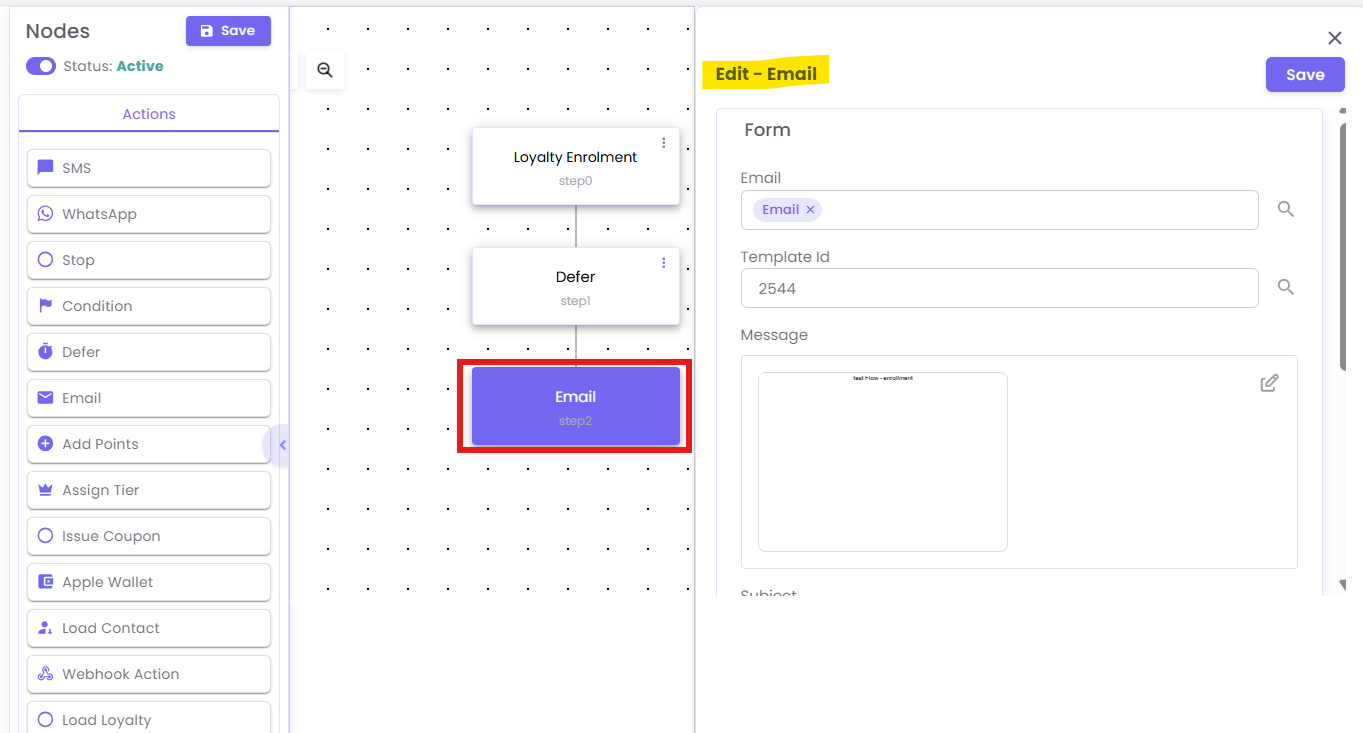
Example B: Configuring an 'Email' Node
-
Drag the Email node onto your canvas and connect it.
-
Click the
Emailnode. The "Edit - Email" panel will open. -
Enter the
Template Idfor the email you want to send and fill in other required fields.
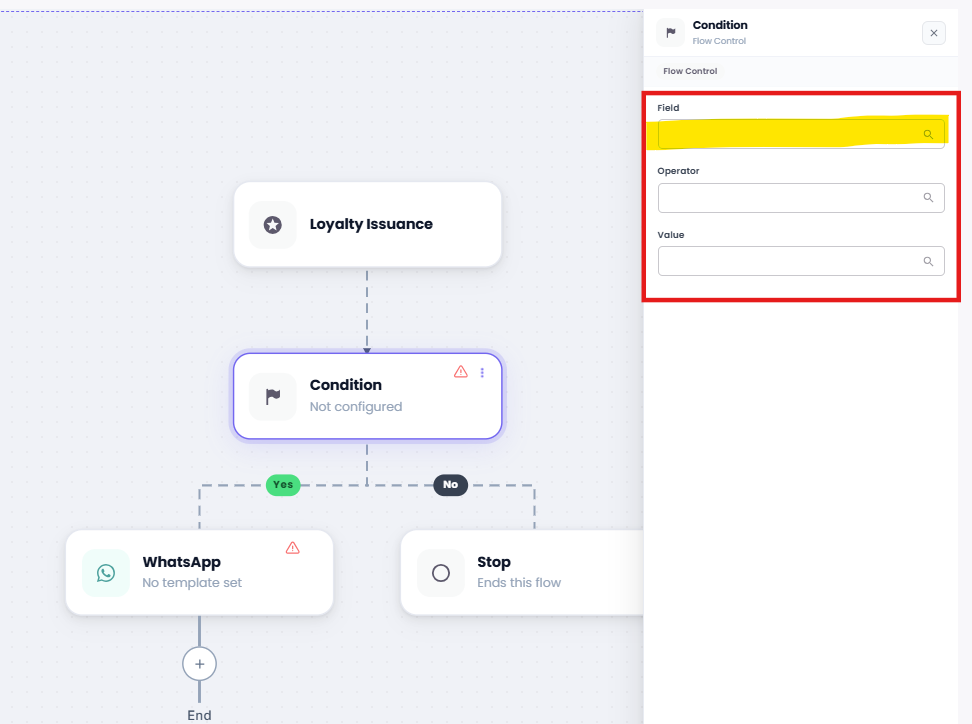
Example C: Configuring a 'Condition' (Branching) Node
-
Drag the Condition node onto your canvas and connect it.
-
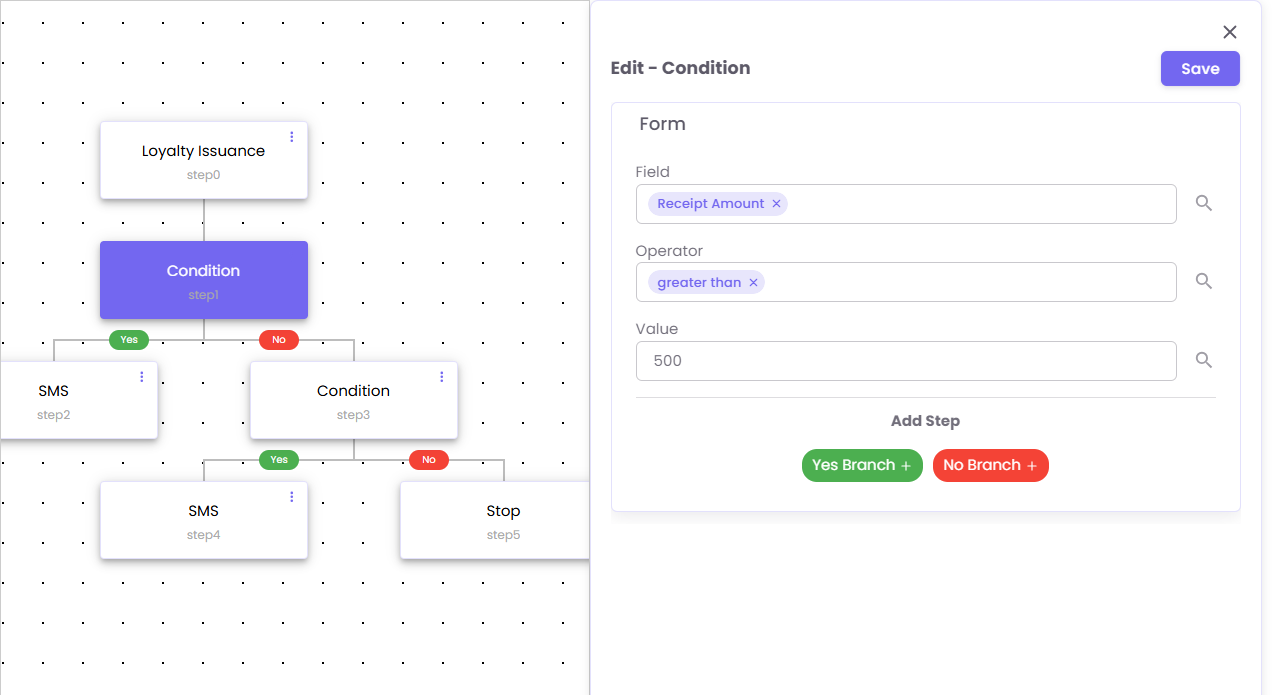
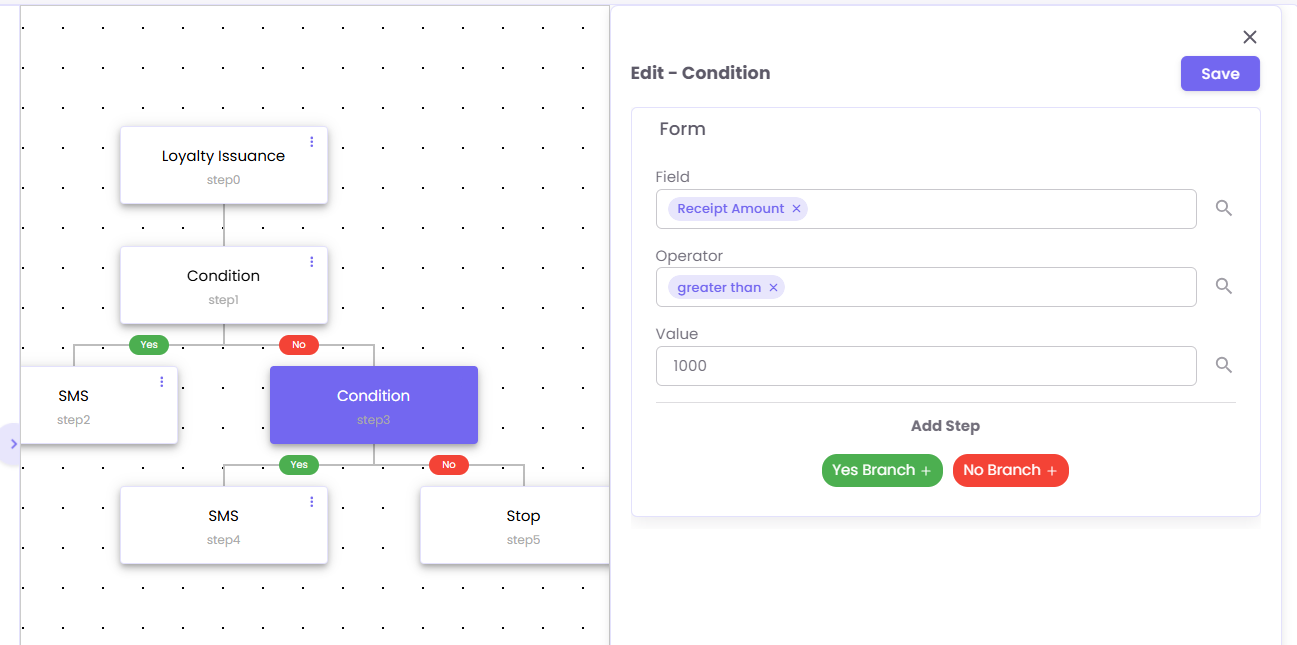
Click the Condition node to open the "Edit - Condition" panel.
-
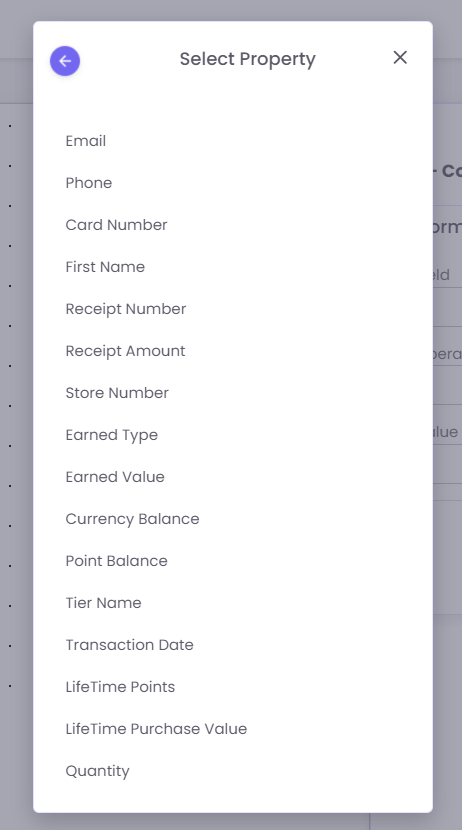
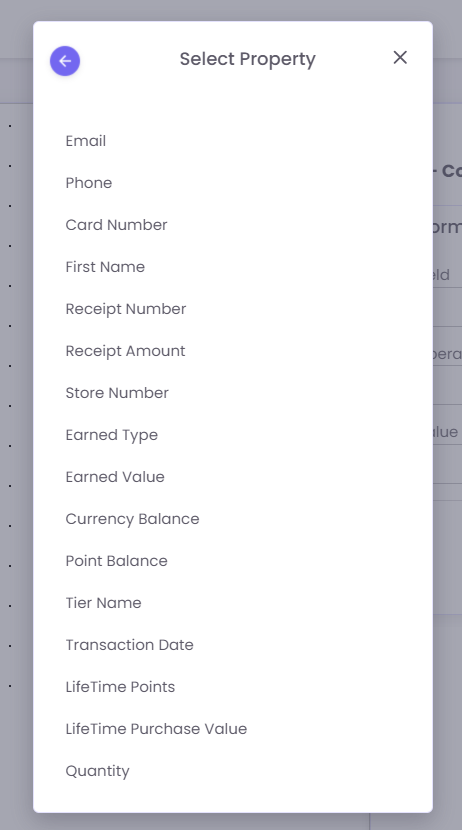
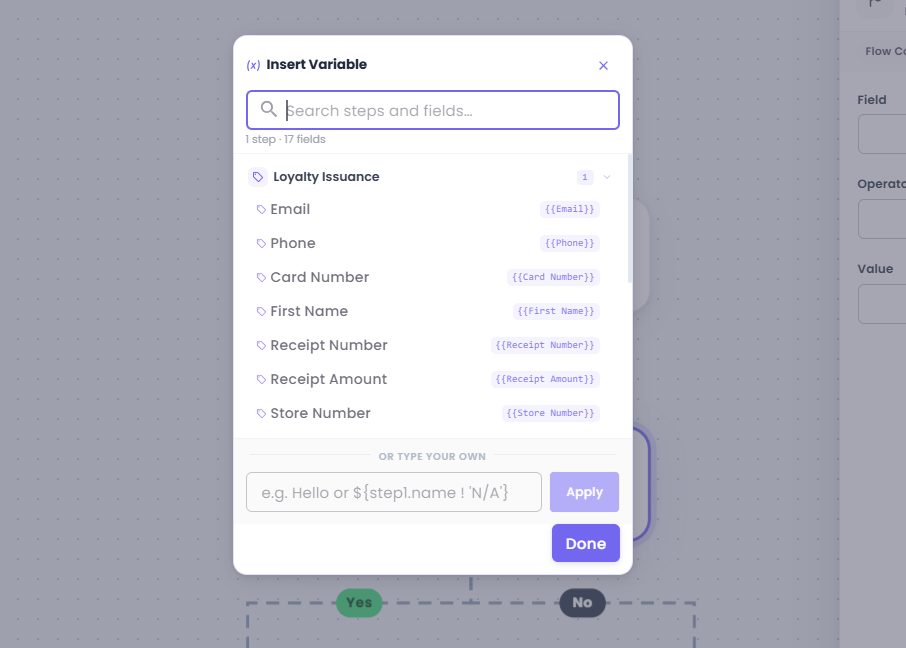
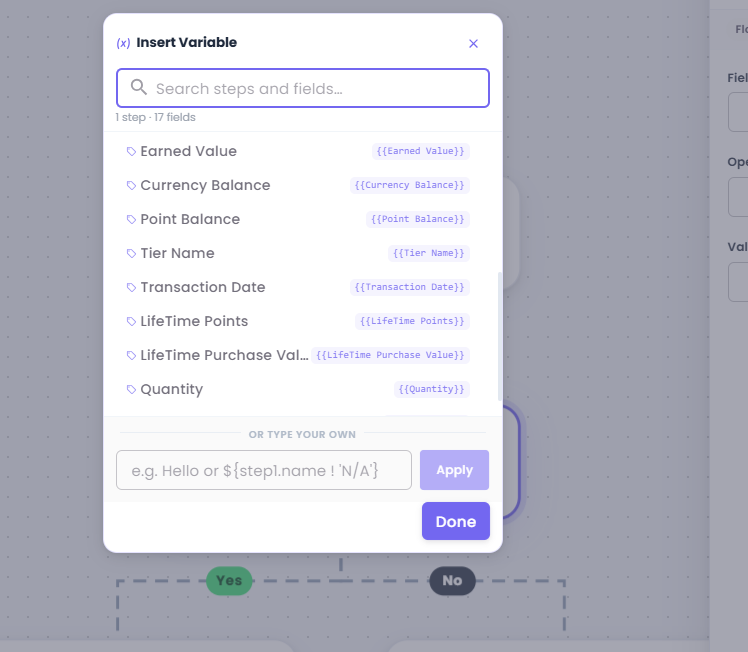
Field: Click the search box to select the property you want to check.
-
Email: The customer's email address, used for identification and email communications.
-
Phone: The customer's mobile phone number, used for identification and SMS communications.
-
Card Number: The unique identification number for the customer's loyalty or membership card.
-
First Name: The customer's first name, used for personalization.
-
Receipt Number: The unique identifier for a specific sales transaction receipt.
-
Receipt Amount: The total monetary value of a customer's transaction (purchase).
-
Store Number: The unique ID for the store location where a transaction or event occurred.
-
Earned Type: The category of points or currency earned (e.g., "Purchase," "Bonus").
-
Earned Value: The specific number of points or currency earned in a single transaction.
-
Currency Balance: The total amount of spendable, non-point currency (like a gift card balance) a customer has.
-
Point Balance: The total number of spendable loyalty points a customer currently has.
-
Tier Name: The name of the customer's current loyalty tier (e.g., "Silver," "Gold," "Platinum").
-
Transaction Date: The date (and time) a specific purchase or event occurred.
-
LifeTime Points: The cumulative total of all points a customer has ever earned.
-
LifeTime Purchase Value: The cumulative total monetary value of all purchases a customer has ever made.
-
Quantity: The number of items or units involved in a transaction.
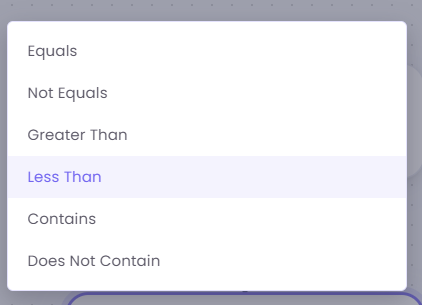
4.Operator:Select how to compare the field (e.g.,greater than,equals,less than).5.Value:Enter the value to check against (e.g.,500).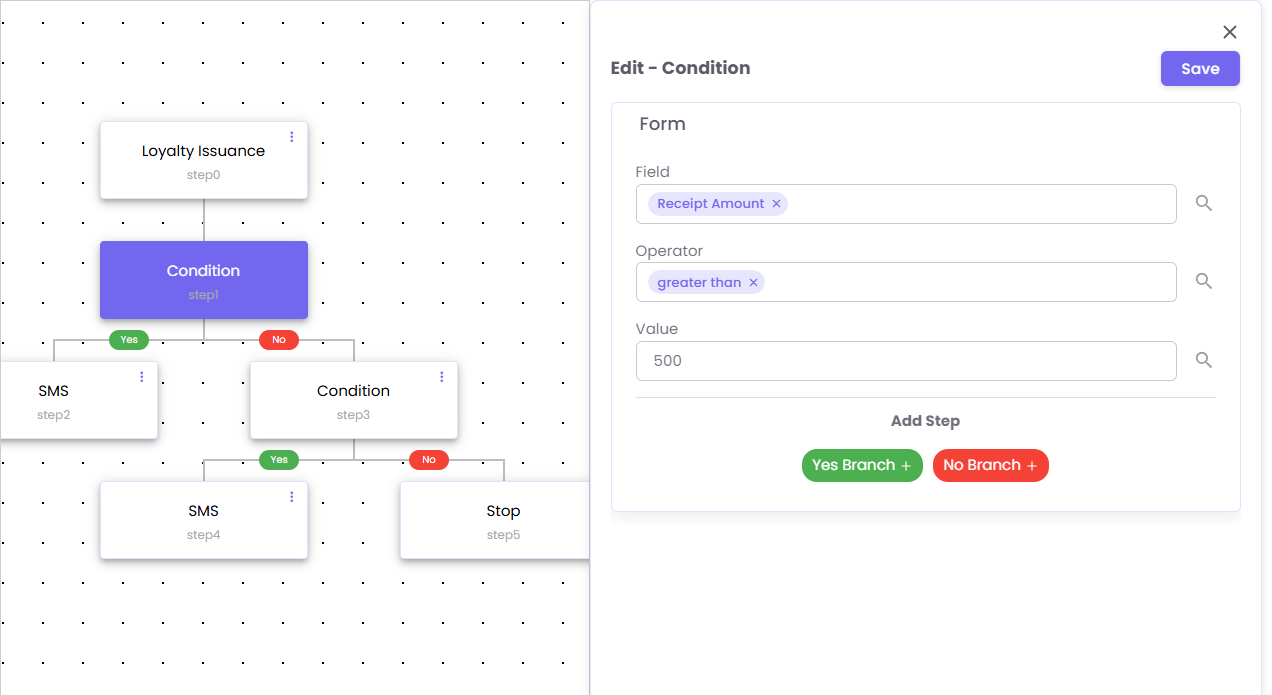
Example B: Configuring a 'Defer' (Wait) NodeThis node pauses the flow for a set time.Drag theDefernode onto your canvas and connect it.Click theDefernode. The "Edit - Defer" panel will open.Set theDelay Type(e.g., Minutes, Hours, Days) andDelay Value(e.g., 2).
-
Example C: Configuring an 'Email' Node
Drag theEmailOperator:node onto your canvas and connect it.Click theEmailnode. The "Edit - Email" panel will open.Enter theTemplate Idfor the email you want to send and fill in other required fields.
Example C: Configuring a 'Condition' (Branching) Node
This is the most powerful node. It creates a "Yes" / "No" branch.
Drag theConditionnode onto your canvas and connect it.Click theConditionnode. The "Edit - Condition" panel will open.Field:Click the search box to select the property you want to check.- Operator: Select how to compare the field (e.g.,
greater than,equals,less than). -
Value: Enter the value to check
againstagainst.(e.g.,500).
Step 6: Build Your Logic (Yes/No Branches)
The Condition node will now show a green "Yes" branch and a red "No" branch. You must add actions to both paths, even if it's just a Stop node.
See the example flow below:
-
Trigger:
Loyalty Issuance(a purchase is made). -
Step 1 (Condition): Is
Receipt Amountgreater than500? -
Yes Branch (step2): Send
SMS(e.g., a "high-value customer" thank you). -
No Branch (step3): Check another
Condition. for greater than 1000
Step 7: Save and Activate Your Flow
Your flow is not "live" until you activate it.
-
Click the Save button in the top-left corner.
-
Click the Status toggle to switch it from inactive to Active.
Your flow is now running and will process all new customers who meet the trigger.