Creating A/B Testing Email Campaign
Part 1: Setting Up Your A/B Test Campaign
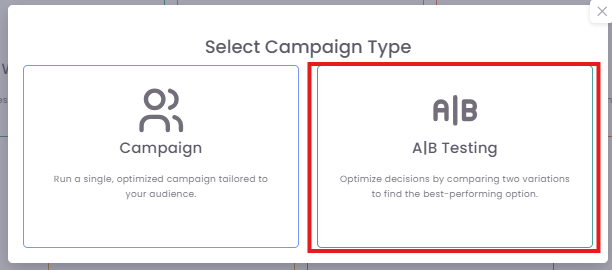
Select A/B Testing Options under the Email Campaign.
Step 1:3: Name YourDefine Campaign Details
In the Campaign Name field, enter a clear and descriptive name that explains what you are testing (e.g., "Subject Line Test - New Collection" or "CTA Button Test - Summer Sale").
Step 2: Define Your Audience
-
ChooseCampaignContacts SourceName:whoEnterwillareceiveclear,thisinternalcampaign whetherSegmentorList Choose the relevant categoryname for your campaign (e.g., "Promotional,"Dormant"Sales"Offer Campaign - Q4 2025"). Thishelps target customers who have opted inis forspecificyourcommunicationreferencetypes.only.Note:By default, this is disabled.
Step 3: Choose Your Test Type
This is the most crucial part of the setup. Choose what you want to test:
Content:(Default) Select this to test different email content, such as the subject line, from name, template design, etc.-
ContentContacts& Time:Source: Selectthishow you want totestdefinebothyourdifferenttargetemailaudience.contentInandthisdifferentexample,sendingselecttimesSegmenttoorsee which combination performs best.List
Click the Next button to save changes for the current section.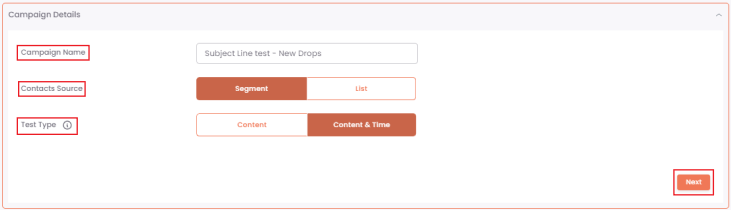
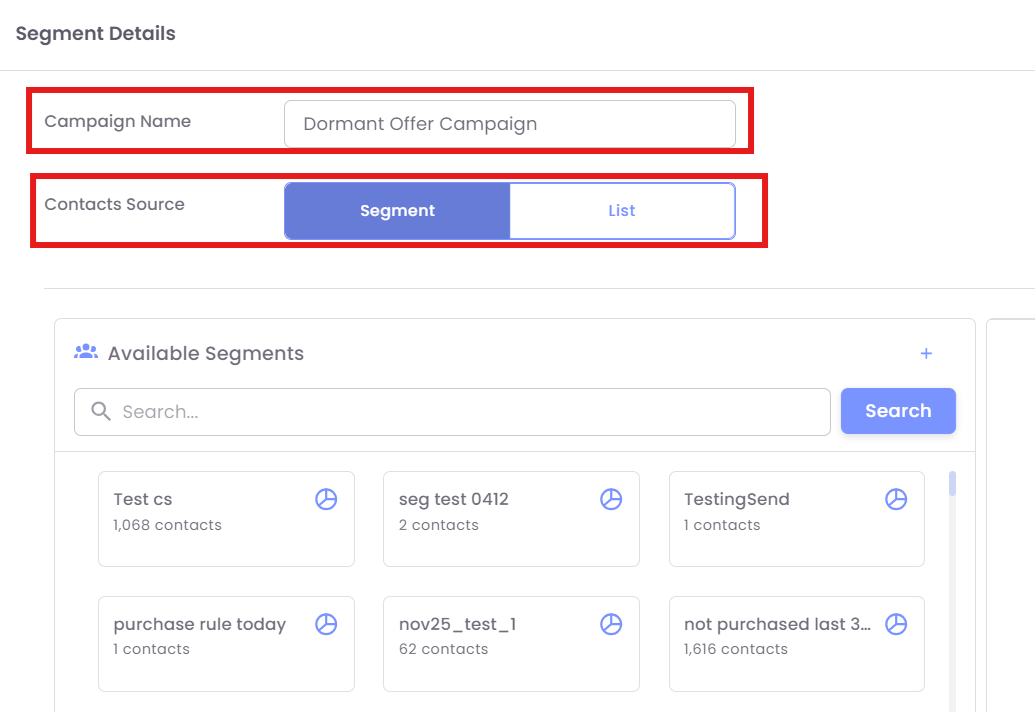
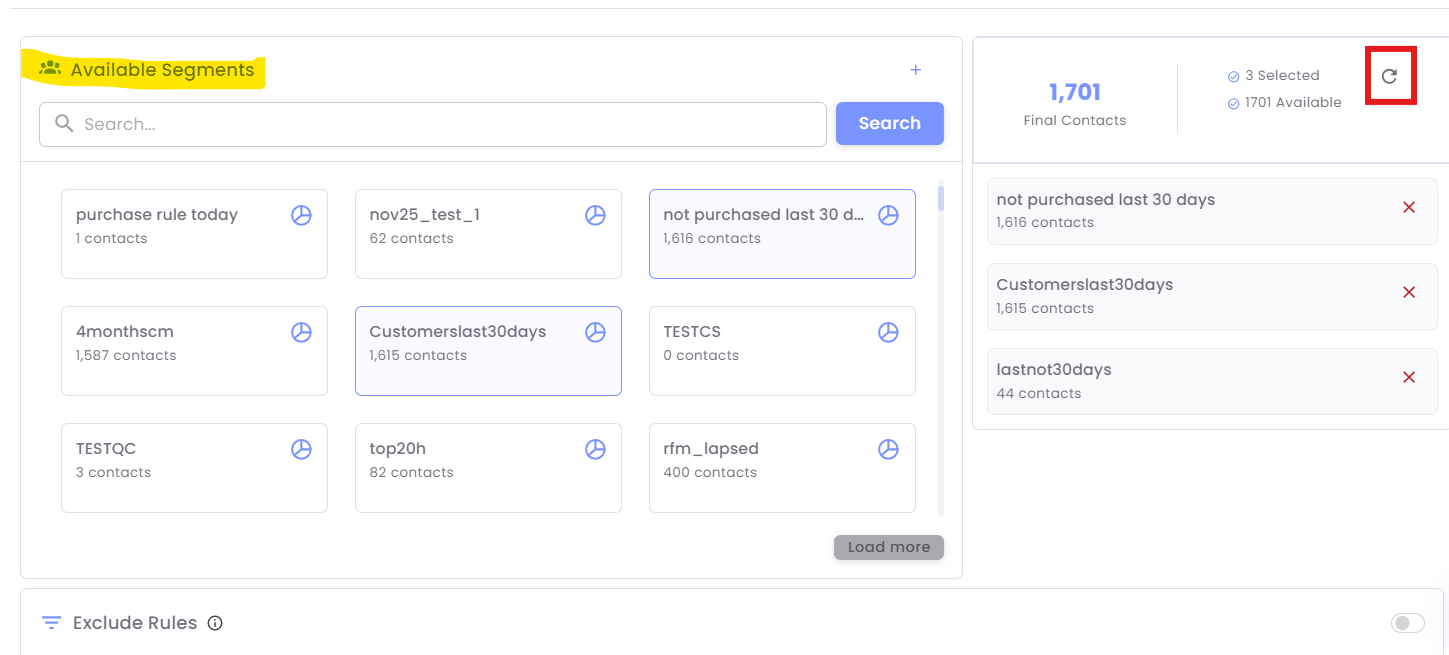
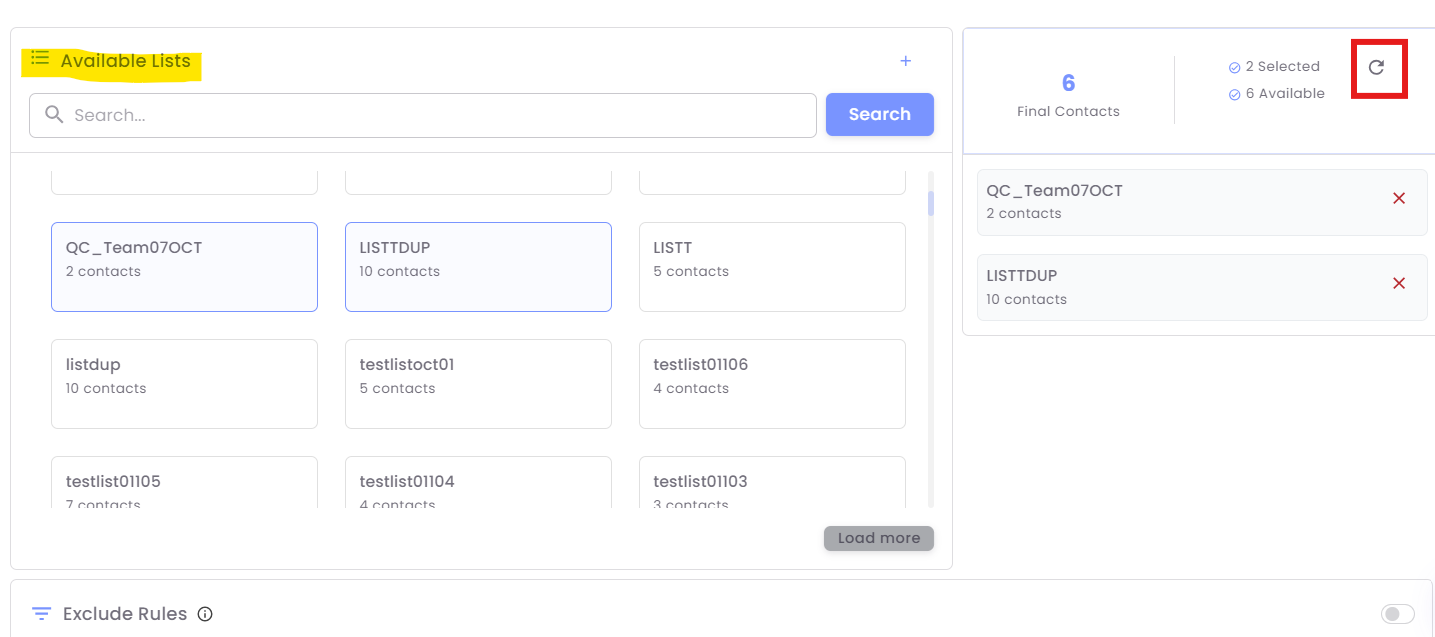
Step 4: Select YourTarget SegmentAudience (Segments)
IfYou must select the customer segments you chosewish to target for this campaign.
1. Under Available Segments or Lists, click on you want to include. The selected segments\Lists will move to the right-hand panel.
- Example: Selecting "not purhased Last 30 days" (1616 contacts), "Customerslast30days" (1615 contacts) and "lastnot30days" (44 contacts) results in a total of
Segment1701 Final Contacts"as(this number may be lower due to automatically removing duplicate contacts).
2. Click the Refresh icon (indicated by a circular arrow) next to the final contact count to ensure the most up-to-date count of contacts based on your contactselection.
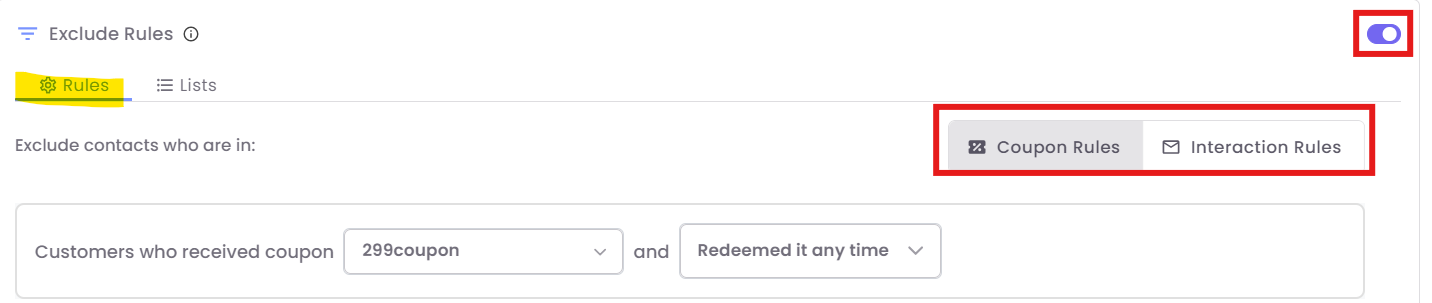
Step 5: Configure Exclusion Rules (Optional)
Use exclusion rules to remove specific groups of contacts from your final audience, ensuring you woulddon't send messages to ineligible or recently targeted customers.
-
Ensure the Exclude Rules toggle is ON (highlighted in the images).
-
Exclusion by Rules (Coupon/Interaction): Click the Rules tab.
-
You can exclude contacts only in segments based on:
- Coupon Rules: Contacts who have
toreceived,selectredeemed, or have an active coupon.-
- Example: You are sending a
pre-existing"FlashsegmentSale" campaign, but you want to exclude anyone who has already "Redeemed it any time" for a previous 10% discount coupon. - Use Case: Don't send a discount code to someone who just purchased from you yesterday!
- Example: You are sending a
-
- Interaction Rules: Contacts who have interacted (e.g., clicked a link) with a previous campaign.
-
-
Example: You can exclude customers who have "received exactly" 2 WhatsApp communications in the last 30 days.
- Use Case: Avoid "spamming" your most active customers by skipping them in a general broadcast if they've already heard from you multiple times this month.
-
-
-
Exclusion by Lists: Click the Lists tab.
-
Select specific static lists of contacts you wish to exclude either from selected Segments or
createLists.a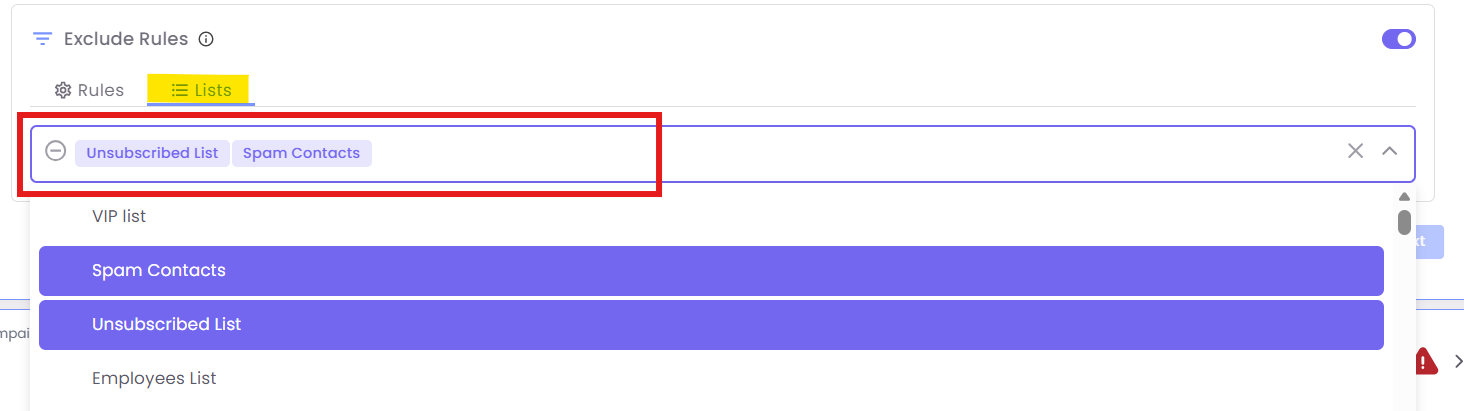
new
oneusing -
-
Once exclusions are configured, click the
+ Create Segment button. Once selected, clickNext.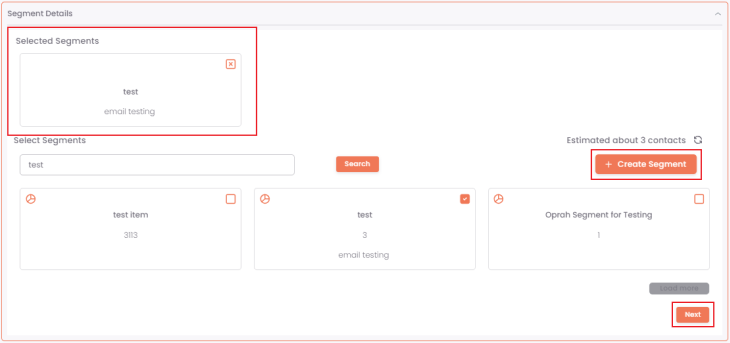

Part 2: Creating the Email Variations
This is where you will build the different versions (variations) of your email to test against each other.
Step 5:6: Configure Variation A
The first variation (Variation A) is set up by default. Fill in the following fields:
-
From Name & From Email
-
Subject: The subject line for this variation. This is one of the most common and impactful elements to test.
-
Select Time of Schedule: If you chose "Content & Time" as your test type, specify the send time for this variation here.
-
Enable Email Preview: Check this box to add a pre-header text that appears after the subject line in most email clients.
-
Template: Select a pre-designed template or create one using the drag & drop email editor.
-
Send Test: Before proceeding, you can use the Send Test button to send a preview of this variation to one or more email addresses.

![]()
Step 6: Add More Variations
Click the Add Variation button to create another version of your email (Variation B, C, etc.). For each new variation, change the element you wish to test (e.g., write a different subject line for Variation B while keeping all other content the same).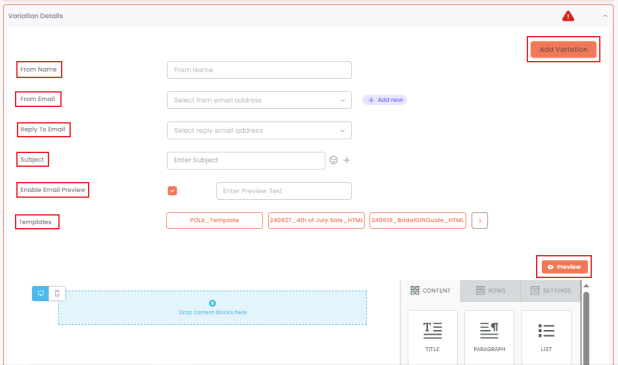
Part 3: Defining the Test Parameters and Launching
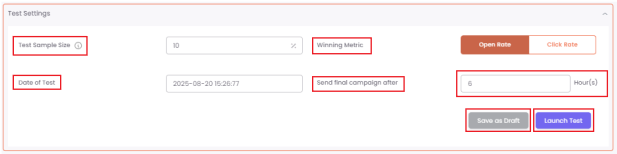
Step 7: Configure Test Settings and Save All the Changes
This section determines how your A/B test will run and how a winner will be chosen.
-
Test Sample Size: Enter the percentage of your total audience that will be used for the test.
For example, if you enter 20% for a two-variation test, 10% of your audience will receive Variation A and 10% will receive Variation B. The remaining 80% will receive the winning variation. -
Winning Metric: Choose the goal of your test.
-
Open Rate: The variation with the highest percentage of open wins (ideal for testing subject lines).
-
Click Rate: The variation with the highest percentage of clicks wins (ideal for testing templates, images, or calls-to-action).
-
Testing Date: Set the date and time for the test variations to be sent to the sample audience.
-
Final Campaign Send Date: Specify how long the system should wait after the initial test to determine a winner (e.g., wait 4 hours). After this period, the winning variation will be automatically sent to the rest of your audience.
-
Save as Draft: Save your A/B test setup to continue working on it later.
-
Launch Test: Schedule your campaign. At the designated time, the test will be sent to the sample group, a winner will be determined, and the winning version will be sent to the remaining contacts.