
Create a Advanced Flow
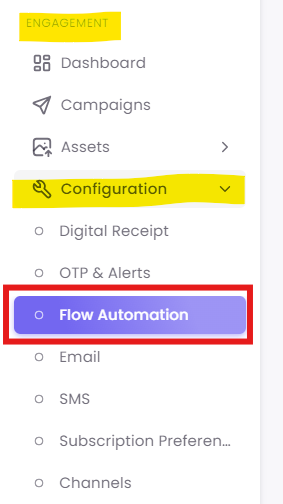
Step 1: Navigate to Flow Automation
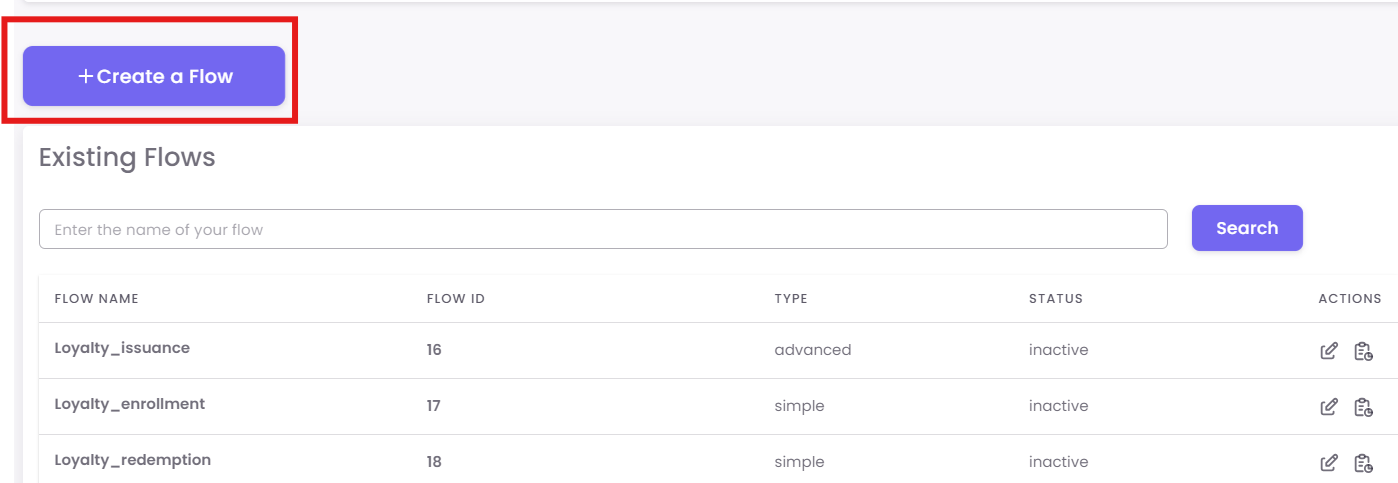
Step 2: Create a New Advanced Flow
In the "Existing Flows" dashboard, click the + Create a Flow button.
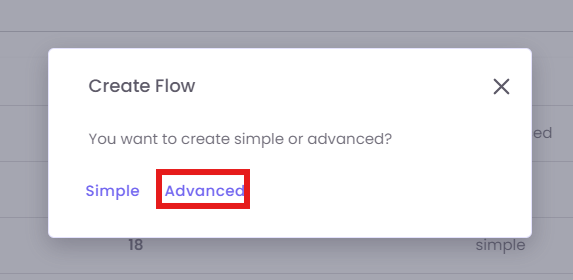
A pop-up will ask you to choose the type. Select Advanced.
Step 3: Select Your Trigger
You will now see the blank canvas. Your first step is to choose the event that will start this flow.
-
On the "Nodes" panel (left), make sure you are on the Triggers tab.
-
Drag your desired trigger onto the canvas. This will be step0.
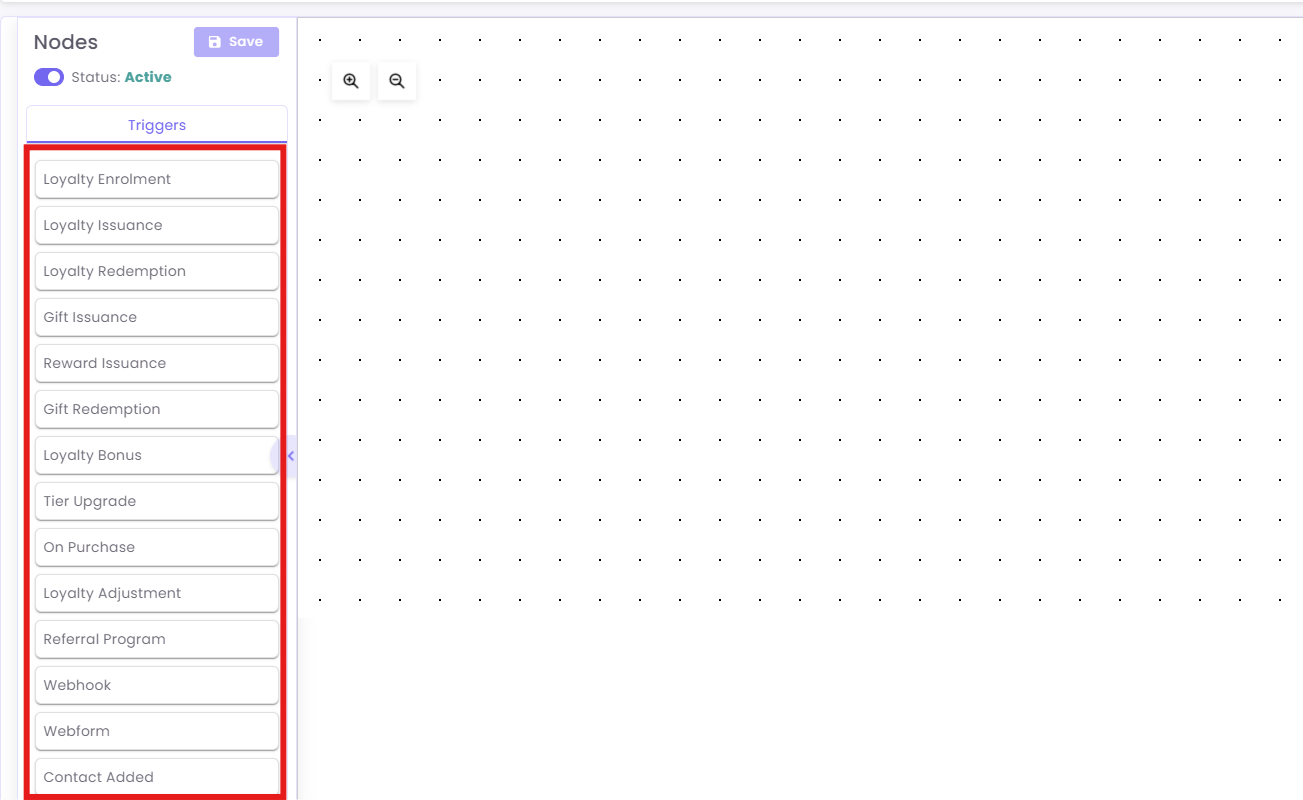
Available Triggers:
-
Loyalty Enrolment: Starts
a flowwhen a customer first signs up foryourthe loyalty program. -
Loyalty Issuance: Triggers when
loyaltypoints aregiven to a customer,awarded, typically after a purchase. -
Loyalty Redemption: Triggers when a customer spends
their loyaltypoints to claim a reward. -
Gift Issuance: Starts
a flowwhen a gift card is purchased andissuedissued.to a customer. -
Reward Issuance: Triggers when a
specific,non-point reward (like a coupon) isgivengiven.to a customer. -
Gift Redemption: Triggers when a customer uses a gift card
to make afor payment. -
Loyalty Bonus: Starts
a flowwhen a customer receives bonus pointsoutside of a standard purchase(e.g.,forabirthday)birthday bonus). -
Tier Upgrade: Triggers the moment a customer
earns enough to move upmoves to anewhigher loyaltytiertier.(e.g., from Silver to Gold). -
On Purchase: Starts
a flowwhenever any customer completes a purchase transaction. -
Loyalty Adjustment: Triggers when a staff member manually adds or removes
pointspoints.from a customer's account. -
Referral Program: Starts
a flowwhen a customer successfully refers afriend who signssigned-uporfriend.makes a purchase. -
Webhook: An advanced trigger that starts a flow
whenvia an external system(likesignal.your website) sends a signal to OptCulture. -
Webform: Triggers when a customer submits
a specifican OptCulture-hostedwebformwebform.(like a "Contact Us" form). -
Contact Added: A general trigger that starts
a flowwhen any new contactis added to your database, regardless ofenters thesource.database.
Step 4: Add and Connect Action Nodes
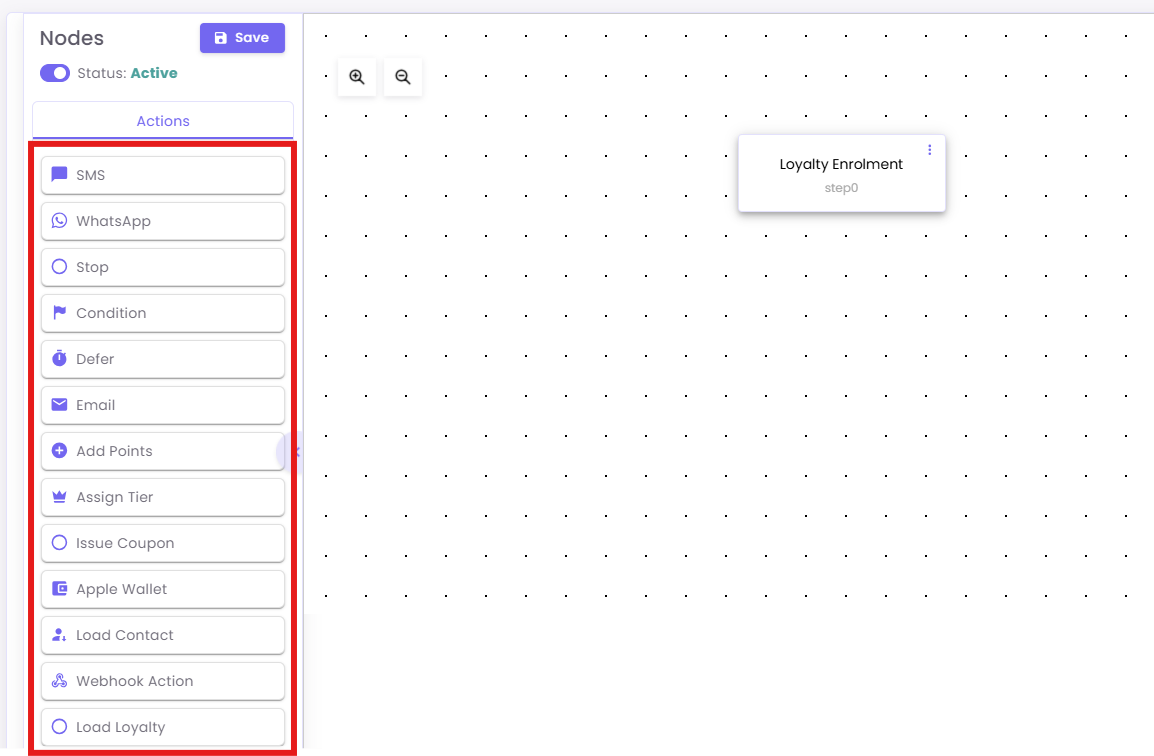
Next, you will build the journey using "Action" nodes.
Click the required
ActionsActiontabon the"Nodes"leftpanel (left).panel.Drag your desired action (e.g.,Defer,Condition,Email) onto the canvas.To connect nodes, click and drag from the small circle on the bottom of one node to the small circle on the top of the next node.
Here
Action isSidebar an explanation of each action listed in the sidebar:Definitions:
- Communication Channels
- SMS: Sends a text message to the customer.
-
WhatsApp: Sends a text message directly to the customer’s mobile number.
-
Email: Sends a formatted email (usually for receipts, newsletters, or notifications).
- Apple Wallet: Likely triggers a push notification or an update to a digital pass/card stored in the customer's Apple Wallet.
-
Logic & Flow Control
-
Stop: Ends the specific workflow branch for that customer.
- Defer: A "Wait" timer. It pauses the workflow for a specific duration (e.g., 2 days) or until a specific date/time before moving to the next step.
-
Condition:
TheThe Condition node acts as a"forkdecisioninenginetheusingroad."If/ThenIt allows youlogic to personalize thejourneycustomerbyjourney.checkingIt checks if a customer meets specificcriteria. If the condition is met,criteria, they follow the Yes Branch; if not, they follow the No Branch.These properties are categorized into:
-
Identity Data: Email, Phone, First Name.
-
Transaction Data: Receipt Number, Receipt Amount, Store Number, Transaction Date, Quantity.
-
Loyalty Data:
*Earned Type/Value: How they earned points.-
Currency/Point Balance: How many points they currently have.
-
Tier Name: Their current status level.
-
LifeTime Metrics: Total points or purchase value over the history of their account.
-
-
-
-
Loyalty & Reward Management
- Add Points: Increases the customer’s loyalty point balance by a defined amount.
- Assign Tier: Manually moves a customer to a specific membership level (e.g., "Gold" or "VIP").
- Issue Coupon: Generates and assigns a unique discount code or voucher to the customer's account.
- Load Loyalty: Retrieves the customer's current loyalty data (balance, tier, etc.) to be used in subsequent steps or messages.
- Data & Integration
- Load Contact: Fetches specific profile details for the user (like name or phone number) from the database.
- Webhook Action: Sends data to an external third-party system (like your own website or a different CRM) via an API call.
Step 5: Configure Your Nodes
This is the most important step. You must click on each node you add to open the Configuration Panel on the right and set it up.
Example A: Configuring a 'Condition' (Branching) Node
This is the most powerful node. It creates a "Yes" / "No" branch.
1. Drag the Condition node onto your canvas and connect it.
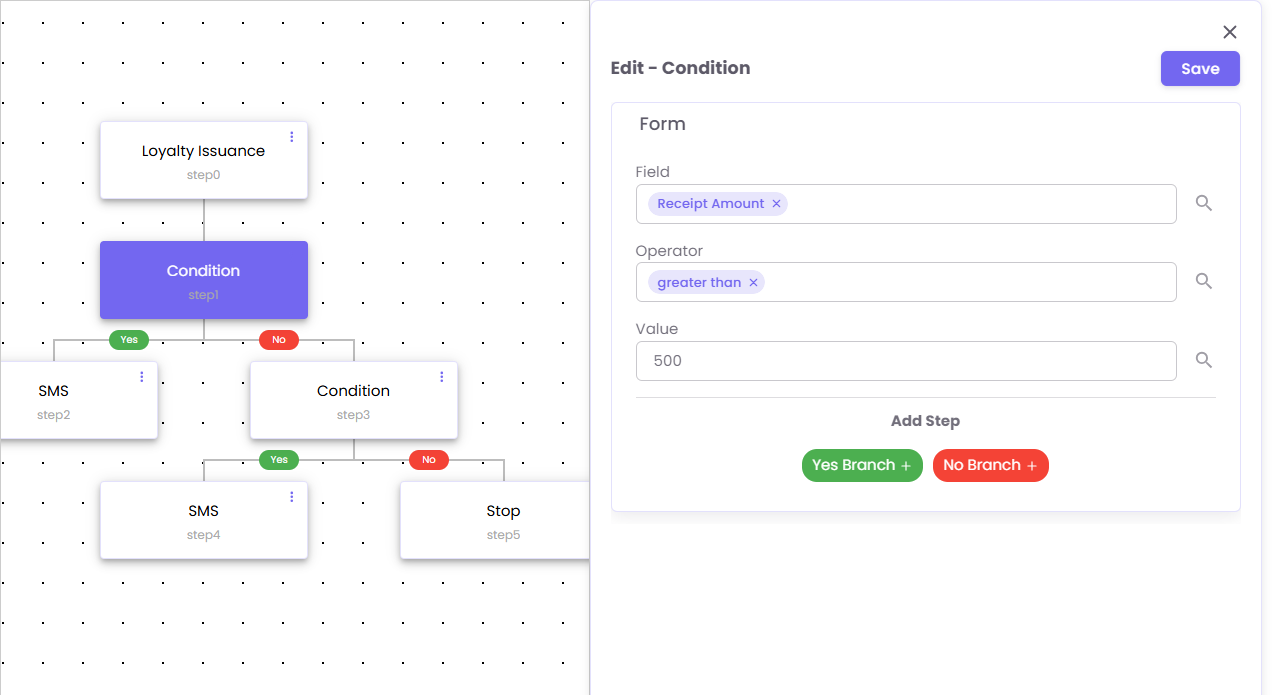
2. Click the Condition node. The "Edit - Condition" panel will open.
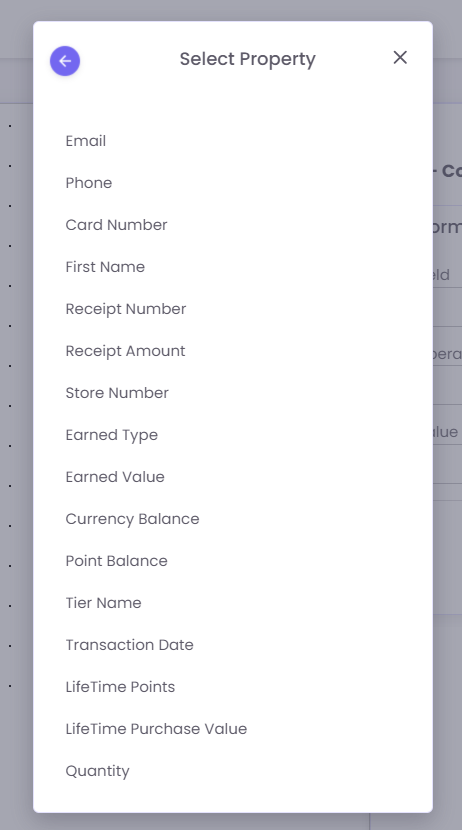
3. Field: Click the search box to select the property you want to check.
-
Email: The customer's email address, used for identification and email communications.
-
Phone: The customer's mobile phone number, used for identification and SMS communications.
-
Card Number: The unique identification number for the customer's loyalty or membership card.
-
First Name: The customer's first name, used for personalization.
-
Receipt Number: The unique identifier for a specific sales transaction receipt.
-
Receipt Amount: The total monetary value of a customer's transaction (purchase).
-
Store Number: The unique ID for the store location where a transaction or event occurred.
-
Earned Type: The category of points or currency earned (e.g., "Purchase," "Bonus").
-
Earned Value: The specific number of points or currency earned in a single transaction.
-
Currency Balance: The total amount of spendable, non-point currency (like a gift card balance) a customer has.
-
Point Balance: The total number of spendable loyalty points a customer currently has.
-
Tier Name: The name of the customer's current loyalty tier (e.g., "Silver," "Gold," "Platinum").
-
Transaction Date: The date (and time) a specific purchase or event occurred.
-
LifeTime Points: The cumulative total of all points a customer has ever earned.
-
LifeTime Purchase Value: The cumulative total monetary value of all purchases a customer has ever made.
-
Quantity: The number of items or units involved in a transaction.
4. Operator: Select how to compare the field (e.g., greater than, equals, less than).
5. Value: Enter the value to check against (e.g., 500).
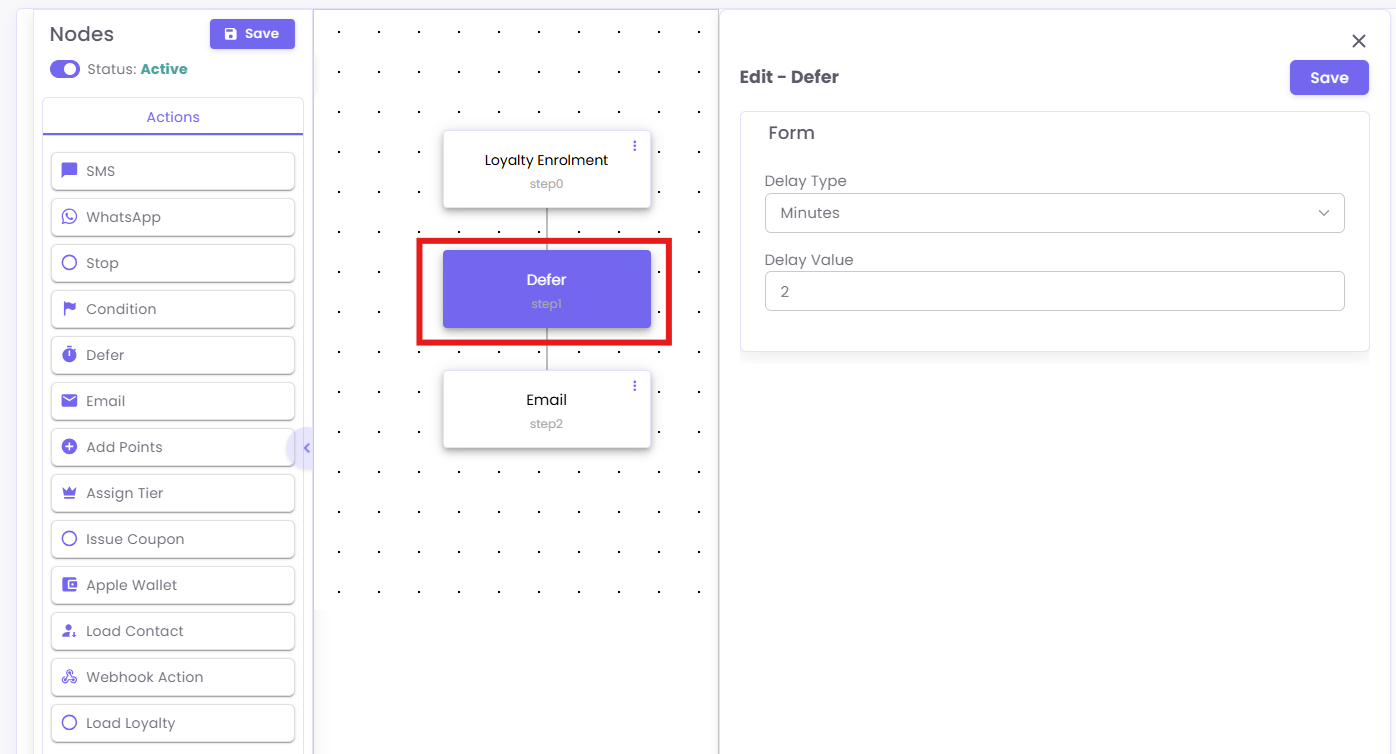
Example A:B: Configuring a 'Defer' (Wait) Node
This node pauses the flow for a set time.
-
Drag the Defer node onto your canvas and connect it.
-
Click the
Defernode. The "Edit - Defer" panel will open. -
Set the Delay Type (e.g., Minutes, Hours, Days) and Delay Value (e.g., 2).
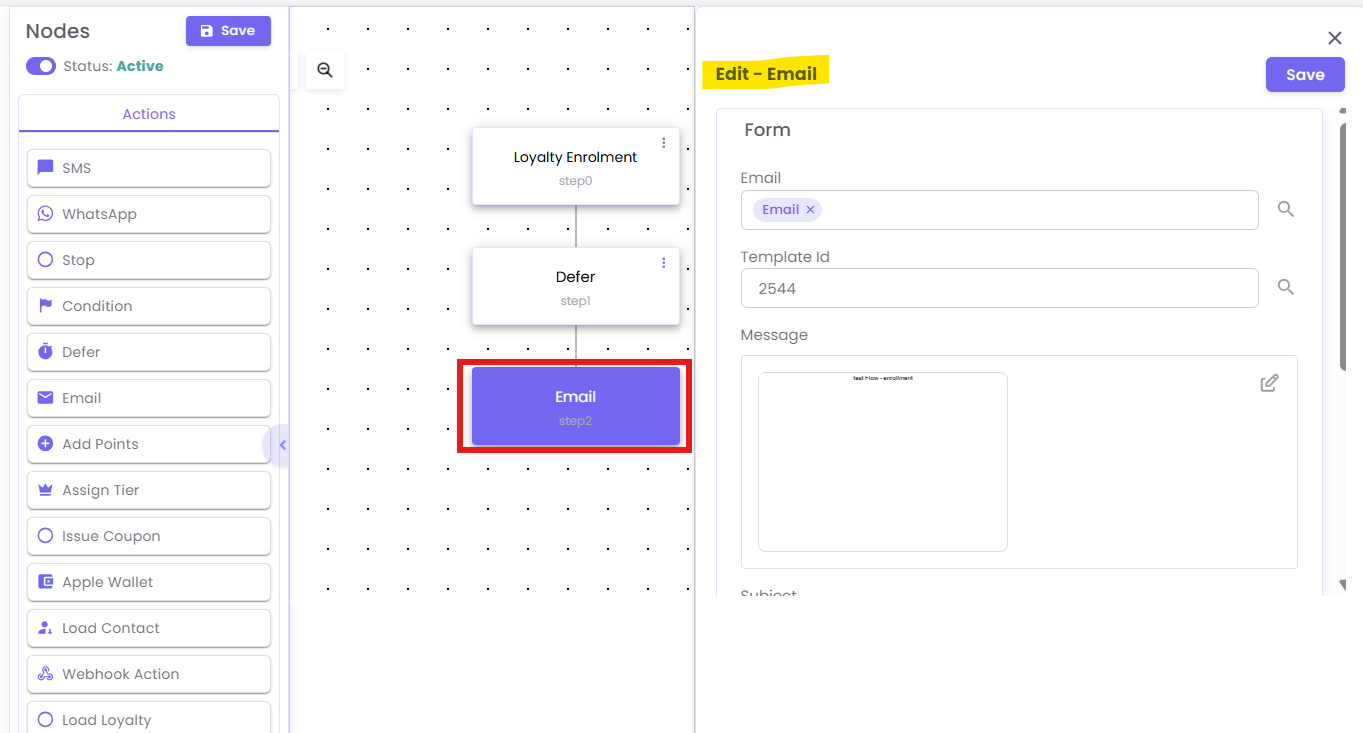
Example B:C: Configuring an 'Email' Node
-
Drag the Email node onto your canvas and connect it.
-
Click the
Emailnode. The "Edit - Email" panel will open. -
Enter the
Template Idfor the email you want to send and fill in other required fields.
Example C: Configuring a 'Condition' (Branching) Node
This is the most powerful node. It creates a "Yes" / "No" branch.
-
Drag the Condition node onto your canvas and connect it.
-
Click the
Conditionnode. The "Edit - Condition" panel will open. -
Field: Click the search box to select the property you want to check.
- Operator: Select how to compare the field (e.g.,
greater than,equals,less than). - Value: Enter the value to check against (e.g.,
500).
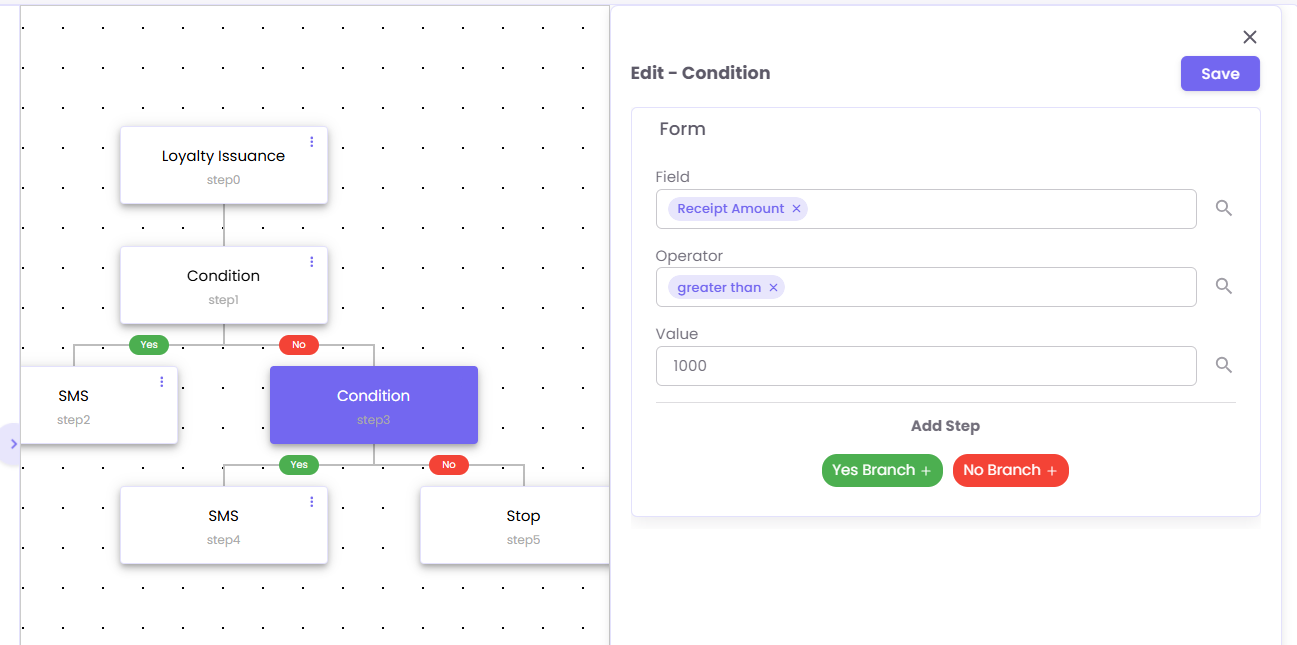
Step 6: Build Your Logic (Yes/No Branches)
The Condition node will now show a green "Yes" branch and a red "No" branch. You must add actions to both paths, even if it's just a Stop node.
See the example flow below:
-
Trigger:
Loyalty Issuance(a purchase is made). -
Step 1 (Condition): Is
Receipt Amountgreater than500? -
Yes Branch (step2): Send
SMS(e.g., a "high-value customer" thank you). -
No Branch (step3): Check another
Condition. for greater than 1000
Step 7: Save and Activate Your Flow
Your flow is not "live" until you activate it.
-
Click the Save button in the top-left corner.
-
Click the Status toggle to switch it from inactive to Active.
Your flow is now running and will process all new customers who meet the trigger.