
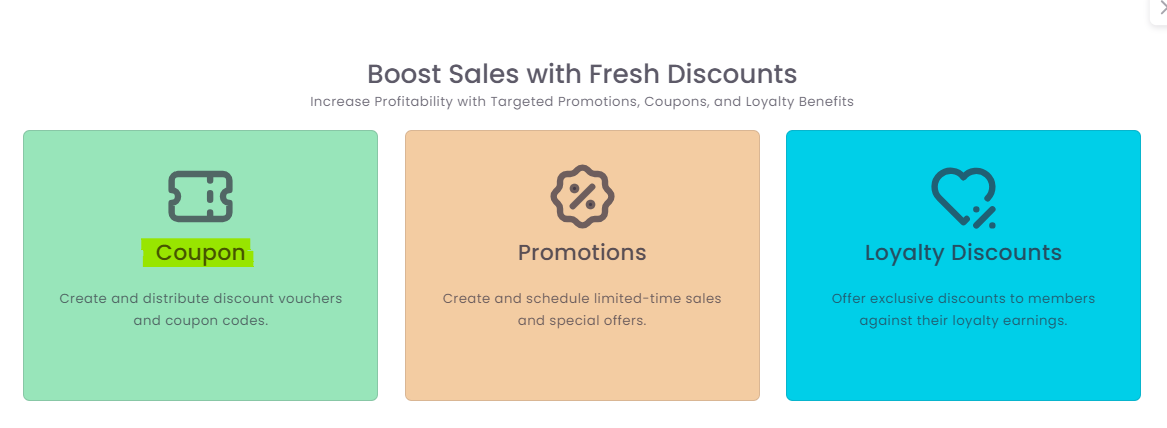
Create a Coupon
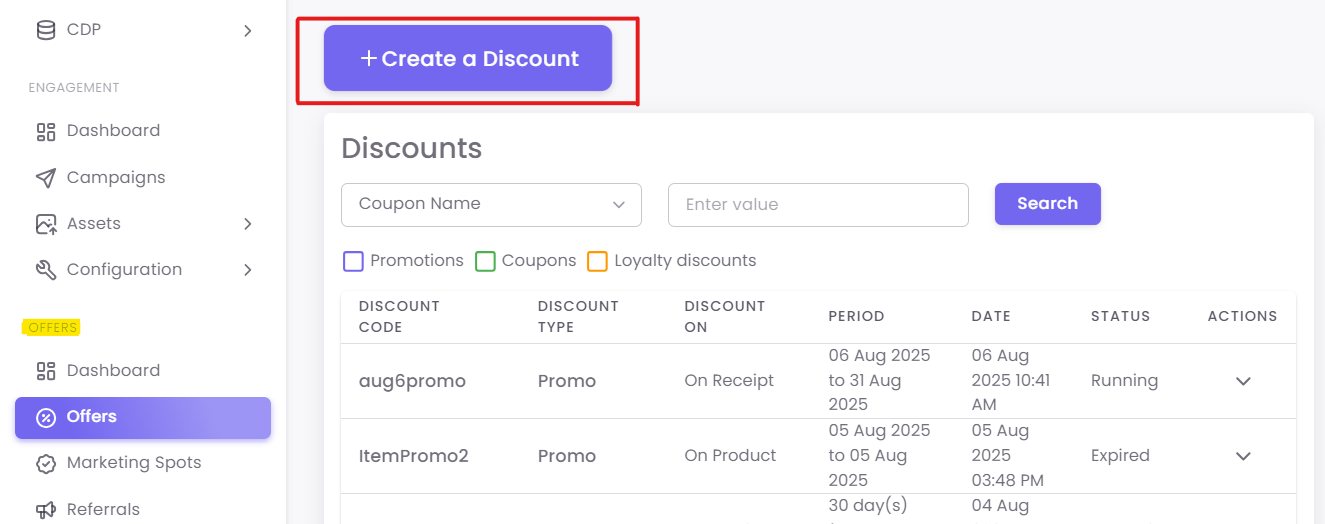
Step 1: Navigate to Discounts
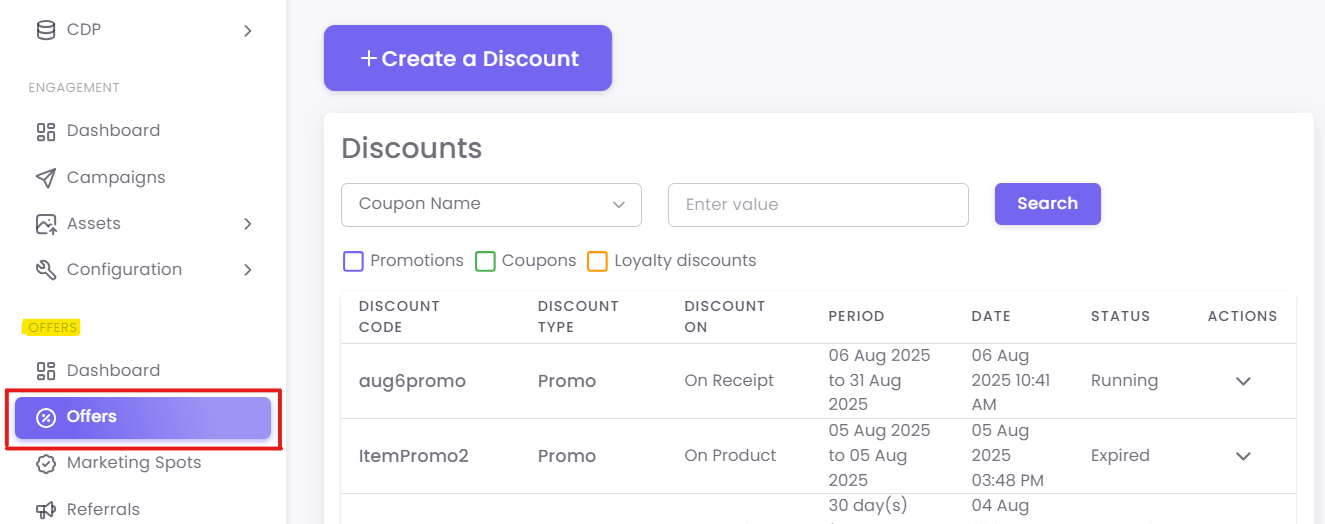
Click the +Create a Discount button and select Coupon.
Step 2: Enter Coupon Details
-
-
Coupon Code Name: An internal name for your reference (e.g., "Summer2024-15%Off").
-
Discount Amount/Percentage: Define the value, such as a fixed
$10off or15%off. -
Minimum Receipt Amount: (Optional) Set a minimum purchase value, like
$50, required to redeem the coupon. -
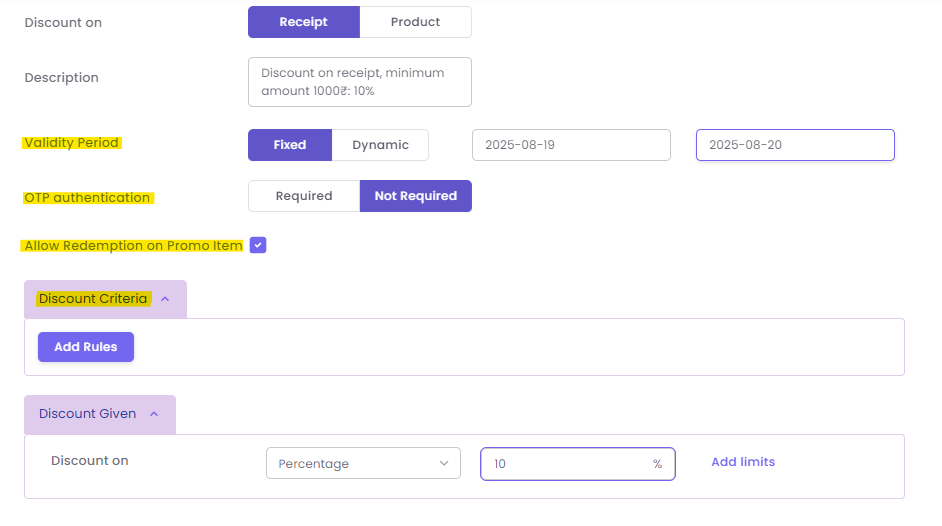
Validity Period: Set the start and end dates for the coupon.
-
OTP Authentication: (Optional) Check this box if you require a one-time password at the POS for redemption, adding a layer of security.
-
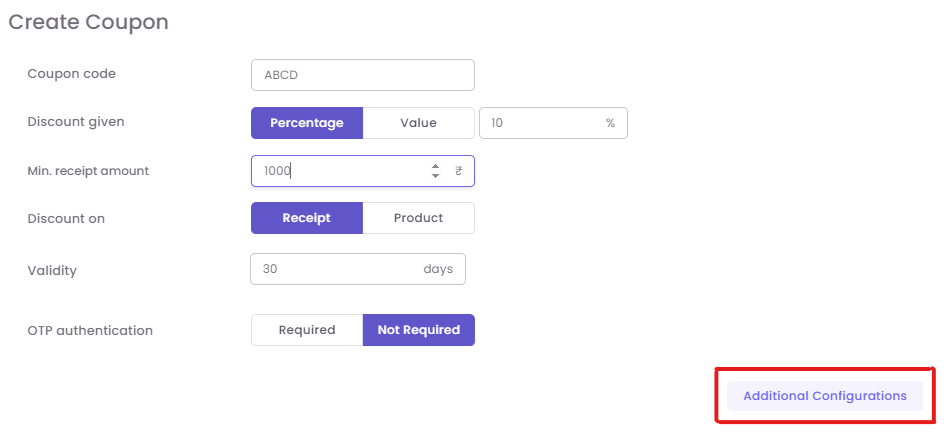
Add additional configurations. These can include fixed or dynamic validity, redemption on a promo item, OTP authentication,or rules of Discount Criteria.
-
Add additional configurations. These can include fixed validity, redemption on a promo item, or OTP authentication.
-
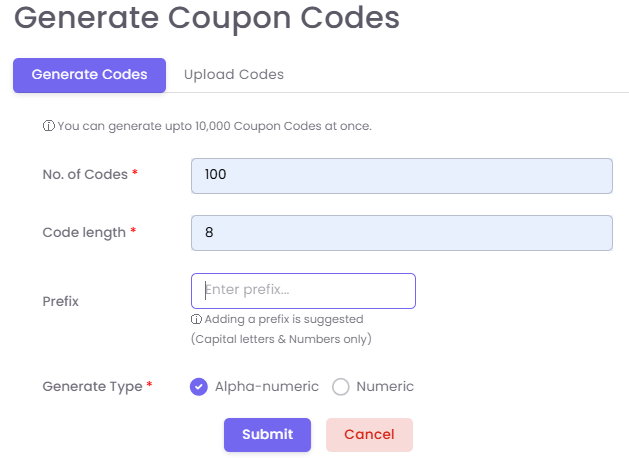
Generate coupon codes

After the coupon is created, click on "Actions" and then "Generate Codes".
-
Add the required details for the codes, such as the number of codes, code length, and generate type (e.g., Alpha-numeric or Numeric).
-
You can generate up to 10,000 coupon codes at once.
-
You also have the option to "Upload Codes". If you choose to upload codes, your Excel/CSV file should have one column with the coupon code.
-
If the coupon needs to be assigned, the uploaded file must have "Coupon Code" and either "email" or "Mobile Number" columns.
-
Click "Submit" to complete the process.
Once the codes are generated, they can be issued via campaigns and tagged to specific customers to avoid fraud. The option to quickly issue a coupon to a specific customer is available in the "Quick Coupon" section in Customer 360.