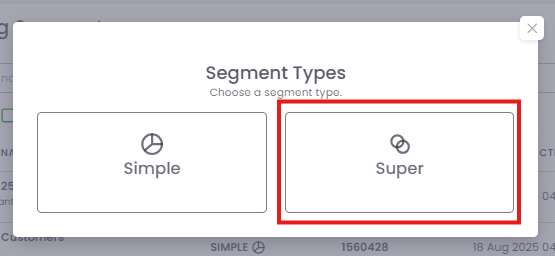
Creating a Super Segment
Step 1: Choose the Super Segment Type
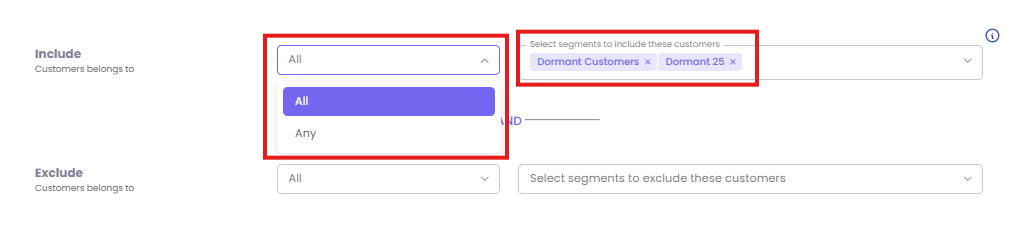
Step 2: Define Your Inclusion Rules
This step creates your starting audience.
-
Select Logic: Choose Any or All from the first dropdown.
-
Select Segments: In the search box, select the Simple Segments you want to include. You can add one or more.
-
Example (ANY): To combine all customers from "Dormant 25" and "Dormant Customers" into one large group, you would select Any and add both segments.
-
Example (ALL): To find only the customers who are in both the "Dormant 25" and "Dormant Customers" segments, you would select All and add both segments.
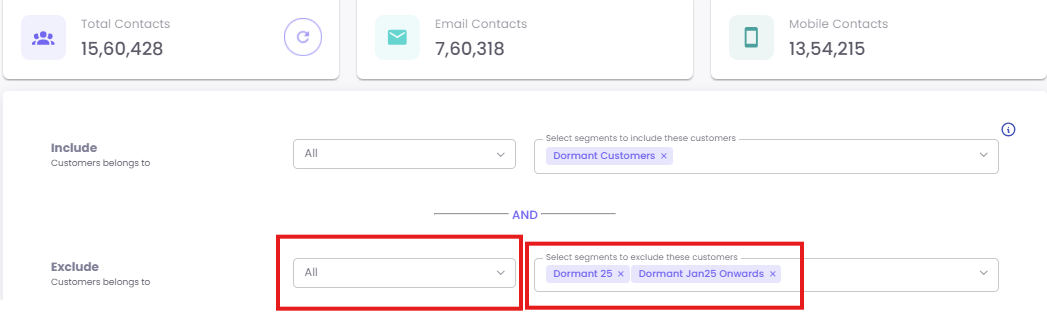
Step 3: Define Your Exclusion Rules (Optional)
This step refines your audience by removing unwanted customers. The process is the same as the Include step but will subtract from the group you just created.
-
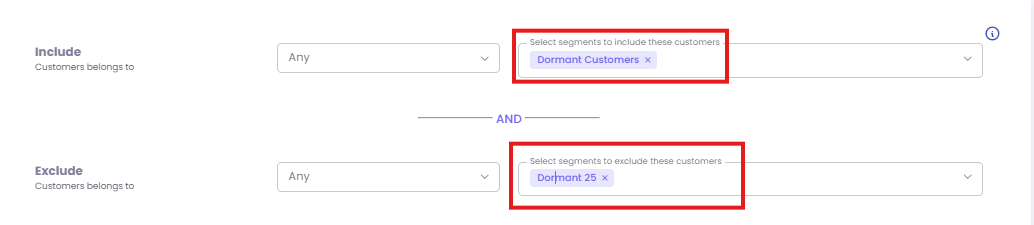
Example: To start with the "Dormant Customers" segment but remove anyone who is also in the "Dormant 25" segment, you would set your rules as follows:
-
Include Any of "Dormant Customers"
-
Exclude Any of "Dormant 25"
Step 4: Name, Refresh, and Save
-
Name Your Segment: Give your Super Segment a clear, descriptive name that explains its logic (e.g., "High-Value Customers - Excl. Recent Shoppers").
-
Refresh: Click the Refresh button (circular arrow) to calculate the final number of contacts in your new segment.
-
Save: Once you are satisfied with the count, click Save.