Step-by-Step Setup Guide
-
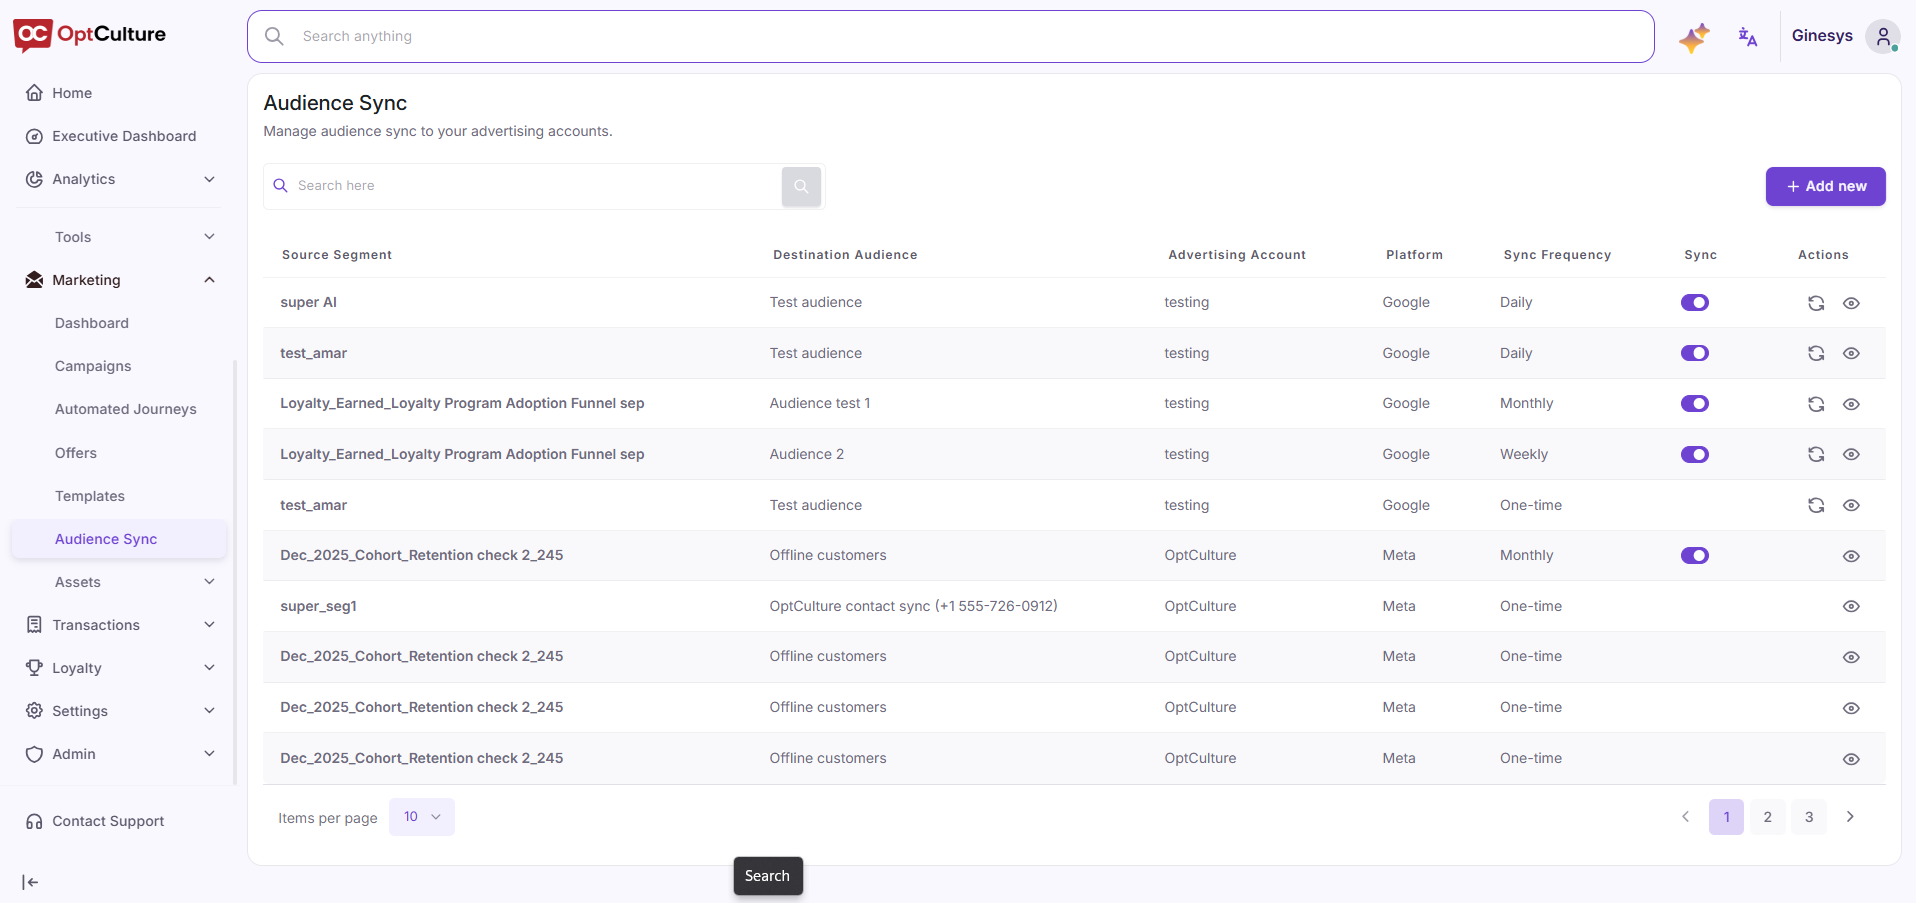
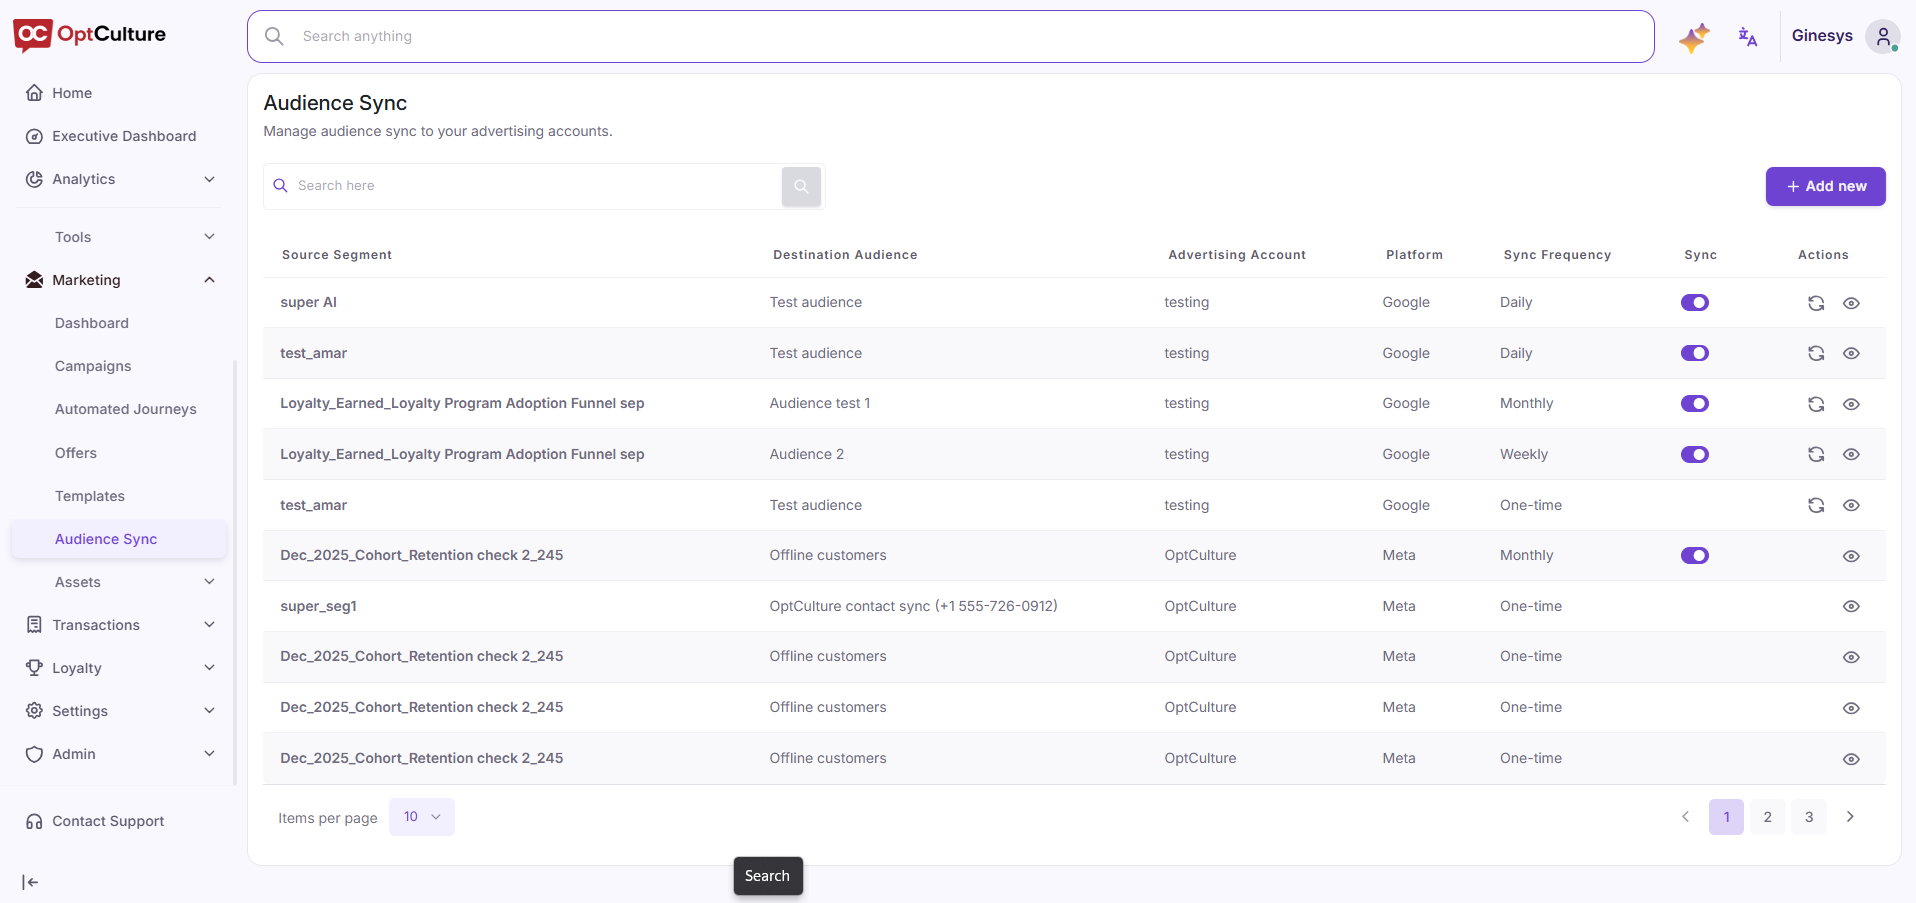
TheStepmain1: Access the Audience Sync Dashboard Navigate to Marketing > Audience Sync in the left sidebar menu. Click the purple + Add new button in the top right corner of the dashboard.
displaysall
-
theirStep
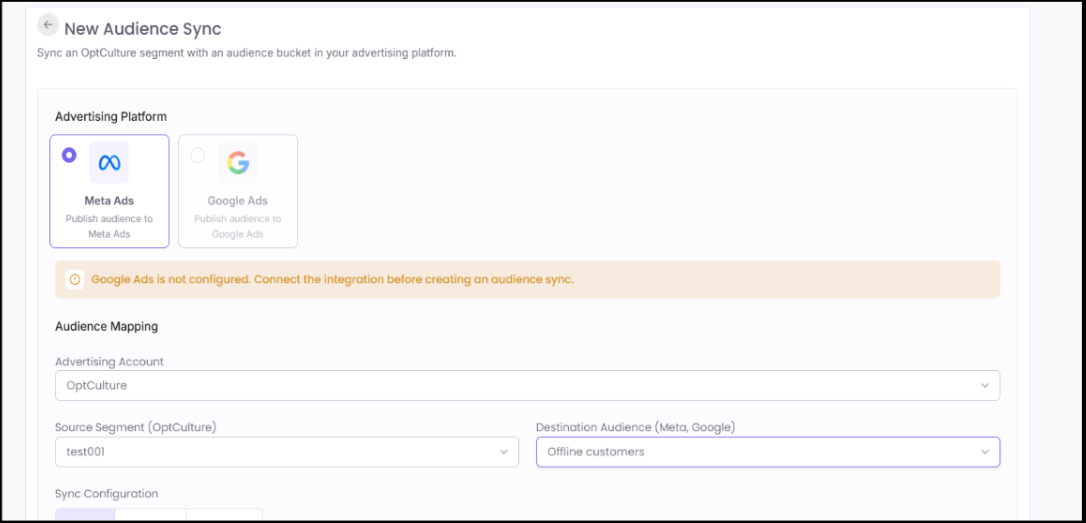
status2: Select Advertising Platform & Account Choose your target platform by selecting either the Meta Ads or Google Ads card. Under Audience Mapping, select your target Advertising Account from the dropdown menu.
-
GoStep 3: Map Source Segment to Destination Audience Select your OptCulture customer segment from theMarketingSource>Segment (OptCulture) dropdown. Next, pick your target custom audience from the Destination AudienceSync(Meta, Google) dropdown.
-
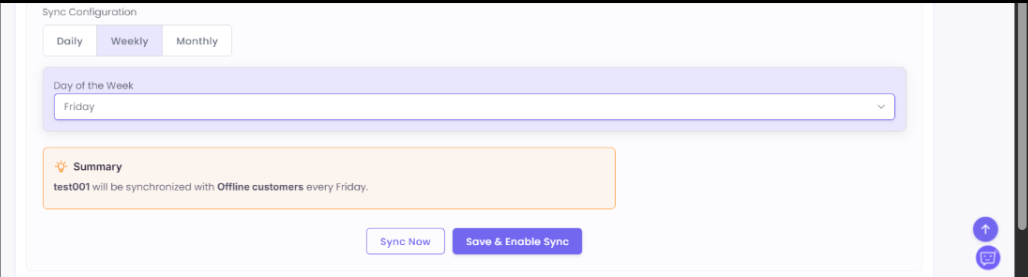
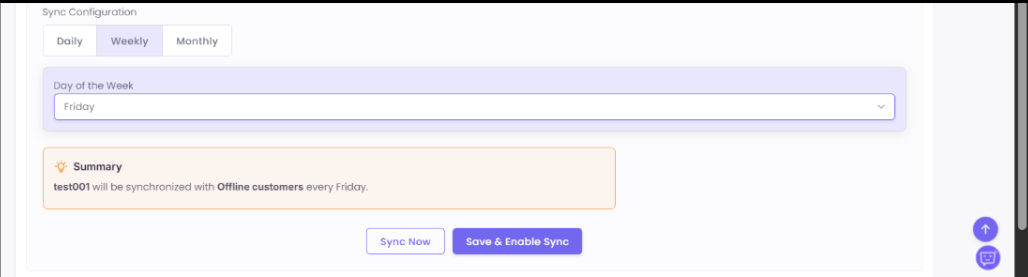
UseStepthe4:dashboardConfiguretoSyncmonitorSchedulemappings,&trackActivatefrequencies,SelectandyourturnpreferredsyncsscheduleonunderorSyncoffConfiguration:-
Daily: Synchronizes audience data automatically every 24 hours.
-
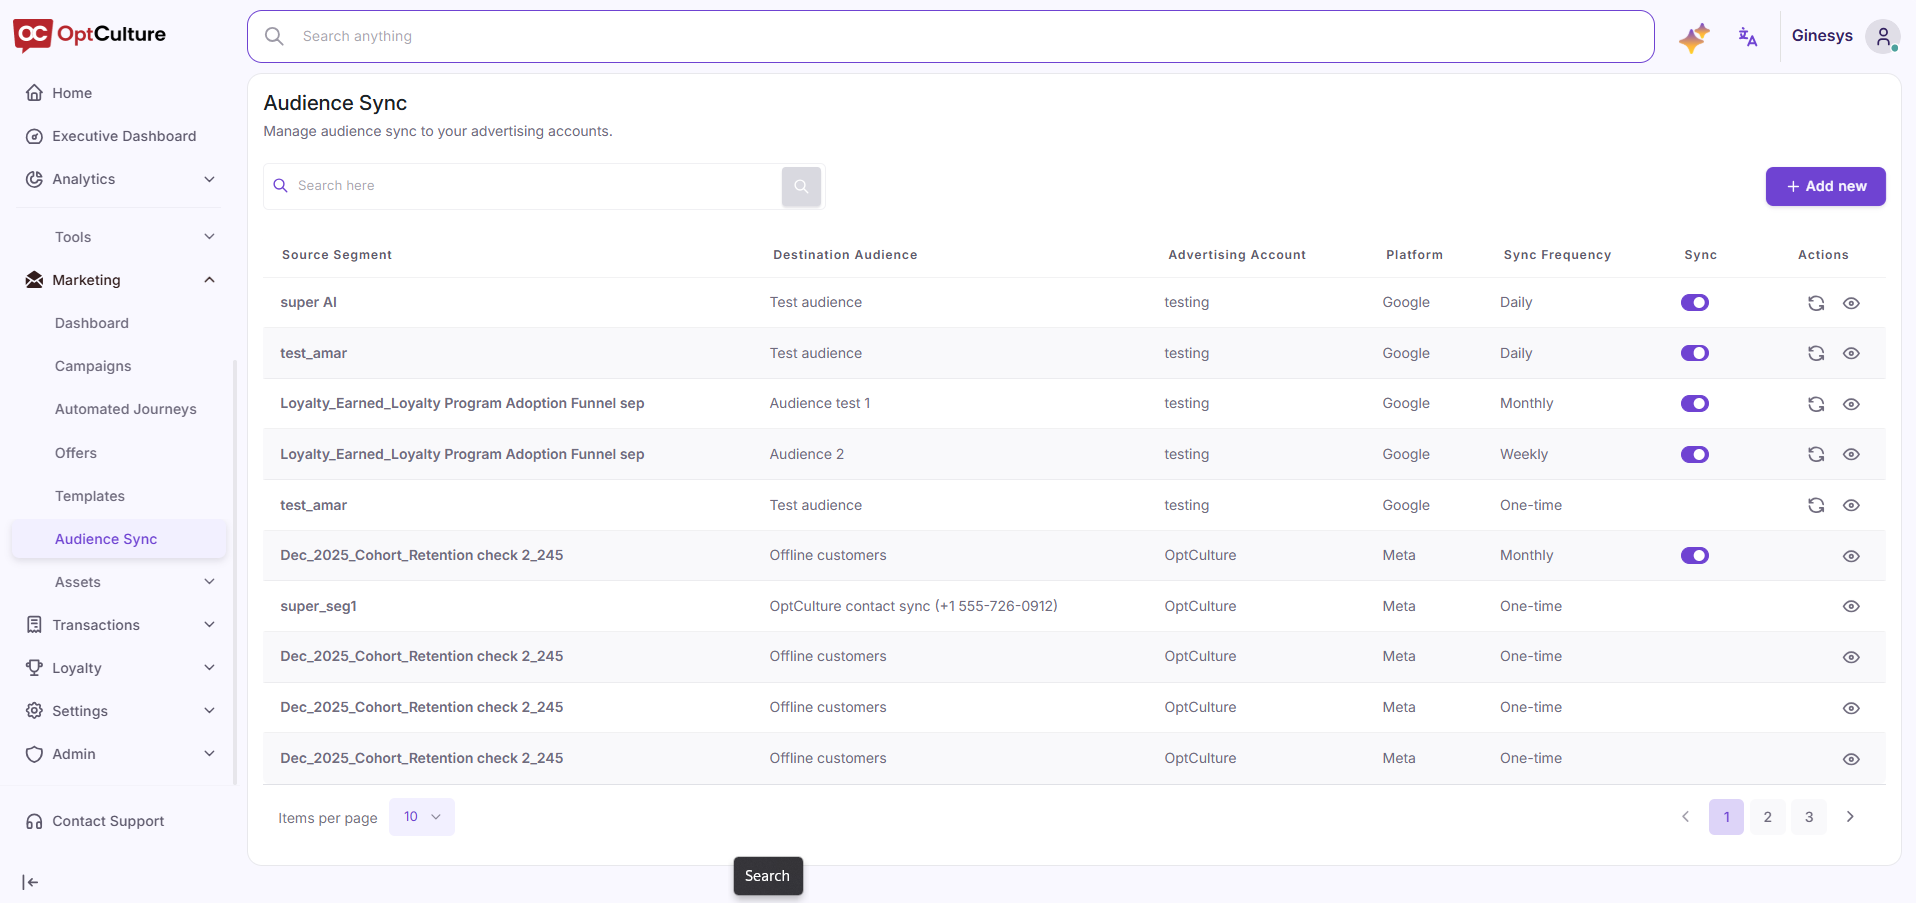
Dashboard ColumnsSource Segment:Weekly:ThePickOptCulturethesegmenttargetbeingdaysynchronizedof the week (e.g., Friday) from the dropdown menu.-
Destination Audience:Monthly:TheSelectmappedthecustomspecificaudiencedayinofyourtheadmonthaccountfor execution.
-
AdvertisingStepAccount:5: Confirm and Save Sync RuleTheReviewtargetedtheadautomatedaccountruleID/namesummary inside the Summary callout box. Click Platform:Save & Enable SyncMetato turn on recurring automated updates, orGoogleclick Sync Now to perform an immediate manual sync.
Sync Frequency:Daily, Weekly, Monthly, or One-time.Sync Toggle:Enable to allow automated updates, or disable to pause updates while retaining your settings.Actions:View detailed history logs or trigger immediate manual updates.
-