
New Page
Customer 360 View
The Customer 360 (C360) View consolidates all individual customer data and interactions into a single, comprehensive dashboard. It provides a deep understanding of each customer, enabling your teams to deliver personalized service, make informed marketing decisions, and resolve issues efficiently.
Part 1: Finding and Accessing a Customer Profile
Step 1: Search for a Customer

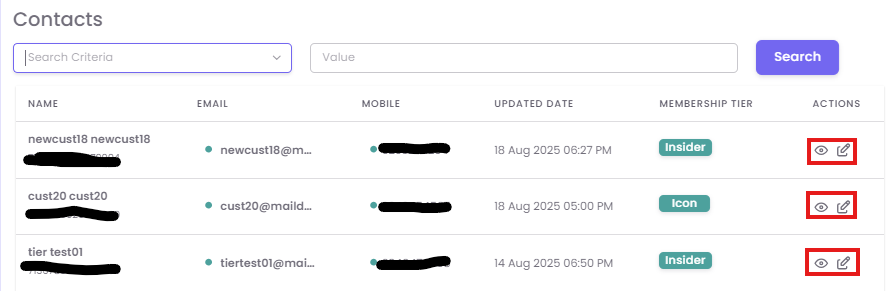
Step 2: Open the C360 View
From the list of contacts, locate the customer you wish to view. In the Actions column on the far right, click the View (eye) icon to open their detailed C360 profile.
Part 2: Understanding the C360 Dashboard
The C360 View is organized into several key sections to give you a complete picture of the customer at a glance.
-
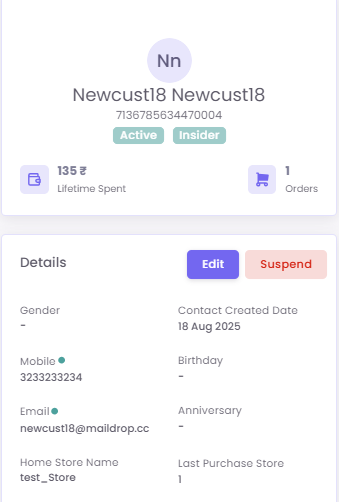
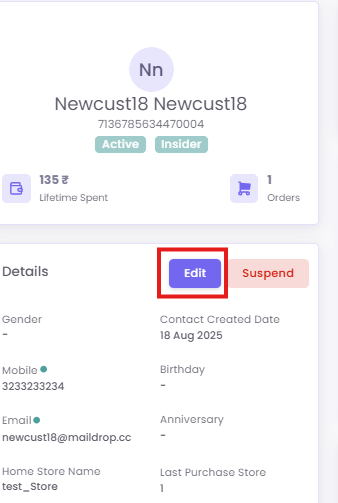
A. Profile Summary:
Provides the Customer Information. You can also see their total Lifetime Spent and number of Orders.Orders.
-
B. Key Metrics:
This section provides quick insights into spending habits and Last NPS Rating,Rating, if available.

-
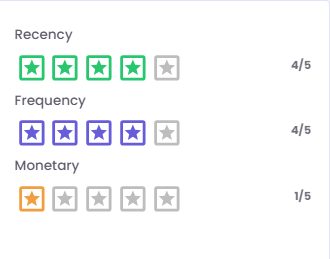
C. RFM Analysis:
This panel rates the customer on a 5-star scale for Recency (how recently they visited), Frequency (how often they visit), and Monetary (how much they spend), providing a quick assessment of their engagement level.
-
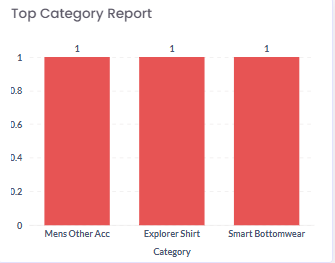
D. Top Category Report:
This chart visualizes the product categories the customer purchases from most often, offering valuable insight into their preferences.
Part 3: Managing Customer Information and Status
A. Editing Personal Details
You can easily update a customer's information directly from their profile.
-
In the Details section, click the Edit button.
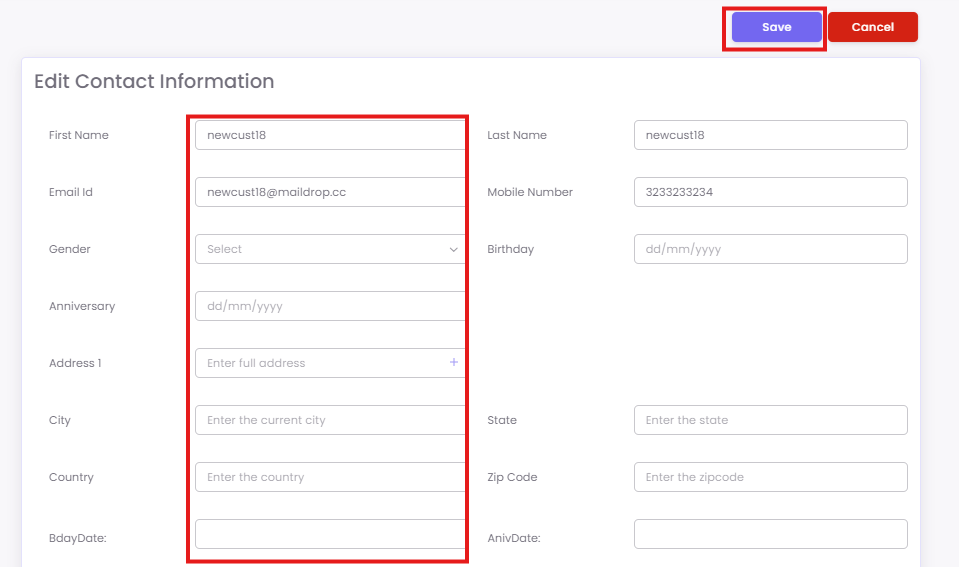
-
The Edit Contact Information screen will appear, allowing you to modify the customer information. After making your changes, click
Save.Save.
B. Suspending a Contact
If necessary, you can suspend a customer's account by clicking the
This will remove customer from the Loyalty Program.
Part 4: Interacting with Loyalty, Coupons, and Timeline
A. Loyalty Panel:
This section shows a complete overview of the customer's loyalty status.
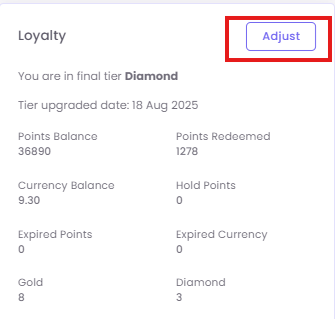
-
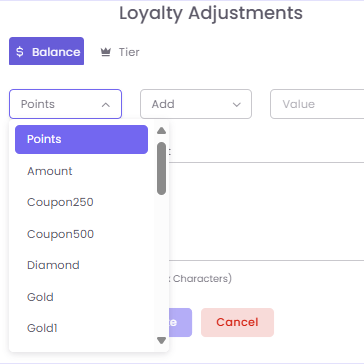
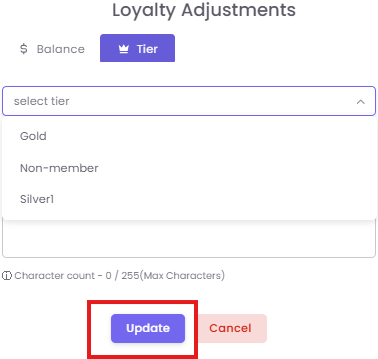
Loyalty Adjustments: Click the Adjust button to modify a customer's loyalty account. A pop-up will allow you to adjust. Click Update to save the changes.
B. Coupons Panel:
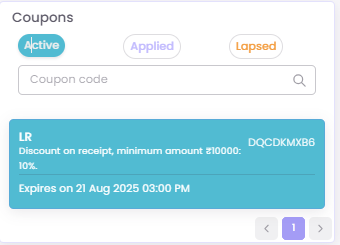
View all coupons associated with the customer, organized into Active, Applied, and Lapsed tabs.
-
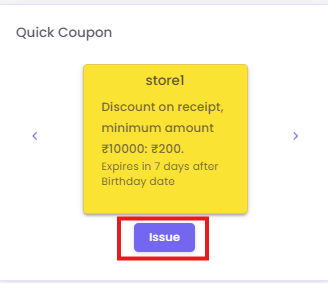
Quick Coupon Issuance: Manually assign a pre-existing coupon directly to the customer via Quick Coupon and click
Issue.Issue.
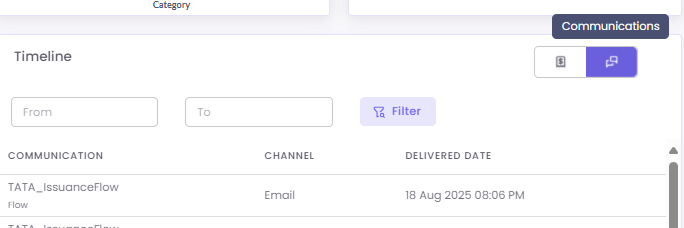
C. Customer Timeline:
This provides a chronological log of every interaction, including Enrollment and Purchase events.
-
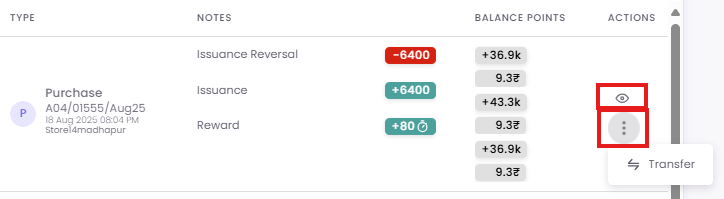
You can view the details of a specific purchase by clicking the eye icon in the Actions column.
-
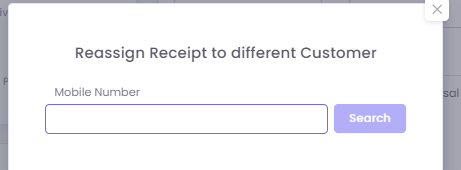
You can Transfer the specific purchase by clicking on 3 dots in the Actions column.
-
You can also view a log of all past marketing Communications sent to the customer by clicking the message icon.
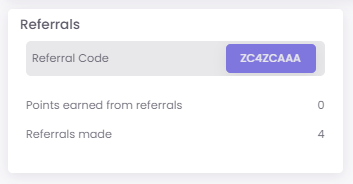
D. Referrals Panel:
Track the customer's participation in your referral program, including their unique Referral Code, Points earned from referrals, and the total number of Referrals made.
Best Practices
-
Review Before Engaging: Before a customer service call or in-store interaction, take a moment to review the customer's C360 profile to understand their history and value.
-
Maintain Data Accuracy: Use the Edit function to keep customer contact information up to date, which is crucial for campaign deliverability and service quality.
-
Empower Your Team: Use the Adjust and Quick Coupon features to empower managers to resolve customer issues on the spot or to reward positive behaviour.
Common Use Cases
-
Customer Service Inquiry: A support agent uses the C360 timeline to see a customer's recent purchase and quickly resolve a question about their loyalty points.
-
In-Store Personalization: A store manager looks up a VIP customer by name, sees their "Top Category Report," and offers a personalized recommendation.
-
Manual Reward: A manager uses the Quick Coupon feature to issue a special discount to a customer who provided valuable feedback.
Troubleshooting & FAQs
Q: Why is the "Top Category Report" empty?
A: This can occur if the customer is new and has not made enough purchases to establish a trend. It may also take some time for data from very recent purchases to be processed and reflected in the chart.
Q: What is the difference between "Adjust" in the Loyalty panel and "Issue" in the Quick Coupon panel?
A: Adjust is used for making direct changes to a customer's loyalty account, such as adding goodwill points or manually changing their tier. Issue is for assigning a specific, pre-configured promotional coupon to the customer.
Q: I edited a customer's mobile number. Will this update be reflected in my Segments?
A: Yes. The C360 View is the master record for a customer's profile. Any changes saved here are updated across the OptCulture platform and will be reflected in any dynamic Segments the customer qualifies for.
Customer 360 View
The Customer 360 (C360) View consolidates all individual customer data and interactions into a single, comprehensive dashboard. It provides a deep understanding of each customer, enabling your teams to deliver personalized service, make informed marketing decisions, and resolve issues efficiently.
Part 1: Finding and Accessing a Customer Profile
Step 1: Search for a Customer
Step 2: Open the C360 View
From the list of contacts, locate the customer you wish to view. In the Actions column on the far right, click the View (eye) icon to open their detailed C360 profile.
Part 2: Understanding the C360 Dashboard
The C360 View is organized into several key sections to give you a complete picture of the customer at a glance.
A. Profile Summary:
Provides the Customer Information.You can also see their total Lifetime Spent and number of Orders.
B. Key Metrics:
This section provides quick insights into spending habits and Last NPS Rating, if available.
C. RFM Analysis:
This panel rates the customer on a 5-star scale for Recency (how recently they visited), Frequency (how often they visit), and Monetary (how much they spend), providing a quick assessment of their engagement level.
D. Top Category Report:
This chart visualizes the product categories the customer purchases from most often, offering valuable insight into their preferences.
Part 3: Managing Customer Information and Status
A. Editing Personal Details
You can easily update a customer's information directly from their profile.
In the Details section, click the Edit button.
The Edit Contact Information screen will appear, allowing you to modify the customer information. After making your changes, click Save.
B. Suspending a Contact
If necessary, you can suspend a customer's account by clicking the
This will remove customer from the Loyalty Program.
Part 4: Interacting with Loyalty, Coupons, and Timeline
A. Loyalty Panel: This section shows a complete overview of the customer's loyalty status.
Loyalty Adjustments: Click the Adjust button to modify a customer's loyalty account. A pop-up will allow you to adjust. Click Update to save the changes.
B. Coupons Panel: View all coupons associated with the customer, organized into Active, Applied, and Lapsed tabs.
Quick Coupon Issuance: Manually assign a pre-existing coupon directly to the customer via Quick Coupon and click Issue.
C. Customer Timeline:
This provides a chronological log of every interaction, including Enrollment and Purchase events.
You can view the details of a specific purchase by clicking the eye icon in the Actions column.You can Transfer the specific purchase by clicking on 3 dots in the Actions column.
You can also view a log of all past marketing Communications sent to the customer by clicking the message icon.
D. Referrals Panel:
Track the customer's participation in your referral program, including their unique Referral Code, Points earned from referrals, and the total number of Referrals made.
Best Practices
Review Before Engaging: Before a customer service call or in-store interaction, take a moment to review the customer's C360 profile to understand their history and value.Maintain Data Accuracy: Use the Edit function to keep customer contact information up to date, which is crucial for campaign deliverability and service quality.Empower Your Team: Use the Adjust and Quick Coupon features to empower managers to resolve customer issues on the spot or to reward positive behaviour.
Common Use Cases
Customer Service Inquiry: A support agent uses the C360 timeline to see a customer's recent purchase and quickly resolve a question about their loyalty points.In-Store Personalization: A store manager looks up a VIP customer by name, sees their "Top Category Report," and offers a personalized recommendation.Manual Reward: A manager uses the Quick Coupon feature to issue a special discount to a customer who provided valuable feedback.
Troubleshooting & FAQs
Q: Why is the "Top Category Report" empty?
A: This can occur if the customer is new and has not made enough purchases to establish a trend. It may also take some time for data from very recent purchases to be processed and reflected in the chart.
Q: What is the difference between "Adjust" in the Loyalty panel and "Issue" in the Quick Coupon panel?
A: Adjust is used for making direct changes to a customer's loyalty account, such as adding goodwill points or manually changing their tier. Issue is for assigning a specific, pre-configured promotional coupon to the customer.
Q: I edited a customer's mobile number. Will this update be reflected in my Segments?
A: Yes. The C360 View is the master record for a customer's profile. Any changes saved here are updated across the OptCulture platform and will be reflected in any dynamic Segments the customer qualifies for.