
Creating a New Zone
To
Step1: begin, you will need to navigate to the Zones page from the main menu and click the "Create Zone" button.
Click on Zones under the Configurations section. This will take you to the main Zones management page.
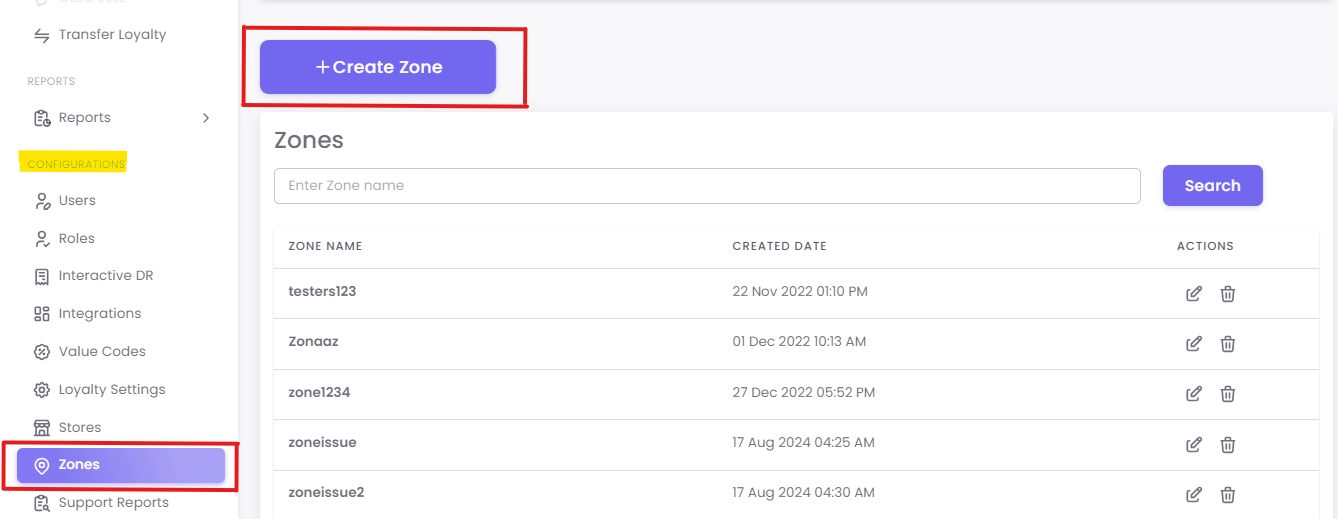
Initiate Zone Creation:Click the +atin thetoptop-right corner of the page.Step
2: Fill in Zone
Details:DetailsA new pop-up window will appear, prompting you to add the details of your new zone.
-
Zone
Name:NameThis is a mandatory field.(Mandatory): Enter a clear and descriptive name for yourzonezone. This is the name you will see in reports and campaign settings. (e.g., "North EastMidwest Region," "WhatsAppReceiptsReceiptZone," "SMS Receipts Zone"Stores"). -
Description:DescriptionThis is an optional field.(Optional): Use this space to add more context or notes about the zone, such as its purpose or the criteria for including stores (e.g., "Stores in this zone use SMS for digitalreceipts"receipts").
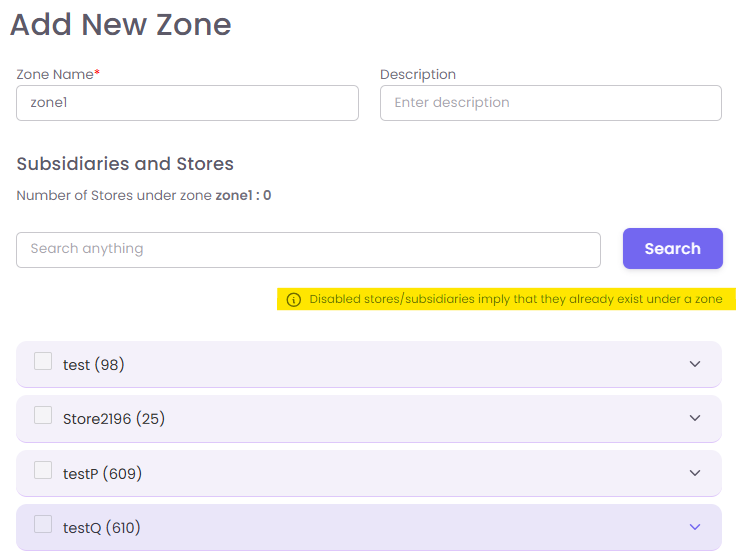
Step 3: Add Stores and Subsidiaries:Subsidiaries
In the same pop-up window, you can add stores and subsidiaries to your new zone.
-
Use the search bar to find stores or subsidiaries by name.
-
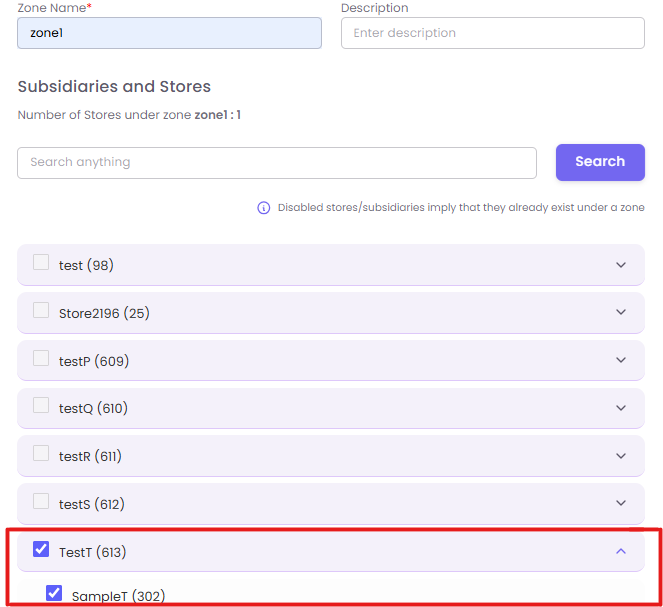
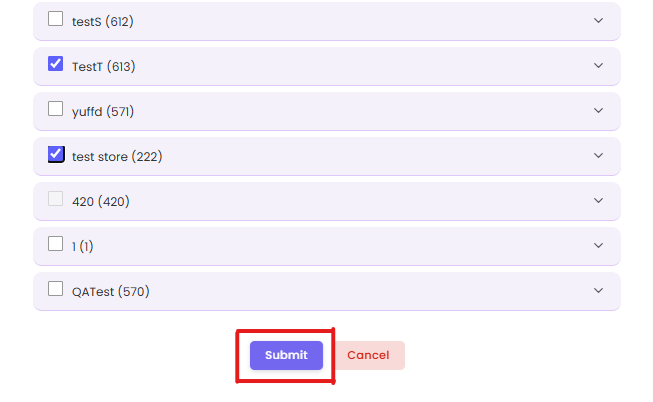
Disabled stores/subsidiaries are grayed out because they are already assigned to another zone. A store can only belong to one zone. Select the stores
and subsidiariesyou want to include by checking the box next to them.-
The "Number of Stores under this zone" counter will update as you make your selections.
- 4: Submit
Step
Submit: Once you have filled in the details and selected all the necessary stores, click the Submit button to create your new zone.
Editing an Existing Zone
You can modify an existing zone by clicking the Edit button associated with it on the main Zones management page. The process is similar to creating a new zone. You can change the name, description, and add or remove stores from the zone. To remove a store, simply deselect it from the list.
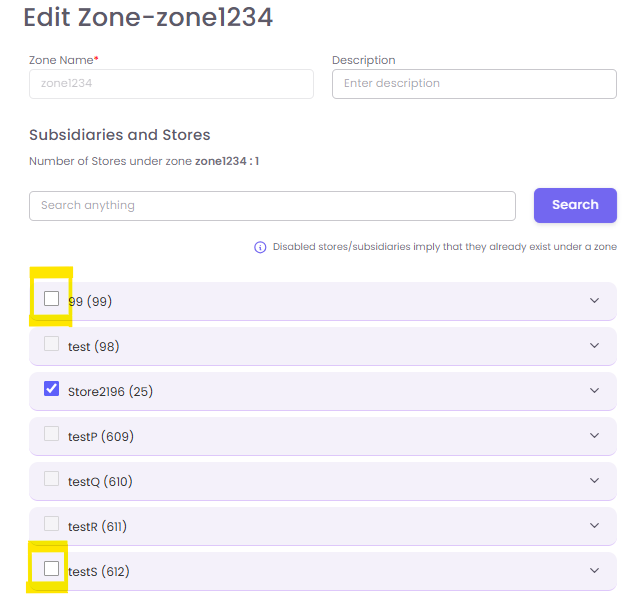
Submit after editing the zone.
Common Scenarios and Q&A
Q: What if I can't find a store I want to add to my zone?
A: If a store isn't appearing in the search results or is grayed out, it's likely already part of an existing zone. A store can only be in one zone at a time. To add it to your new zone, you must first remove it from its current zone.
Q: What's the best practice for naming my zones?
A: Use clear and descriptive names that reflect the purpose or grouping logic of the zone. For example, instead of "Zone 1," use "Midwest Stores," "SMS Receipts Zone," or "Franchise Partners." This makes it easier for you and other users to understand the purpose of each zone at a glance.
Q: Why would I use zones instead of just applying a configuration to all stores?
A: Zones offer more granular control and operational efficiency. For instance, you might need to use SMS for digital receipts in a region where WhatsApp is not widely used, while using WhatsApp in another. Zones allow you to target these specific groups without affecting your other stores. This approach is more efficient and prevents any accidental misconfigurations.