
Creating a New Zone
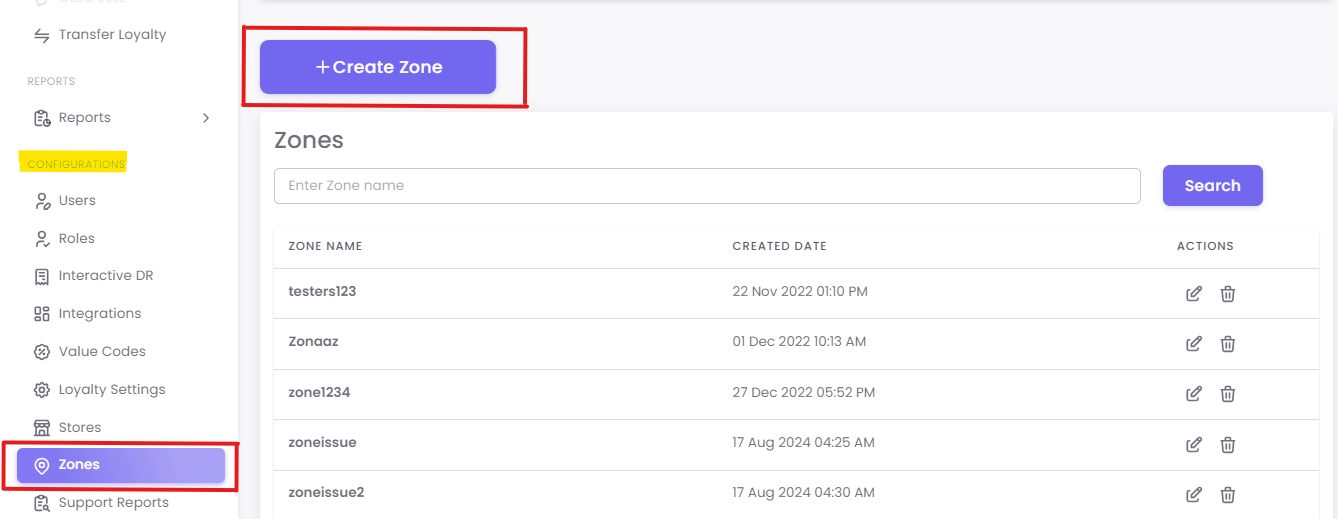
Step1: Navigate to the Zones Page
Click on Zones under the Configurations section. This will take you to the main Zones management page.
Click the +Create Zone button located in the top-right corner of the page.
Step 2: Fill in Zone Details
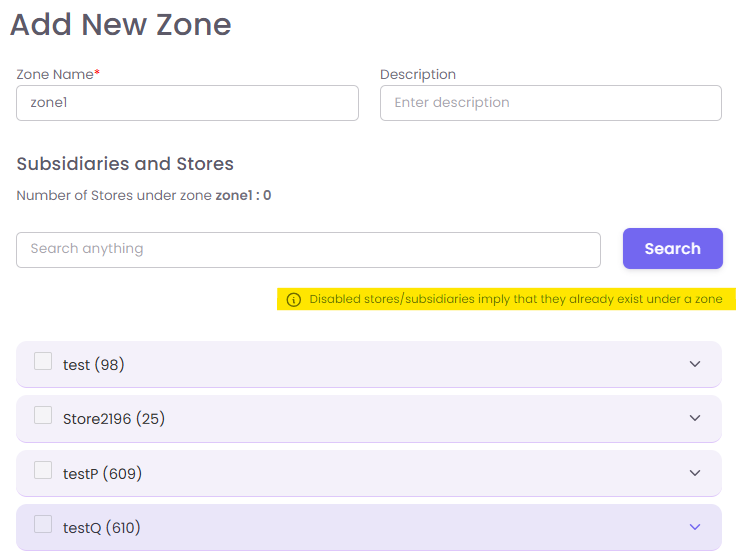
A new pop-up window will appear, prompting you to add the details of your new zone.
-
Zone Name (Mandatory): Enter a clear and descriptive name for your zone. This is the name you will see in reports and campaign settings. (e.g., "Midwest Region," "WhatsApp Receipt Stores").
-
Description (Optional): Use this space to add more context or notes about the zone, such as its purpose or the criteria for including stores (e.g., "Stores in this zone use SMS for digital receipts").
Step 3: Add Stores and Subsidiaries
In the same pop-up window, you can add stores and subsidiaries to your new zone.
-
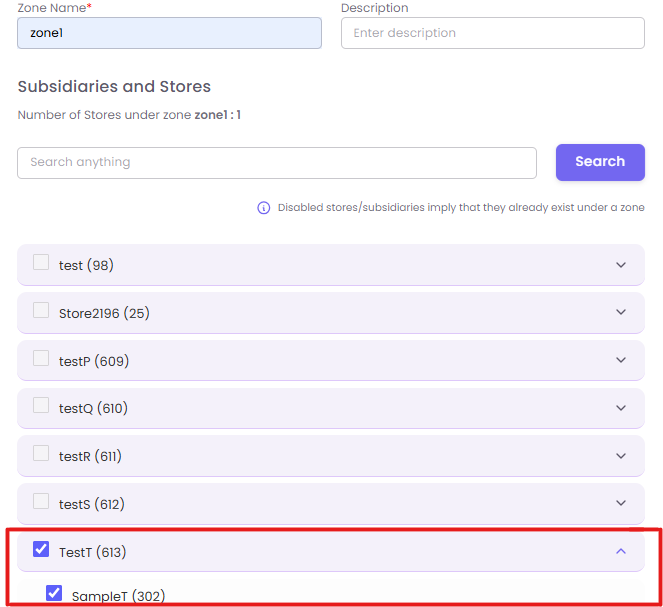
Use the search bar to find stores or subsidiaries by name.
-
Select the stores you want to include by checking the box next to them.
-
The "Number of Stores under this zone" counter will update as you make your selections.
Key Rule: If a store is grayed out or disabled in the list, it means it is already assigned to another zone. You must remove it from its current zone before you can add it to this one (see "How to Edit" below).
Step 4: Submit
Once you have filled in the details and selected all the necessary stores, click the Submit button to create your new zone.