
Creating an E-Receipt Template
Step 1: Navigate to the Template Builder
-
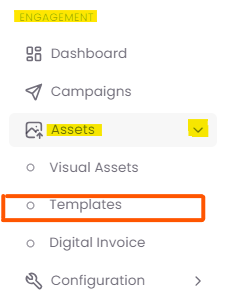
From the main dashboard, hover over the Engagement tab.
-
Click on Assets, and then select Templates.
Step 2: Select the E-Receipt Communication Channel
This is where you specify that you are building a transactional e-receipt.
-
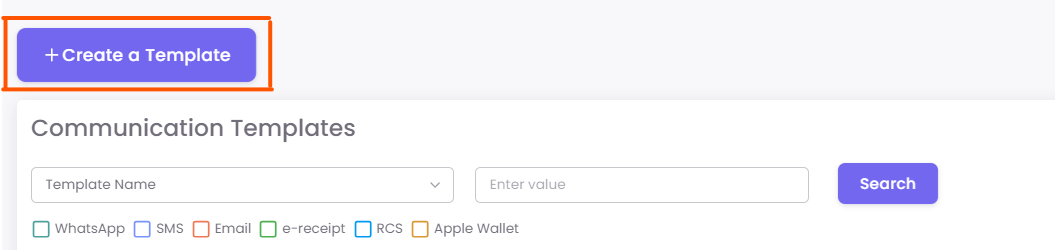
On the "Communication Templates" page, click the + Create a Template button.
-
On the "Mode of Communication" screen, select the Transactional radio button.
-
From the transactional options, choose e-receipt.
Step 3: Design Your E-Receipt with Available Components
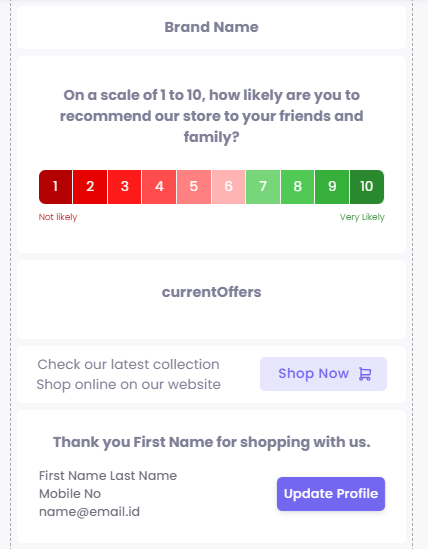
You will now be in the template builder. This is a drag-and-drop interface where you will add and arrange content blocks. The right side of the screen shows a live preview of your e-receipt.
You can drag and drop a variety of components from the "Available Components" list on the left side of the screen onto the e-receipt preview area.
Available Components:
-
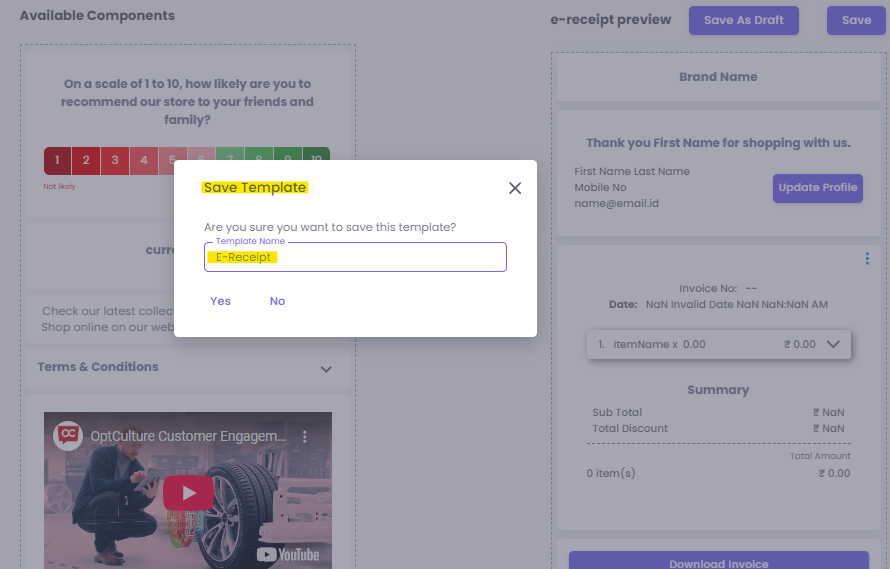
NPS Survey: A "On a scale of 1 to 10..." rating component to gather customer feedback.
-
Current Offers: A section to display your latest promotions.
-
Check our latest collection: A component with a "Shop Now" button that links to your website.
-
Customer Profile: Displays the customer's name and contact information, with an "Update Profile" button.
-
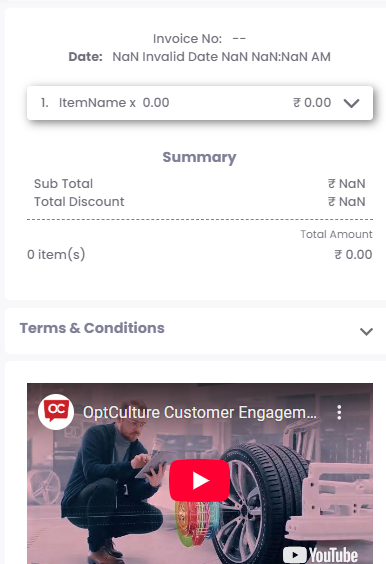
Invoice Section: A dynamic block that automatically populates with invoice details like item name, subtotal, and total amount.
-
Terms & Conditions: A collapsible section for legal and store policies.
-
Video Component: Embed a promotional video from platforms like YouTube.
-
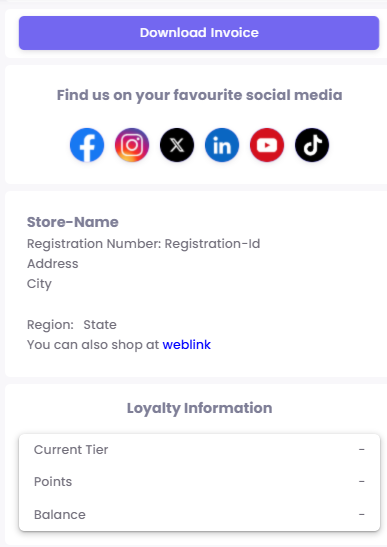
Social Media Links: Icons for Facebook, Instagram, X (Twitter), LinkedIn, YouTube, and TikTok.
-
Store Information: Displays the store's name, registration ID, address, and city.
-
Loyalty Information: Shows the customer's loyalty tier, points, and balance.
-
Contact Us: Displays store contact number and email.
-
Review Us: A component with a direct link to your Google reviews.

Step 4: Save and Manage Your Template
After you have arranged and customized all the desired components, you need to save the template.
-
Click on the Save button in the top right corner of the screen.
-
A dialog box will appear asking you to name your template. Provide a clear and descriptive name (e.g., "Post-Purchase E-Receipt - Main Template").
-
Click Save to finalize your template.
Your new template will now appear on the "Communication Templates" list, ready to be configured and used.