
Creating a WhatsApp Campaign
Step 1: Navigate to Campaigns
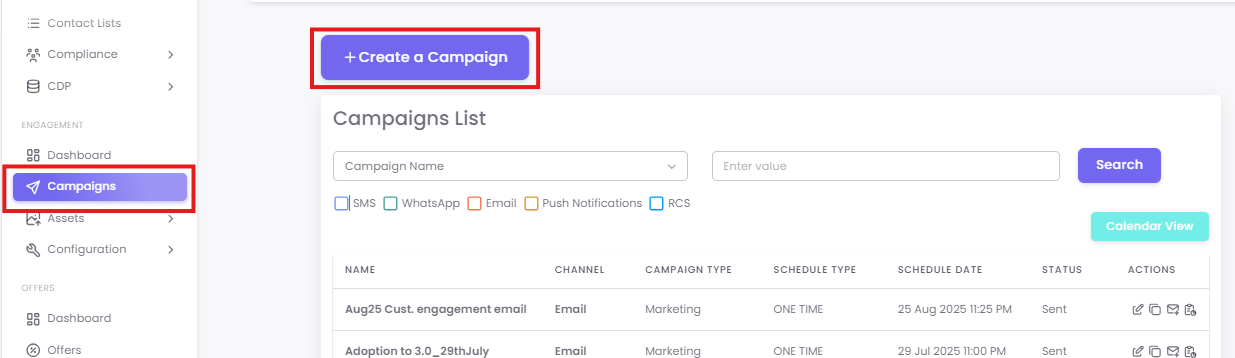
From the main dashboard, select Campaigns from the left-hand navigation menu and click the +Create a Campaign button.
From the "Mode of Communication" options, select WhatsApp to begin.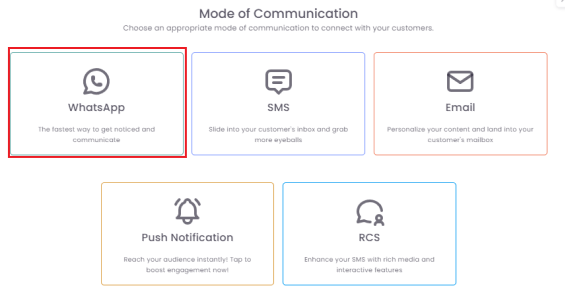
Step 2: Fill out Campaign Details
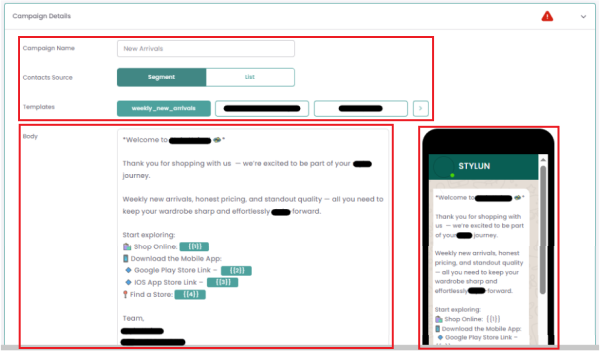
In the Campaign Details section, fill in the required information
- Campaign Name: Give your campaign a unique, descriptive name for internal reference.
-
Contact Source: Select the source of your contacts.
-
Campaign Category: Choose a suitable category for your campaign.
-
Message Template: Select a pre-approved message template. Once selected, the content will automatically populate the "Body" field, and a preview will be visible.
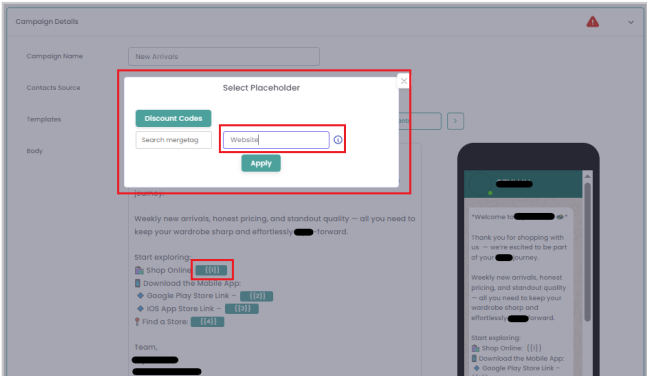
Step 3: Personalize Your Message
If your template body includes merge tags, simply click on them. A "Select Placeholder" pop-up will appear, allowing you to add the correct personalization details.
Step 4: Test and Save Section
Use the Send Test feature to send a test message to yourself. This is crucial for verifying content, personalization, and links. Once satisfied, click Next to save the section.
![]()
Step 5: Select Your Segment
Choose an existing segment of contacts or create a new one using the +Create Segment button. This defines the specific group of contacts who will receive your message. After making your selection, click Next.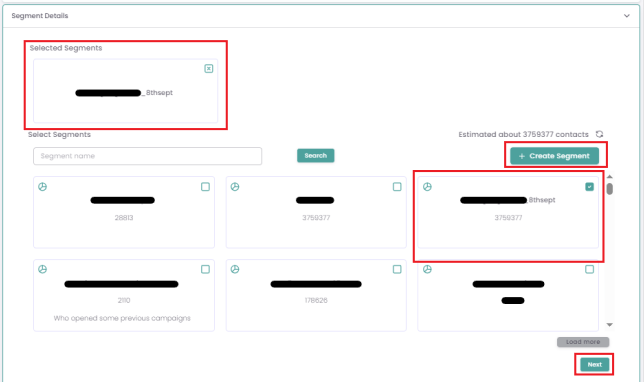
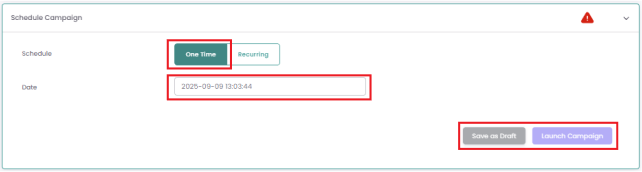
Step 6: Schedule Your Campaign
In the Schedule Campaign section, choose your schedule type:
-
One Time: Sends the campaign to all contacts at a fixed date and time. This is the default option.
-
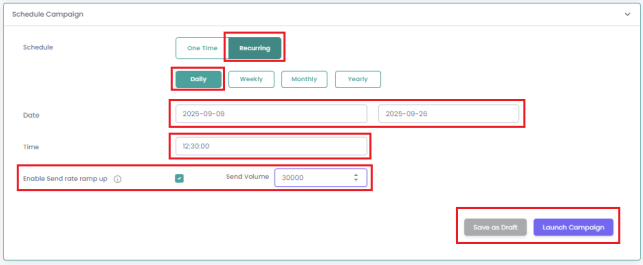
Recurring: Sends the campaign on a daily, weekly, monthly, or yearly basis
-
Rate Ramp Up: This feature allows you to set a maximum number of unique customers to be targeted each time the campaign is sent. The system will automatically exclude contacts reached in previous sends, ensuring each contact is reached only once as the campaign recurs.
-
Step 7: Launch or Save
Once your schedule is set, you can either:
-
-
Click Save as Draft to return to it later,
-
Click Launch Campaign to save the campaign and schedule it for delivery at the chosen time,
-
Note: Once you've chosen your schedule, you can either click Save as Draft or Launch Campaign. Clicking Launch Campaign saves the campaign and sends it at the scheduled time.