
Creating an RCS Campaign
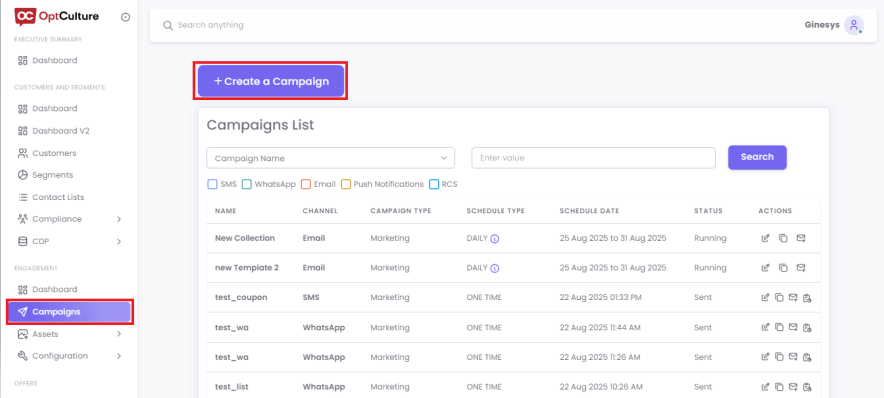
Step 1: Navigate to Campaigns
From the main dashboard, navigate to Campaigns on the left-hand menu. Click the + Create a Campaign button.
From the "Mode of Communication" options, select Push Notification.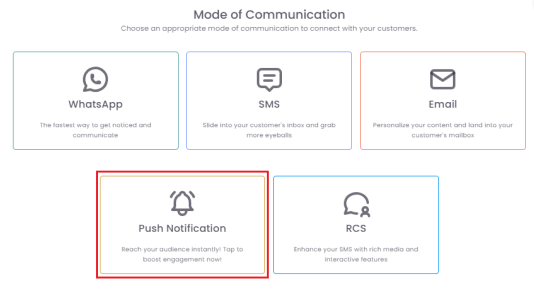
Step 2: Define Content Details
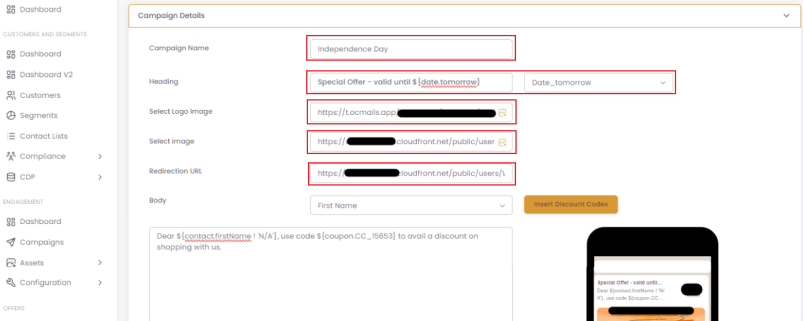
On the campaign setup screen, you will first define the core components of your notification:
-
Campaign Name: Enter an internal name for your reference (e.g., "Q4 Flash Sale - Push").
-
Heading: This is the bold title of your notification. You can also insert merge tags to personalize it.
-
Images: Choose an image to include in your notification.
-
Redirection URL: Enter the web page (URL) where you want to send users when they click the notification.
Step 3: Compose Your Message
Next, you will write the main content of your notification.
-
Compose Body: Directly create the content of your campaign in the Body field.
-
Note: The push notification feature does not support saved templates.
-
-
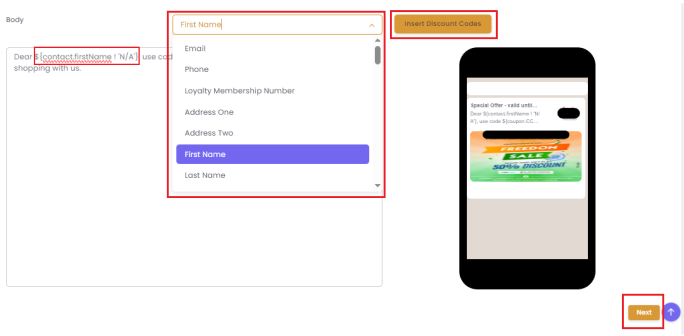
Add Personalization: To add merge tags (like a customer's name) or dynamic discount codes, click on the Add Merge Tags and Insert Discount Codes fields and select from the available options.
-
Preview: A live preview of your notification will be visible on the right side of the screen as you type.
-
Once you are satisfied, click Next to save the section.

Step 4: Define Your Audience
In the Segment Details section, choose who will receive your notification. You can select a pre-existing segment or click + Create Segment to build a new one. Click Next to proceed.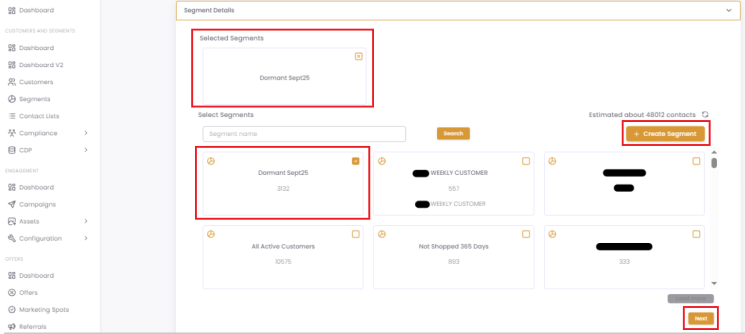
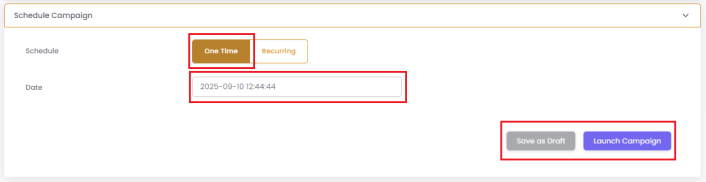
Step 5: Schedule Your Campaign
You have two options for scheduling your push notification:
-
One-time: The campaign will be sent once at the specific date and time you set.
-
Recurring: The campaign can be sent repeatedly (e.g., daily, weekly, monthly).
-
Ramp up: This advanced recurring feature helps you divide your segment into smaller batches ("Send Volume") and send the campaign to one batch at a time. For example, for a 10,000-contact segment, you could set a daily schedule with a "Send Volume" of 2,000 for 5 days. The system will send to 2,000 unique contacts each day until all 10,000 are covered.
-
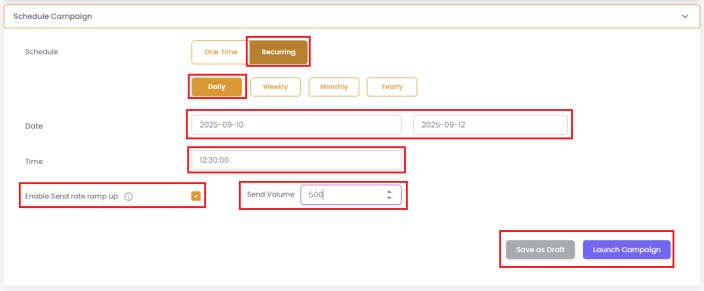
Step 6: Launch or Save as Draft
After setting your schedule, you have two final options:
-
Save as Draft: Saves your progress to finish later.
-
Launch Campaign: This saves the campaign and schedules it to be sent at your chosen time.
Click Next to save the section.