
Creating a Standard Email Campaign
Step 1: Navigate to Campaigns
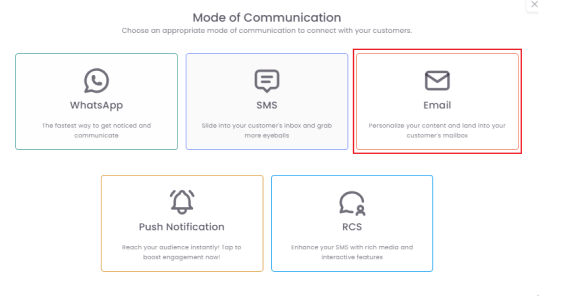
From the main dashboard, select Campaigns from the left-hand navigation menu and click the +Create a Campaign button and select Email.

Step 2: Select Campaign Type
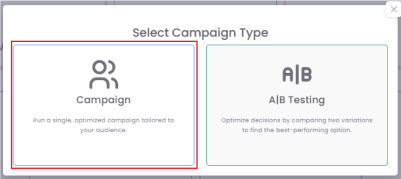
You will be prompted to select the campaign type. For a standard email, choose Campaign.
Step 3: Define Campaign Details
-
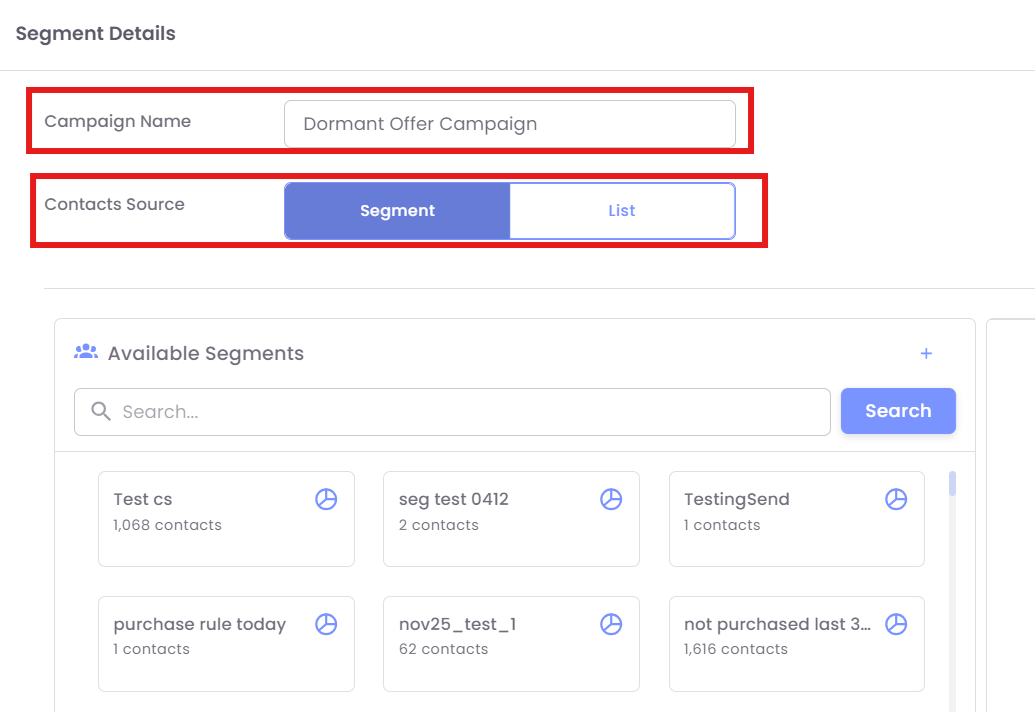
Campaign Name: Enter a clear, internal name for your campaign (e.g., "Dormant Offer Campaign - Q4 2025"). This is for your reference only.
-
Contacts Source: Select how you want to define your target audience. In this example, select Segment or List
Step 4: Select Target Audience (Segments)
You must select the customer segments you wish to target for this campaign.
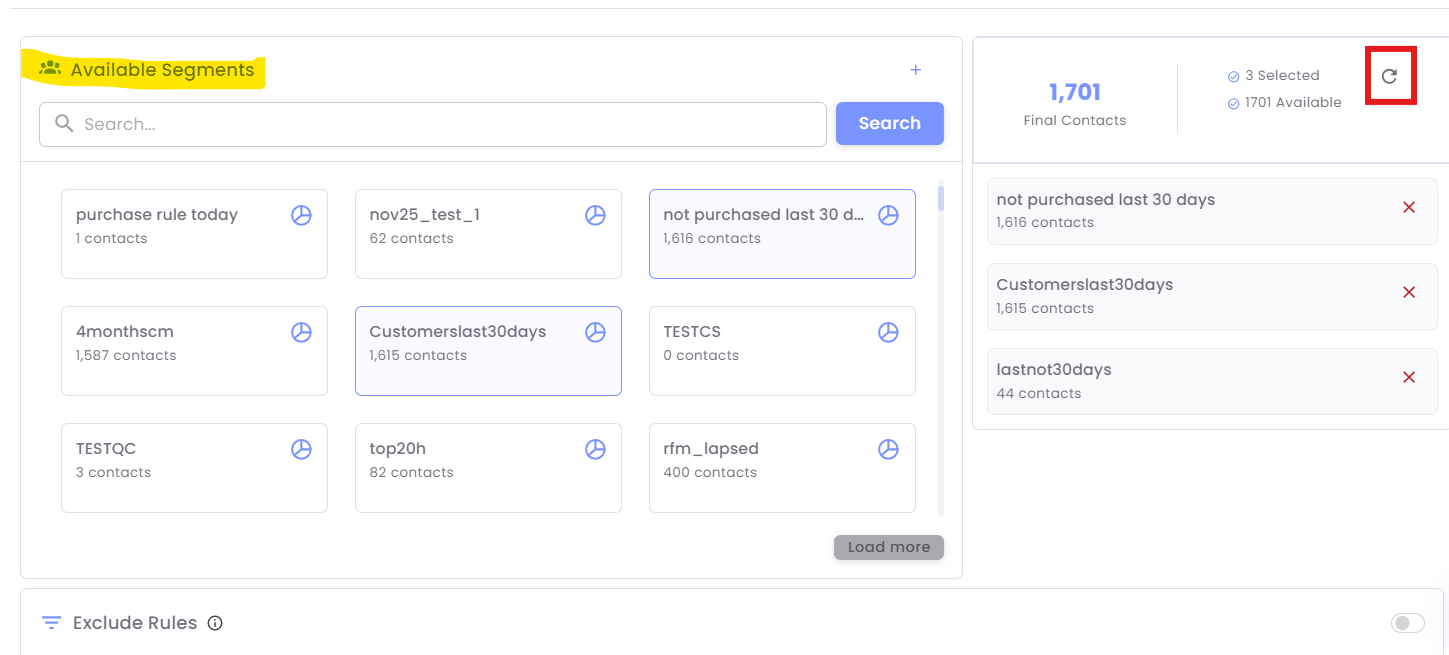
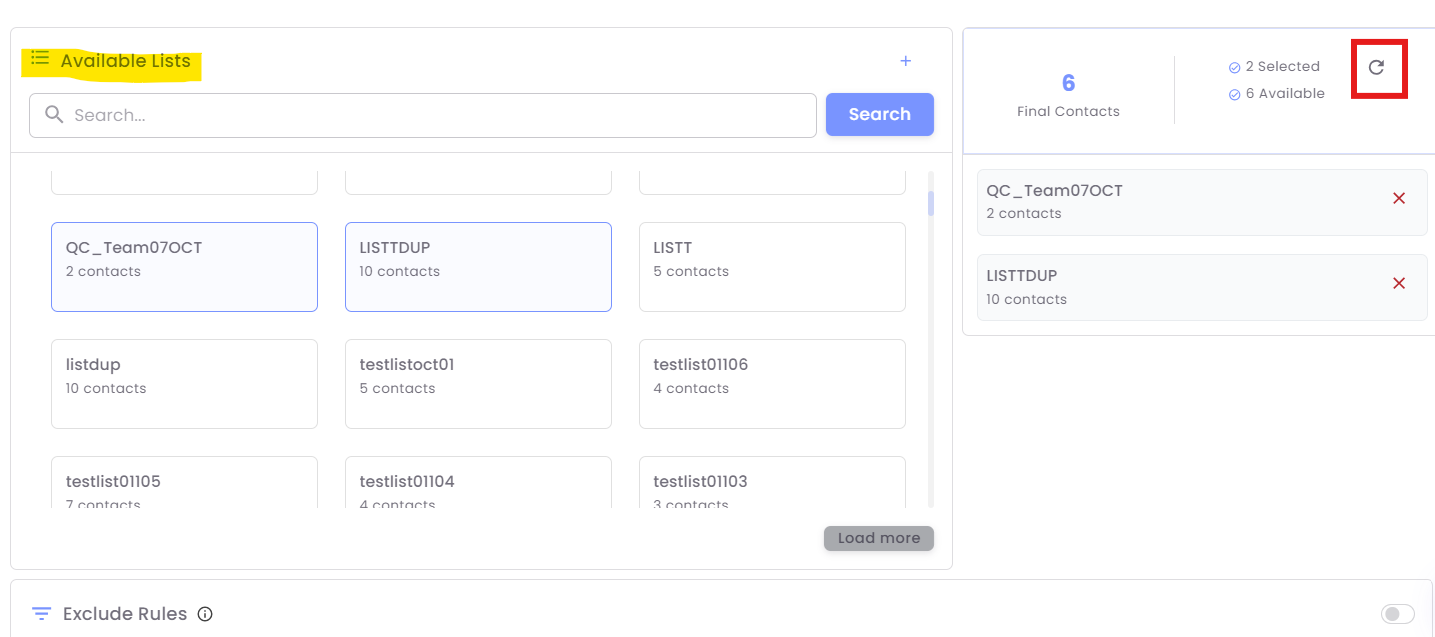
1. Under Available Segments or Lists, click on you want to include. The selected segments\Lists will move to the right-hand panel.
- Example: Selecting "not purhased Last 30 days" (1616 contacts), "Customerslast30days" (1615 contacts) and "lastnot30days" (44 contacts) results in a total of 1701 Final Contacts (this number may be lower due to automatically removing duplicate contacts).
2. Click the Refresh icon (indicated by a circular arrow) next to the final contact count to ensure the most up-to-date count of contacts based on your selection.
Step 5: Configure Exclusion Rules (Optional)
Use exclusion rules to remove specific groups of contacts from your final audience, ensuring you don't send messages to ineligible or recently targeted customers.
-
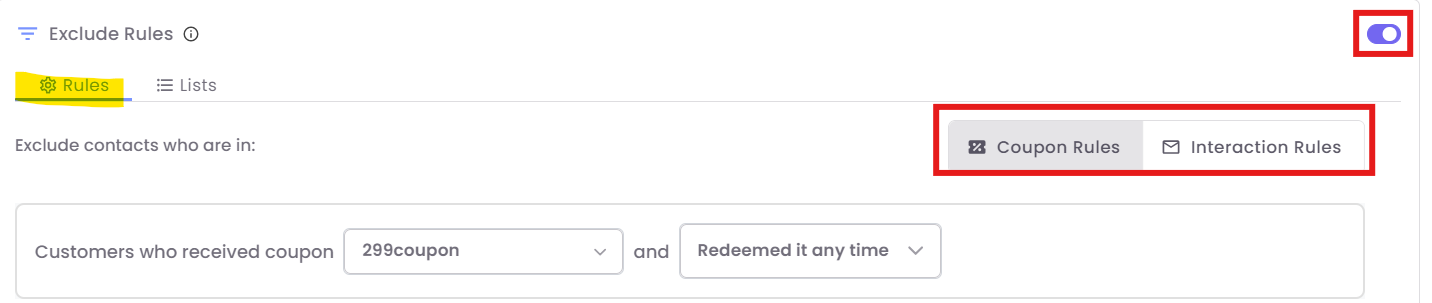
Ensure the Exclude Rules toggle is ON (highlighted in the images).
-
Exclusion by Rules (Coupon/Interaction): Click the Rules tab.
-
You can exclude contacts only in segments based on:
- Coupon Rules: Contacts who have received, redeemed, or have an active coupon.
-
- Example: You are sending a "Flash Sale" campaign, but you want to exclude anyone who has already "Redeemed it any time" for a previous 10% discount coupon.
- Use Case: Don't send a discount code to someone who just purchased from you yesterday!
-
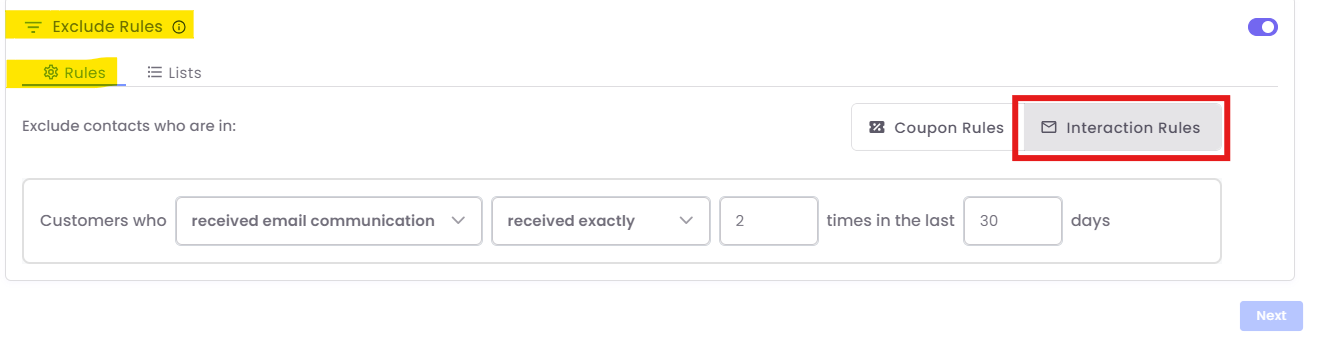
- Interaction Rules: Contacts who have interacted (e.g., clicked a link) with a previous campaign.
-
-
Example: You can exclude customers who have "received exactly" 2 WhatsApp communications in the last 30 days.
- Use Case: Avoid "spamming" your most active customers by skipping them in a general broadcast if they've already heard from your multiple times this month.
-
-

-
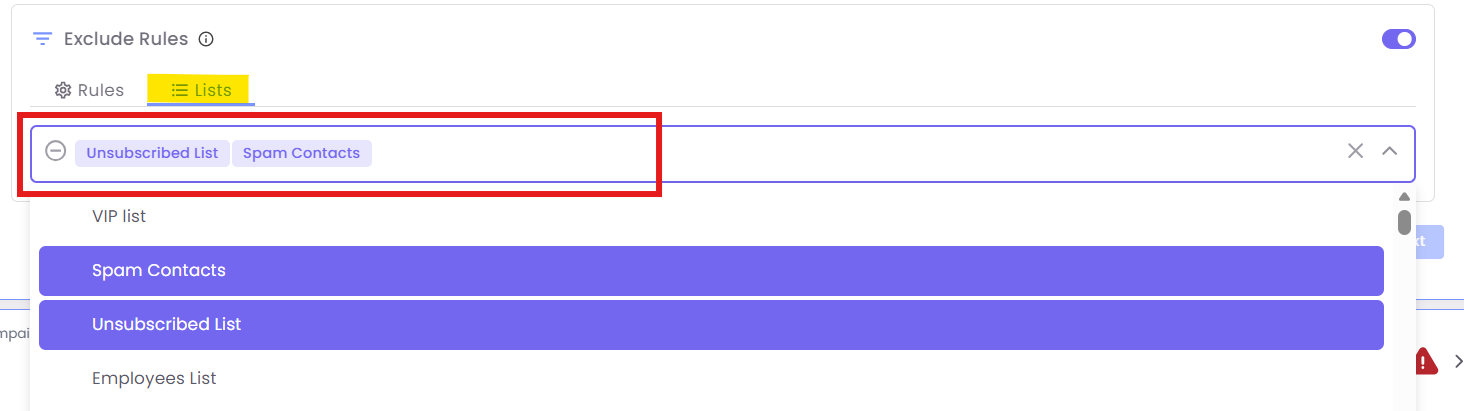
Exclusion by Lists: Click the Lists tab.
-
Select specific static lists of contacts you wish to exclude either from selected Segments or Lists.
-
-
Once exclusions are configured, click the Next button.

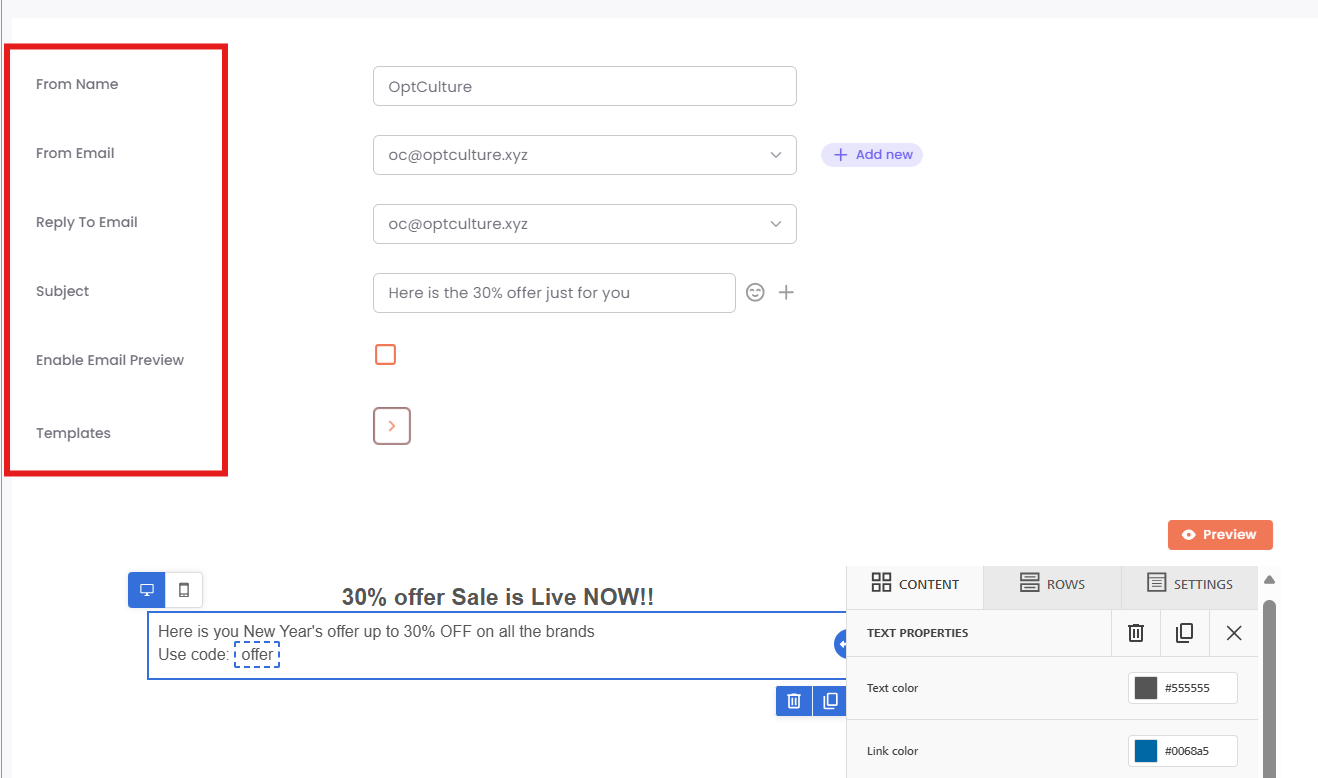
Step 6: Define Email Sender and Subject
-
In the campaign setup screen, define the email's identity:
-
From Name: The name contacts will see (e.g., "OptCulture Marketing").
-
From Email: The email address the campaign is sent from (e.g.,
oc@optculture.xyz). -
Reply To Email: The address that receives customer replies.
-
Subject: The compelling text that encourages opens (e.g., "Here is the 30% offer just for you").
-
-
Enable Email Preview: Check this box if you want to set a preheader text, which appears next to the subject line in the inbox.
-
Click the Templates button (arrow icon) to select or create the email content.
Once complete, click Next.
Step 7: Test and Finalize Message
-
Click the Send Test button.
-
Enter one or more mobile numbers (separated by commas) to receive a test message. This lets you preview the message content and delivery.
Note: Personalized variables may not render correctly in test sends. -
Click Send.
-
Once satisfied with the message, click the Next button to proceed to scheduling.

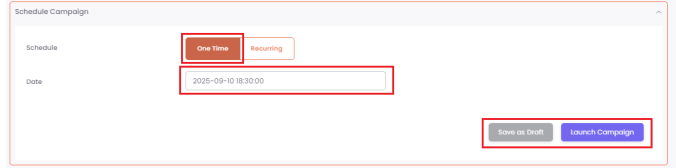
Step 8: Schedule Your Campaign
You have two options for scheduling:
-
One-Time: This sends the campaign once at a specific date and time. This is ideal for time-sensitive offers or discounts that need to reach customers quickly.
-
Recurring: This allows you to send a campaign repeatedly on a daily, weekly, monthly, or yearly basis. This is useful for newsletters or new product announcements, especially with large contact lists.
-
Ramp up: This feature lets you send a campaign in batches to unique contacts over a period.
-
For example, to send a campaign to a segment of 10,000 contacts over 5 days, you can set a daily recurring schedule and enter a "Send Volume" of 2,000. The system will send the email to 2,000 unique contacts each day until all 10,000 have been reached. This strategy can help improve your sender reputation.

-
Step 9: Launch or Save
Once your schedule is set, you can either Save as Draft to work on it later or click Launch Campaign to finalize and schedule it for delivery