
Creating an SMS Campaign (New UI)
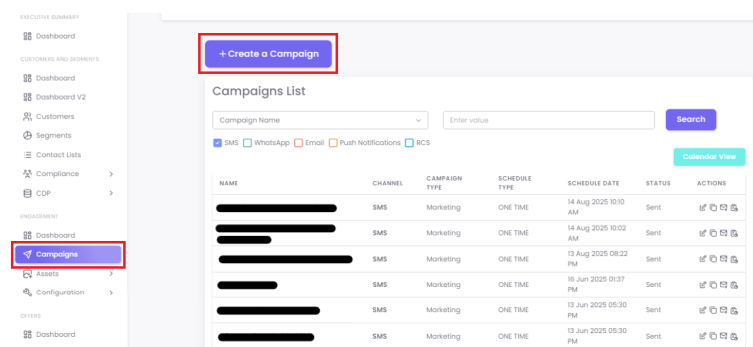
Step 1: Navigate to Campaigns
Select Campaigns and click on the +Create a Campaign button.
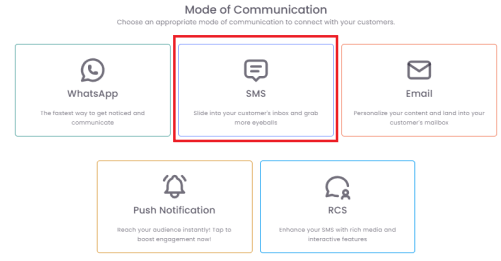
Select SMS from the available "Mode of Communication" options.
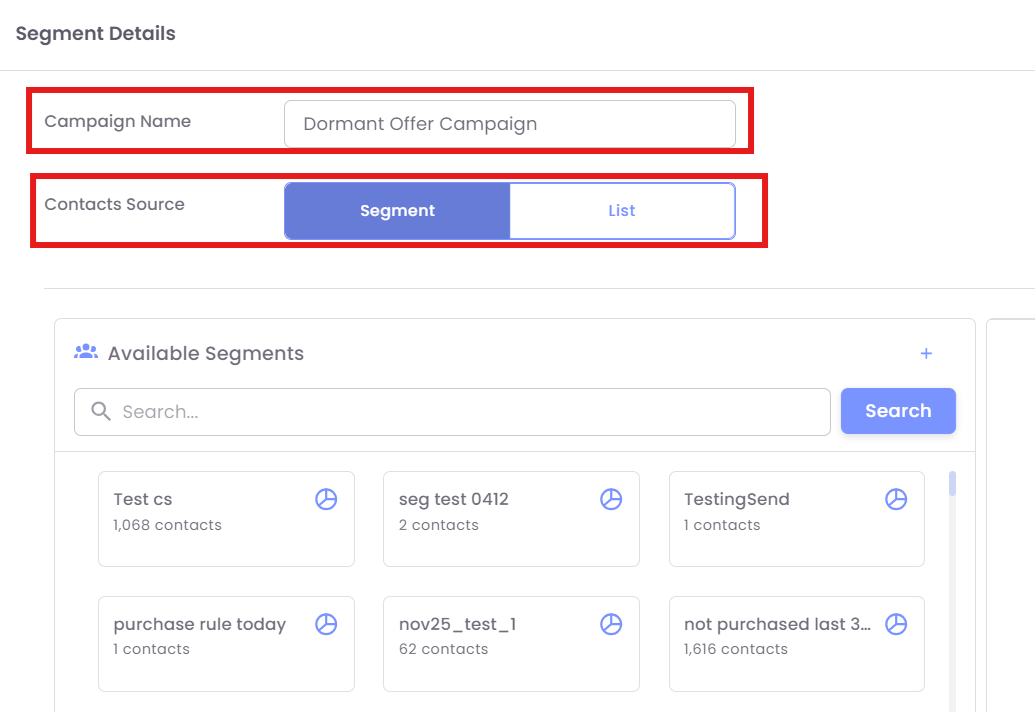
Step 2: Define Campaign Details
-
Campaign Name: Enter a clear, internal name for your campaign (e.g., "Dormant Offer Campaign - Q4 2025"). This is for your reference only.
-
Contacts Source: Select how you want to define your target audience. In this example, select Segment or List
Step 3: Select Target Audience (Segments)
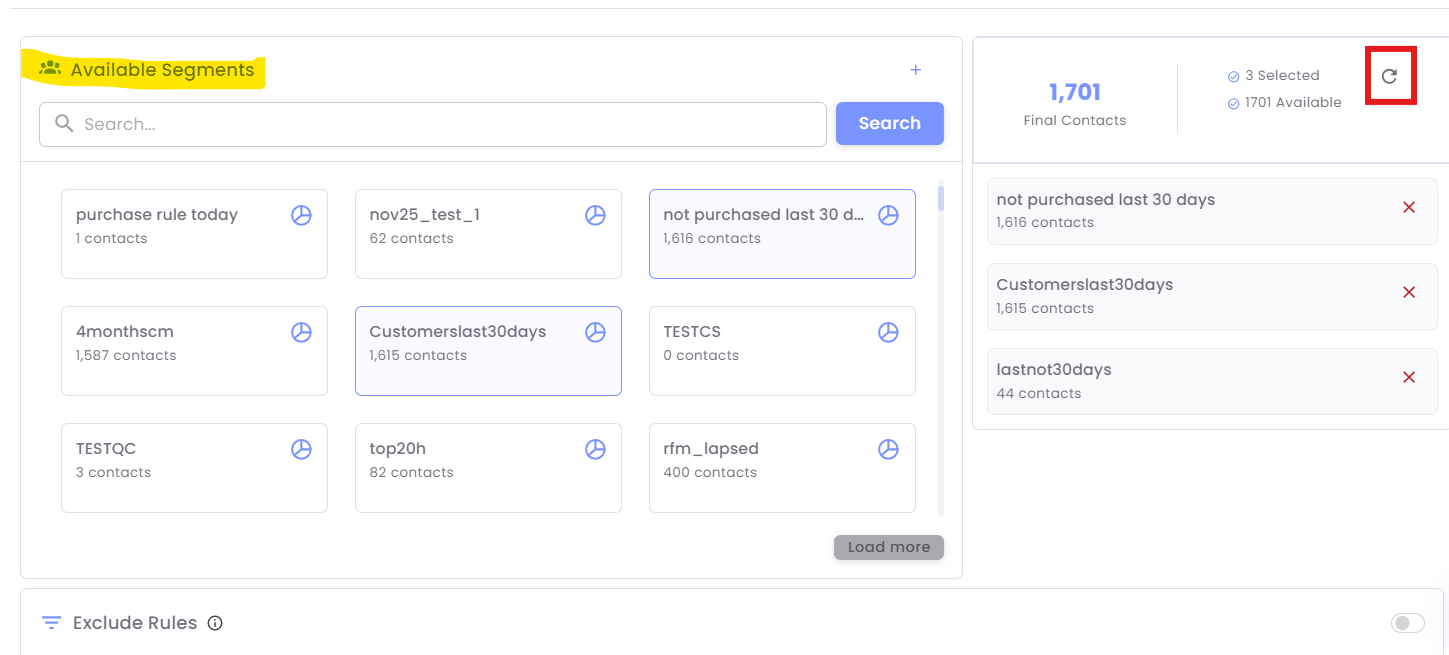
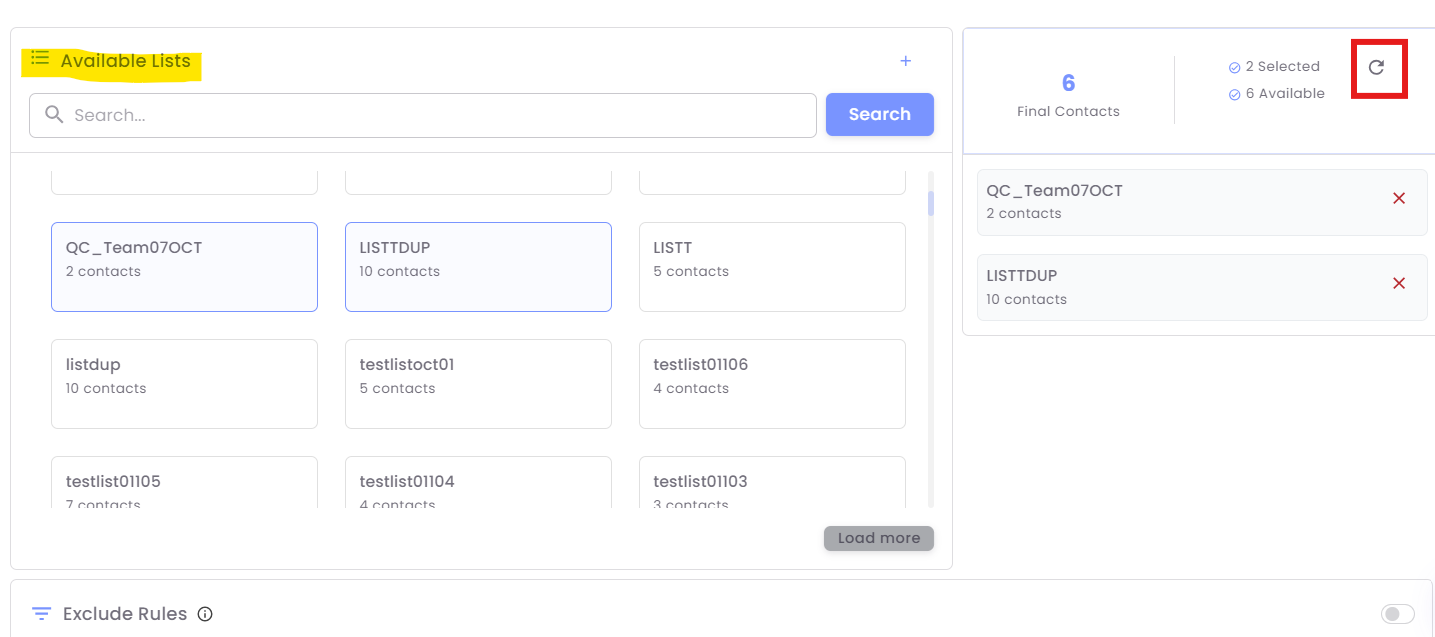
You must select the customer segments you wish to target for this campaign.
1. Under Available Segments or Lists, click on you want to include. The selected segments\Lists will move to the right-hand panel.
- Example: Selecting "not purhased Last 30 days" (1616 contacts), "Customerslast30days" (1615 contacts) and "lastnot30days" (44 contacts) results in a total of 1701 Final Contacts (this number may be lower due to automatically removing duplicate contacts).
2. Click the Refresh icon (indicated by a circular arrow) next to the final contact count to ensure the most up-to-date count of contacts based on your selection.
Step 4: Configure Exclusion Rules (Optional)
Use exclusion rules to remove specific groups of contacts from your final audience, ensuring you don't send messages to ineligible or recently targeted customers.
-
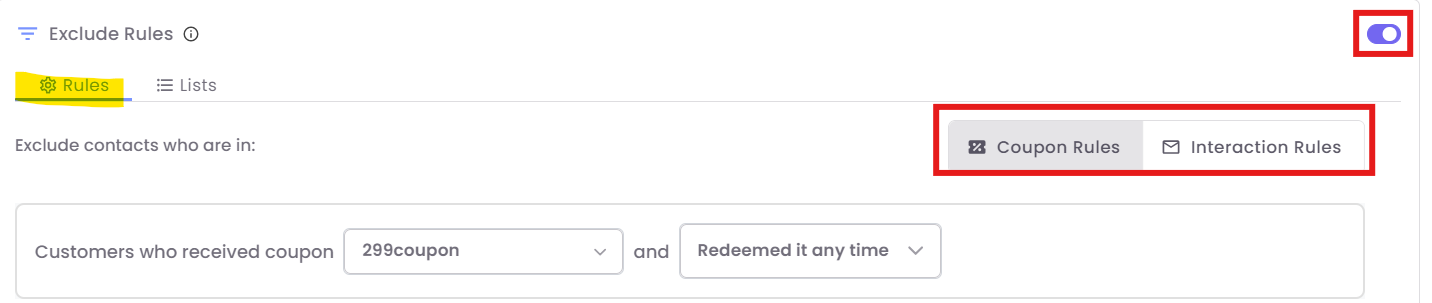
Ensure the Exclude Rules toggle is ON (highlighted in the images).
-
Exclusion by Rules (Coupon/Interaction): Click the Rules tab.
-
You can exclude contacts only in segments based on:
-
Coupon Rules: Contacts who have received, redeemed, or have an active coupon.
-
Interaction Rules: Contacts who have interacted (e.g., clicked a link) with a previous campaign.

-
-
-
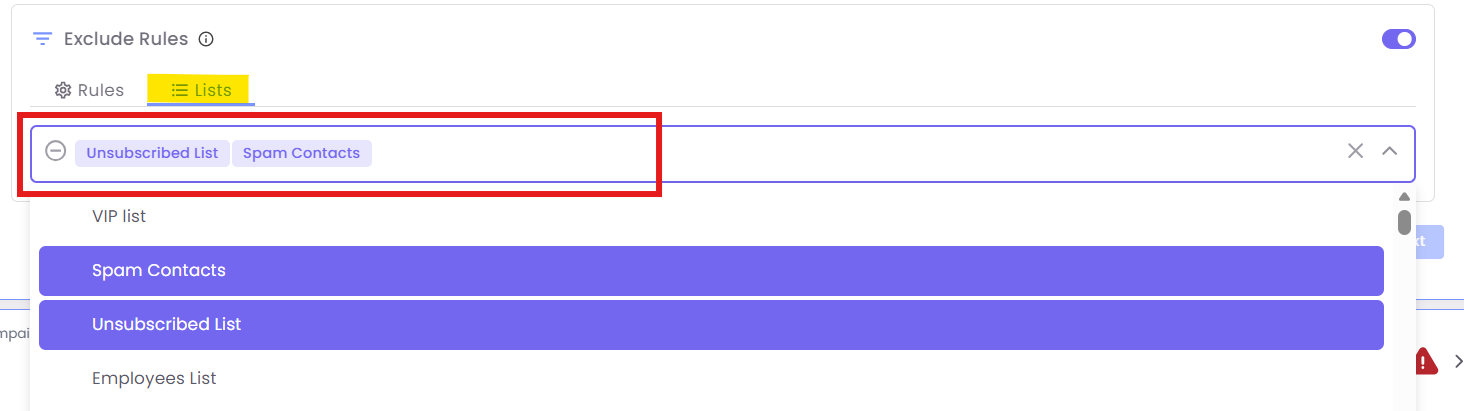
Exclusion by Lists: Click the Lists tab.
-
Select specific static lists of contacts you wish to exclude either from selected Segments or Lists.
-
-
Once exclusions are configured, click the Next button.

Step 5: Select Message Template
-
On the Campaign Details screen, click the Templates tab.

-
Select the pre-approved SMS template you wish to use (e.g., "OCOFFER NEW").
-
Review the Body of the message. For personalization, click on Add placeholder to add merge tags or use dynamic variables (like
{#var#})
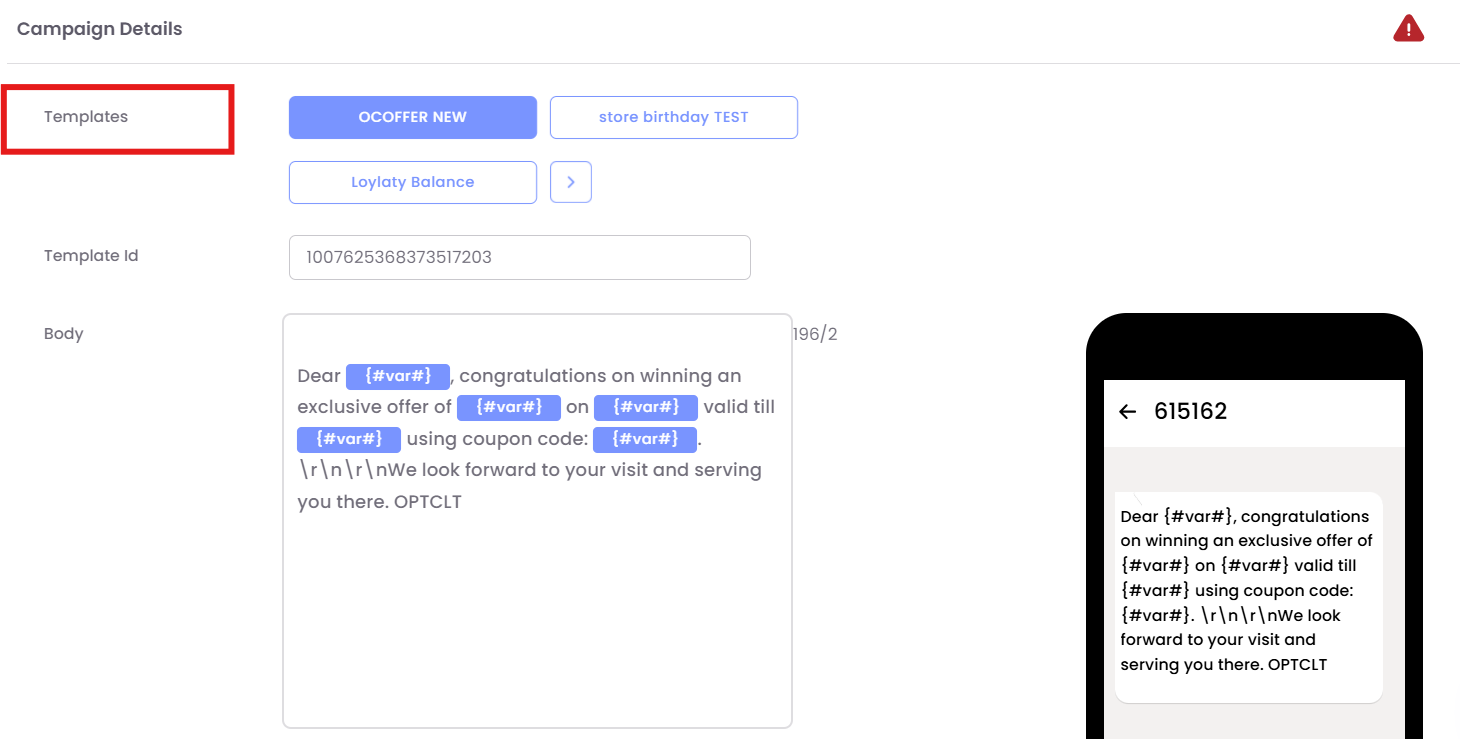
Step 6: Test and Finalize Message
-
Click the Send Test button.
-
Enter one or more mobile numbers (separated by commas) to receive a test message. This lets you preview the message content and delivery.
Note: Personalized variables may not render correctly in test sends. -
Click Send.
-
Once satisfied with the message, click the Next button to proceed to scheduling.

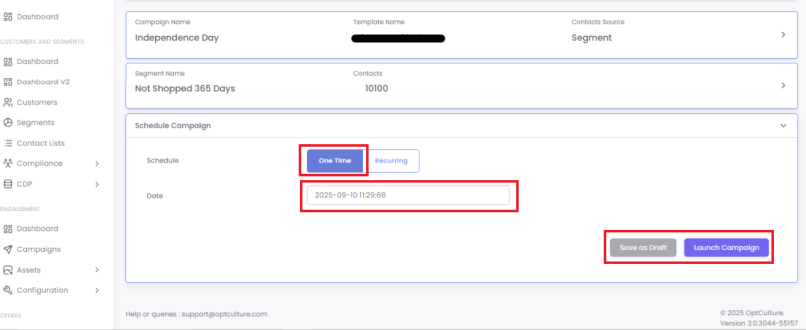
Step 7: Schedule Your Campaign
-
You have two options for scheduling:
-
One-time: The campaign will be sent once as per the scheduled date and time.
-
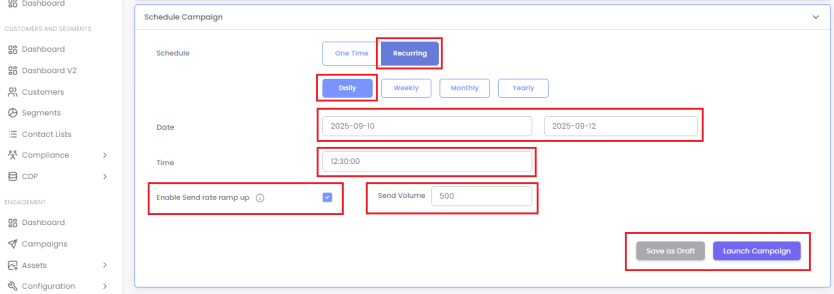
Recurring: The campaign can be sent repeatedly, for example, on a daily, weekly, monthly, or yearly basis.
-
-
Ramp up: This feature helps you divide the chosen segment into small batches of unique contacts (this is done by entering a Send Volume) and send the same campaign to each of those batches.
-
For example, a segment consists of 10,000 contacts. If you want to send the campaign daily for 5 days such that the campaign reaches all 10,000 contacts exactly once, you choose Daily, specify From and To dates, enable the send rate ramp up, and enter the send volume as 2,000. By doing this, the system will pick 2,000 unique contacts from the chosen segment and send the campaign until all the contacts have been covered.
-
Step 8: Launch or Save
-
Once you've chosen your schedule, you can either click Save as Draft or Launch Campaign.
-
Clicking Launch Campaign saves the campaign and sends it at the scheduled time.